
These lampshades, which were recently covered with fabric for Max's room, turned out so well that I decided to try it again. This time on a pair of shades for the lamps I just refinished, and I'm stepping it up a notch! I wanted to refine the look a bit, as this is one of the projects I'll be doing over the next few months for HGTV.com. Rather than simply running the cut fabric up to the existing shade trim, here the fabric will be turned under with ribbon trim applied along the edges. Also, the shades being used are slightly tapered rather than the straight drum style used in the boy's room.
To start the project the shade was laid out on the Waverly Canton Bazaar fabric, allowing me to decide which part of the design to showcase. Then the width of fabric to cover the shade was cut, leaving approximately two inches of fabric extending beyond both the top and bottom edges of the shade.

As you can see, when covering a tapered shade the cut of fabric will turn up on each end. By cutting the fabric this way the grain of the fabric will be straight on the "front" of the shade and become slightly off grain towards the "back", while laying flat against the surface. To determine the degree of curve needed for your shade, place the shade at the center of the fabric and carefully roll in each direction, cutting above and below the edges as you go.

Next, find the center point of the cut fabric and place it on the side of the shade opposite from its seam. Wrap both ends of the fabric around the shade to make certain the fabric is positioned correctly and then cut one end, leaving a half inch of fabric beyond the seam on the shade.

Apply a line of fabric glue along the seam and attach the fabric to the shade.

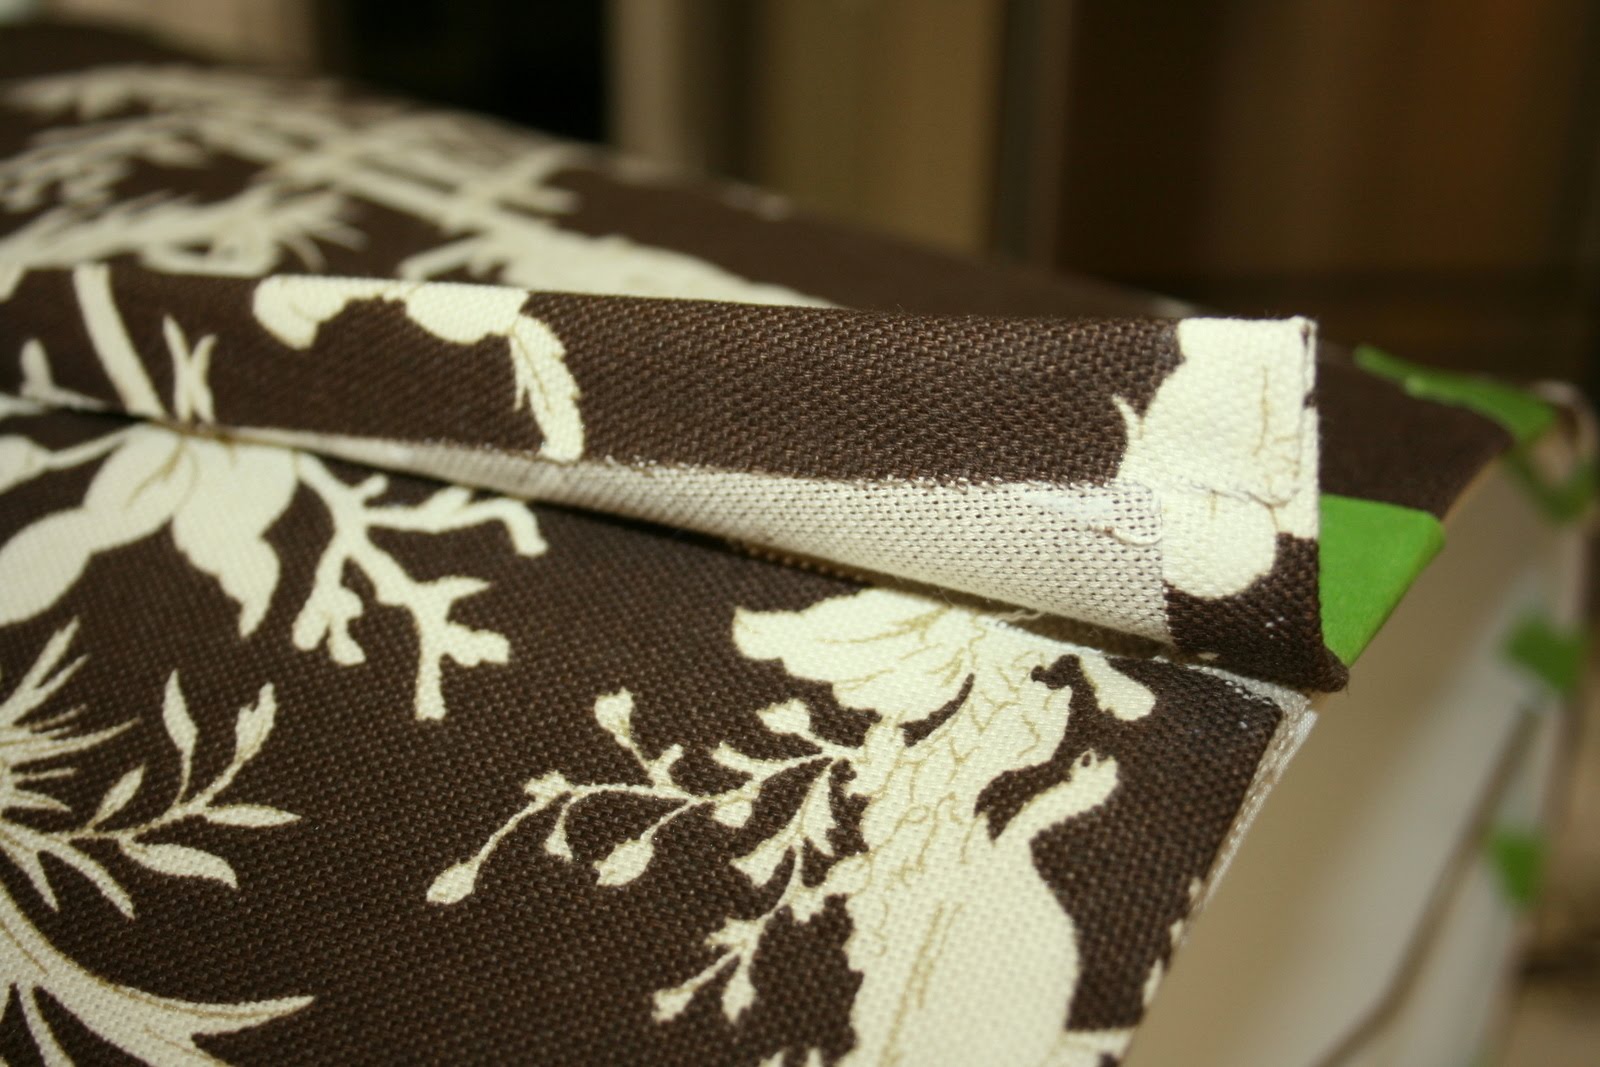
Hold the fabric in place for a few seconds and then tape the edge to the shade so that it doesn't shift as you work. I simply used the tape I had on hand, which happened to be frog tape. Isn't the green pretty?

Then wrap the fabric around the shade, pulling firmly so that there are no gaps as the fabric hugs the shade and tape the second end in place.

Starting on the top edge of the shade, fold the fabric over towards the inside of the shade and mark the fold line with a temporary fabric pen. Do this around the entire circle of the shade.

Next trim off the extra fabric, leaving about a half inch beyond the mark made with the pen.

Tuck under the cut fabric, with the turned edge sitting just a fraction above the existing shade edge.

(Hum, from this angle it looks like the fabric is below the top of the shade...but trust me!)

After turning under the fabric check to make sure the edge ends at an even height around the shade. Next glue into place by squeezing a small continuous amount of fabric glue inbetween the fabric and shade.

Press the fabric down and tape into place while the glue dries.

The next step is to turn the shade over and repeat the above steps to the bottom edge of fabric.


Once the top and bottom edges are turned under and glued, it is time to create the finished seam on the second end of fabric. Make certain the fabric extends two inches past the seam of the shade while overlapping the first fabric end, which has already been glued into place. Cut off the extra fabric, apply a line of glue along the cut and turn under.

I went a little overboard with my next application of glue...it turned out okay, but on a lighter fabric the glue may have shown through. So, apply a smaller amount to the underside of the finish edge and press into place.

Tape the top and bottom edges of the finished seam to the shade, ensuring the fabric doesn't move as the glue dries and work continues.

Then it was time to add trim. I actually read the glue application directions, wanting to make sure the glue didn't bleed through the trim when it dried. The suggested tip was to paint the glue on with a brush, providing a lighter application spread over a wider surface. Made sense to me so that was the approach I used...and it worked! Happily no glue lines are showing through the trim.

I began by attaching the trim at the fabric seam (see second photo below, right side of shade) and then wrapped the trim around the shade, brushing on a layer of glue as I went.


The trim was positioned just a fraction beyond the turned edges of the fabric for a clean result.

And then I repeated the process for lampshade number two. It took about two hours per shade, partially because I had to stop and take a lot of photos, but also because I was figuring out how best to do this project as I went along!

Here is a sneak peek of the finished shades sitting on their fabulous bases. You didn't think I'd show you the final result today, did you?! Plus, I need something to post about tomorrow!! I hope you'll stop back by...
No comments:
Post a Comment