Thursday, April 30, 2009

Alpha-1~

My regular Frugal Friday post will return next week but today I have something important to share...


I don't normally post personal things on this blog, but the month of May is Alpha-1 Awareness Month, and because this disease is very much a part of my family's life, I felt strongly that I want to share a very personal story with all of you.

This post is going to be wordy, but I hope that you will take the time to read it, and to learn a little bit about my family and about Alpha One Antitrypsin Deficiency.


Alpha-1 is a relatively common (but fairly unknown) genetic liver disease affecting an estimated 100,000 people in the United States although to date only about 10,000 people are officially diagnosed with Alpha-1. I will explain more about the details of the disease as I tell you my story.


Mr. Three at 6 months


All Pictures by the Hubby


Almost 3 years ago, the Hubby and I learned that we were expecting our 4th child - a boy. My pregnancy was normal and the delivery was fairly easy. Shortly after delivery, however, things changed.


Just before the hospital was going to release us to bring little Mr. Three home, the pediatrician-on-call came into our room. He informed us that Mr. Three had jaundice. Jaundice in and of itself isn't necessarily scary, so I wasn't particularly worried at the news. He then proceeded to explain to us that there are two kinds of bilirubin (the cause of jaundice). The first is indirect bilirubin. It is the common cause of infant jaundice and isn't usually something to be overly concerned about if kept in check. The second is called direct bilirubin. Whenever there is an elevation in direct bilirubin, it is an indication that something more is wrong. The cause of Mr. Three's jaundice was an elevation in his direct bilirubin, so our doctors were concerned.


And the testing began. Test after test for what seemed like an eternity. Poor Mr. Three didn't have anywhere on his little heels that didn't have a tiny scab from a heel prick for bilirubin level testing. He wasn't gaining weight even though he ate constantly, and we went to the pediatrician daily for weigh-ins.


One of my more painful memories of this time occurred one Sunday as I was changing his diaper in the Mother's room at our church. A little girl who was there with her mother stared at him for a long time, and said finally, "Your baby is REALLY skinny."


"I know" is all I could manage to say back.


Everyday I looked at him as if I were willing him to gain weight, and hoping that his eyes would look less yellow to me. And everyday he was just as skinny, and just as yellow.


And still the testing continued. What I considered to be the scariest of the tests was one they performed for a condition called Biliary Atresia which would have required almost immediate surgery. They strapped my poor, tiny, yellow baby to a huge table and gave him something (it's been two years and I'm fairly good at suppressing painful memories, so I don't remember what it was) through an IV, then put him in what I think was an MRI machine (suppression again) to watch and see if it passed from his liver into his intestines. After two hours, barely any of it had passed through. But "barely any" was enough. And one of our amazing GI Docs called as soon as he heard the news to relieve us. He was relieved too.


But, then the diagnosis came from a simple blood test and even though it didn't require immediate surgery, it wasn't any better. Alpha One Antitrypsin Deficiency. And not only that, but the most severe version of the disease - a type known as ZZ (referring to the genetic code on the DNA).


"WHAT? What's that?" We'd never heard of it, and I bet most of you haven't either.


Alpha-1 is a genetic liver disease that must be inherited from both parents. Alpha One Antitrypsin is a protein that is produced by the liver. It's function is to protect the lungs from the body's own enzymes. So the disease can actually effect both the liver and the lungs. If there is not enough Alpha-1, the body can't adequately protect the lungs and they suffer from increased problems with COPD, emphysema and other related illnesses. There are two reasons why Alpha-1 can be deficient in the body. Either the liver doesn't produce enough of the protein, or it produces a deformed version of the protein that gets trapped in the liver causing liver damage.


Many times, the disease isn't caught during childhood because the person doesn't have difficulties with their liver per se. The fact that we discovered this diagnosis in Mr. Three during infancy gives him an increased chance for cirrhosis and possible liver transplant because obviously his liver isn't working as well as it could.


As scary as this was, it got even scarier when our GI docs urged us to have our other three children tested. Prior to Mr. Three's diagnosis, my husband and I were not even aware that we carried the gene for Alpha-1. So at this point, we weren't sure what to expect. Of course, statistically speaking, the likelihood of our other children being anything but carriers of the disease was low since neither my husband nor I showed any signs of the disease, and we already had one child with a confirmed diagnosis.


But, then the results came back and we learned that our family is an anomally. BOTH of our other sons also have Alpha-1 - with a ZZ allele. We were devastated. We learned that my husband and I are each only carriers of the gene, however, because although there is no known gender link, our three boys all suffer from this disease while somehow our daughter escaped without even being a carrier of the gene.


Mr. One at 18 months


Mr. Two at 1 month


Right now, all three of my boys are fairly healthy. Our wonderful docs have told us to simply treat them like any other children. But, sometimes I worry. Okay, I worry a lot. I look at their beautiful angel faces and wonder what this disease will mean for their futures. I worry that their impending liver biopsies will indicate cirrhosis. I worry that although they are healthy today, liver transplants may loom in their futures. I worry that even if they make it to adulthood without much liver difficulty, they still have the possibility of lung problems. I just worry.


Right now, Alpha-1 has no cure, but research continues. Here is a link to the Alpha One website. Please take a minute to go to the site and learn what you can do to help.


Everyday I look at these little faces and pray for a cure. ~

Master Bedroom Retreat - Lighting


Finding just the right lighting for this master bedroom has been key in achieving the design goals for this room. This room is to be a crisp and modern space, while at the same time containing a sense of warmth through its organic elements.

With that in mind, I was absolutely thrilled when I spotted a pair of lamps at Home Goods that captured both modern and organic design aspects. They remind me of a wonderfully unique item you'd find at some chic boutique, such as Cielo Home at www.shopcielo.com, a delightful store here in Portland. It was with mixed emotions I sent this photo to the client for approval, if they weren't so perfect for this bedroom I would have been very tempted to keep them myself!


For the ceiling light fixture we have selected the Criss Cross pendant by George Nelson. The experience of choosing this fixture reminds me of the understanding that you are not supposed to pick the first item seen when shopping, whether the desired object is a dress or a house. This classic bubble lamp was the client's original choice, but prior to making a final decision we looked at another dozen or more fixtures. It was a worthwhile experience, I discovered new fixtures that I can't wait to use elsewhere and we know for certain the right decision has been made. This pendant is very modern yet has a natural feel, the shape conveys the sense that its design was inspired by a shell or flower.

While at Home Goods, I also found this large sunburst mirror that will be hung over the dresser. The size and shape are ideal for this room. The gold finish...not so ideal. But why should this minor detail stop progress. Just imagine the mirror with a finish similar to the lamp base, perfect! So, no guessing required to figure out what my next project is going to be...

April showers bring May flowers

A good Thursday morning!

I've been working on this card for a couple of days! Finally done! Am using the sketch provide by Mumur for the Friday Sketchers Challenge # 49. I am using a standing tall Tilda image--it's long vertically--so I've turned the sketch on its side.
There's a lot of hmm...something there at the bottom that I have to put and all I could think of was flowers. But that was okay, because I was also thinking about a May card with lots and lots of flowers for the Magnolia-licious Yahoo Group. I spent hours, days it seemed, fiddling with the placement of the flowers. I found out it's not easy trying to cram so many flowers into one space and making it look somewhat presentable. I keep arranging them, walking away from it and coming back for another look, re-arranging them. Agghhh!!! Probably made the flowers to big. Ah well, too late now! That's the end result. Hmm... Does it look okay or just comme ci comme ca?
I had actually planned to use another Tilda image on this card. But yesterday Carole has picked the Tilda image with the Flower Garland in Hair for their CBCJ Old Magnolia Challenge. I had ordered this stamp, but didn't have it yet. And I kid you not...when I came home from work yesterday there was a package in my mail box and this stamp was in it!! I took that as a sign that I'm supposed to use this stamp instead and play along with their challenge--LOL. And she is so adorable here. I just luv this image--it's sure to become one of my favorites.

I really really tried to match the orange and blue to the designer paper and I thought I had it, but as you can see I'm still off there!
And this is what the inside of the card looks like.
Have a wonderful day!

Stamp: Magnolia #214 Flower Garland in Hair
Designer Paper: Daisy Bucket Designs Cool Dude Collection Mondo Matt

Wednesday, April 29, 2009

Birdhouse and old wood projects have begun! Why? Because I'm being forced by...

Melissa at The Inspired Room. She's having a 'Project Procrastinator's Party'.

(click on pic to check it out!)

We are to post the before of a project now and link to her site, and then in two weeks, post the after. Two weeks?!? Pishaw... no problem! (gulp)

Remember my story about Gerry dropping off his garbage wood pile on the way to a big burn pile, but landed on my driveway instead? (yes, I wangled free delivery on this one! I am on a mission, people!)


And remember this adorable birdhouse and post that was buried under that DIY gemware?

Here's what I will promise. I will post an after pic of the birdhouse in full action. Why the birdhouse? Because I've already started the project so I know it'll be ok. (cheat cheat!)

Honestly, I've been working soooo hard on the garden lately. It was baaaaad. I went for my camera while doing the major weeding and installing of the birdhouse, but my son was sick and sleeping inside the room where my camera was and I didn't want to risk waking him at the time. But for the reveal, I'll take a pic of a similar weed bed in the same shape. Yes, I'm the unfortunate owner of a few of those.

As for the wood... I have another idea for it, but not sure I can make it work in two weeks. I have two ideas for the wood... but I will if I can!

1. Attach the tongue and groove rustic wood onto a small bathroom area to create a feature weathered wall.

or...

2. Attach the tongue and groove rustic wood onto a framed only greenhouse out back to create a character building. I'm leaning towards #2 if I have enough wood! And what's better yet is, this weekend I'm going into the little neighbouring summer town that has a store with character buildings just like this, so I'll snap a few photos for inspiration! I'm also going to hang an old window and get a window box together underneath for a grand spillage of lovely flowers.

So there you have it. A birdhouse garden, and a character shed or a rustic bathroom wall. Ok, maybe just the garden. Ok, I'll try the other too. But here's the deal. I'm not spending money to complete these things. So my garden won't be in full bloom and all that. But I know you gals have wonderful imaginations thank goodness. So let the play begin!

So, fess up. What project do you wish you'd get a move on with? Please tell me I'm not alone in this one...

I have a solution for you too. Why not join in the 2 week challenge? Hope to see you at Melissa's!

Glass Bead Magnets~


This is a post from my Archives. Originally posted back in July of last year. But I thought it was worth sharing again. I just love a tutorial~

Here's a fun and easy project. (Great for doing with the kiddos.)


You will need:

Glass beads: I like the large (1-1 1/2") size but you can use any size. I found mine in Target in the flowers and vases section. A whole bag only cost $4.99!

Scrapbook paper: or in the case of the bee magnets, I drew the image myself and photocopied it...shrank it, enlarged it etc. And the toile magnets are made with pieces of fabric...I love TOILE! And have I mentioned before how much I love BEES?

Scissors

Mod Podge: Of course!

Magnets: I use the round ones you can find at any craft store.

Hot Glue: To glue the magnets on the back.


The way I actually made them is by cutting the paper (or fabric) into squares just larger than the beads.

I put Mod Podge on the flat side of the bead and centered the image just where I wanted it (you can see the image even when the Mod Podge is not dry.)

I didn't put a coat of Mod Podge on the back of the paper although you certainly could, but I did coat the back of the fabric with Mod Podge.

After the Mod Podge was sufficiently dry, I cut around the edge of the bead trimming the paper (or fabric) as close as I could.

Then I hot glued on the magnets.

VOILA!

I have seen them made by layering on different papers etc. which can make them much fancier, but I usually make them with my kiddos and so try to keep it as simple as possible.

These are also really fun to make into push pins. Simply use a smaller sized glass bead and hot glue flat headed push pins to the back instead of magnets. Easy Peasy~

Happy Crafting~

Free Holiday Wallpaper


Just download Free holiday Wallpapers for the biggest collection of cute and beautiful high resolution wallpapers on net to celebrate you holiday with fun and joy. Here we offer 1000's of christmas, thanksgiving, halloween, diwali, valentines day, mothers day, fathers day, easter, friendship day wallpapers to you, So choose the best one and adore the look of you PC.

God made iPhones for bloggers

I think I have died and gone to heaven.

Remember my taped together phone from my last post? So many of you were so sweet and harassed me, made fun of me made me feel so much better about my crappy phone.

You must know that I've been through about four phones in two years. I had a cute little pink one when our son was born. And it was soooo adorable when he would want to play with it and then eat it. It died. So did the others -- throwing, dropping, baby goo, whatever you can think of...they all died.

So the last time I said, I'm not buying another nice phone again until he's out of this stage. I've learned he'll never be "out of this stage" so I decided I wanted something NICE. Hence this glorious purchase:

Hubby has had one for years and I've never understood how he can lay in bed for an hour before sleeping, just messing around on this thing. Ummmmm YEAH.

Now I get it.

I am telling you people, it is freakin' amazing. AMAZING. I can get on the Internet from ANYWHERE. I can play just about any game I want. Look -- I got a free "app" that's a level:
I would have never known that our kitchen island isn't level if I didn't have this phone. What would I have done??? (And yes, just another example of how weird I am -- I'm a tool kind of girl and this about put me into a tizzy when I saw it.)

I'm still not sure what "apps" are -- just fun stuff you download I think. Like the faux lighters you see lit up at concerts. Freakin' adorable.

Look what I can do whenever I want:
Check your e-mails!! Look -- there are NONE in the inbox. I push.a.button and there they are. I've checked them ALL!! Oh good God, I'm not kidding, this is the best second best like, fifteenth best day of my LIFE.

So if I'm sitting in the doctor's office, I'll never be bored again.

Cause I have the iPhone. (Why didn't I have this when I was pregnant??)

I won't be bored at a stop light, because I'm so impatient I can't wait for 15 seconds.

Cause I have the iPhone.

I won't get bored drying my hair.

Cause I have the iPhone.

(You think I'm kidding.)

It even has a pretty decent camera on it: Giddy.

Now just like Crackbook, I'm sure this will wear off eventually. (Right?)

It does make me worry that we are creating a generation of kids who won't be able to just sit and not do anything. That part of this stuff freaks me out a bit. I have a love/hate relationship with technology.

But for now...I LOVE.


Change Is Good

I've been working on a little project for my office closet. Let me rephrase that...I've been getting incredibly frustrated with a project that I thought would be little, but is turning out to be a gigantic pain. At first I wasn't going to post about it, but then I figured that there is a lesson to be shared.
Do you see these pretty red boxes I found at the thrift store?
For some strange reason I decided that I wanted them to color coordinate with the other storage boxes in my closet. So I painted the lid of one using craft paint. Fortunately, I stopped at just the lid because after it dried, all it took was the scratch of my fingernail to take off all of the paint.
Then I got another great idea. I tore up pieces of craft paper and scrunched them. Then I applied the craft paper to the box using watered down mod podge. The result looks great, kind of like leather. But it took almost two hours. TWO HOURS for one little box and I still have two boxes to do! I just don't think this is worth my time. I mean really, it's not like my closet is going to be featured on the cover of some nation wide magazine.So the lesson to be learned?
Give yourself permission
to change your mind!
If something isn't turning out exactly as you planned, it's okay to reevaluate and make some changes.As I was taking this picture my youngest son asked if I was going to decorate the other two boxes. I told him no because it took too long. He asked, "So do you regret doing it?" My answer, "No, because I learned something. There are no regrets when you learn a lesson." I tried something that I've wanted to do. I will probably try this technique again, on something bigger like an old trunk.
This lesson can be applied to almost ANYTHING in decorating. If you're half way through painting a room and you absolutely hate the color, it's okay to change your mind. It's just paint. If you loved your couch five years ago when you bought it, but now you think it's an eyesore. It's okay, make or buy a slipcover for it, or sell it and use the money to buy another one that you love (new or used). If you thought you'd love a house with a country feel, but find yourself not feeling at home in your own home, then change the decor.
There is absolutely nothing wrong with going in a different direction than you first intended as long as the end result is a home that you love and feel comfortable in. Because really, shouldn't that be the main goal all along?

for you

Happy Wednesday everybody!

A new challenge blog for us Magnolia addicts, Just Magnolia--Happy Week Two! Their theme this week is a colour challenge, so no sketch to follow. Yes!!! as I've been meaning to do another buckle card. I first saw this card at Claudia's blog and love the style because it's different. If you wish to create one, you can go to her blog Pretty Pressings and she's posted the instructions and measurements to make your own card. Just type in "buckle card" in her 'search' box. I've made some alterations for my card however.

I love this combination of of pink and green. I started thinking of soft pink and pastel green, but found this Basic Grey paper instead with a brighter pink and sort of a lime green colours. (Although you can't really tell from the pictures. How come the cards in my pictures never look exactly like they do in real life? Agghh!! Must be my camera...or the lighting...or most likely it's just me!!! LOL)

I'm using this Heart Jumper Tilda. It was the very very first Tilda that I ever coloured. I was making a Valentine card and it was the only stamp I had with a heart in it at the time. It's still one of my favorites. Anyway, here's the pink and green card.

There's a strip of paper that fits into a slot like a belt, thus the name "buckle card"--I thought that was a very appropriate name.


And the inside of the card is decorated a bit also.


Have a very nice day!


Stamp: Magnolia #215 Heart Jumper Tilda
Designer Papers: Basic Grey Archangel, Momenta A Family Affair Relations, Making Memories (pink green white stripes--don't know the name)

Tuesday, April 28, 2009

On the hunt for seemingly all things WHITE... help


AUGHAUGHAUGH! Why did I go into that favorite thrift store of mine today?!? And I happened to have my camera with me too, so I caught what I spotted. Just to taunt me.


Once upon a time, I wanted to do something like this to my kitchen, so I propped a bunch of odds and sods I had on hand in place. Then I tried to move my massive hutch that really goes here into another room and it didn't fit. So I lost my office dream and dismantled the works.

Some of you may remember my quandary post about loving whites and coastal inspired themes as I live inside my very warm and pretty log cabiny woodsy upstairs. And I was wondering how I could incorporate some of that desired girlie white into my present scheme.


For some time now, I've been wanting to create a kitchen office. If I got rid of that mammoth woodsy hutch, (which holds dogfood and kitchen overflow, something I really can do without)I had imagined a desktop running the length of that hutch nook with something suitable holding up the works. I really desire a nice space for my laptop to get it off the island once and for all.

And what I saw today is so what I had in mind. Augh...


Aren't those cabinets cute?!? Full drawers and one door each, and the doors even both open towards the center. AUGH! BAD! This is soooo bad! (not really but it is for all the right reasons. I should leave well enough alone!)

The two little guys plus that goofy loose board on top was a whoppin' $20. (AUGH) The note on top of the works read, "Great for garage." Yeah right, like that'll happen. Next I'd need to scout out is something long enough to run the length of the hutch area for a topper. And I have this lovely tall white bookcase with a pretty curvy deal along the top, waiting down in my garage begging me to put that thing front and center on that tabletop. What an adorable office that would be! (AUGH)

Admit it! CUTE!

And here's another AUGH.


Look at the pretty lines on these table legs! Hello!?!?! Abit pricier at $69, but the thing was as sturdy as a ROCK. (AUGH) Honestly, if I had a big separate area for a kitchen office, this table would be the desk. It's just that cute. But it wouldn't look good next to my current table. Bleah..


I am in agony here. This table would sit in front of that little office thing. And look good together and everything. The table isn't that big, just a nice size. Not that we even use a table since I have a massively awesome kitchen island that seats on both sides. But you know, one should have a table so the room doesn't look odd and all that.


The top is currently tiled which is kinda cute. One tile was cracked. I know how to tile so I'd have no qualms retiling it. And that is a solid wood outer edge that needs abit of help. But what a nice way to bring warmth to the table while tieing in all the other woodsy factors in the kitchen!

My current kitchen chairs are bowback black. But I could paint just the seats that antique white to tie it in perhaps... eh.. who am I kidding. The chairs would have to go antique white probably. Nothing a spray bomb or 50 wouldn't cure. (this part is a bad AUGH)

Now, how to incorporate whites into my woodsy kitchen you ask? I'd love to find some tongue and groove thin slats of wood and attach them horizontally in the backsplash area. And you guessed it, paint it the same antique white.


Now, I had no intention of getting this, but it caught my eye and she was adorable! And there were two of her. And she was so comfortable! This chair just has to be a she. I can't say it. Gosh she was just so comfortable! (AUGH) See that lovely black metal detail in the back and on the legs? It's so cool! I sure wish I was decorating a diner styled kitchen and I'd have these snapped up in a jiffy! I need a barn for storage. NOW.

I have no budget for new stuff. I really don't. BUT... if I implemented the changes, I could sell my other stuff which would WAY MORE pay for these little itty bitty thrifty items. I'd only need like 8 guys to lug my massive hutch downstairs though. No biggie. (run man variety neighbours, RUN!)

Oh... another thing I spotted was this gigantic roll of sage green canvas style curtain material. It was sort of burlapy to the touch. Exquisite, but it wouldn't be what I would use. But if I just stocked it and had it ready for someone... stop it! I need to buy an acre and a barn first.

How do you just 'leave' these gems in the stores? How do YOU do it?!? I'm dyin' here... I so want to shabby this place up abit and because I'd have to work at it, I have to admit the challenge thrills me so...

As always, I'll sleep on it and stare at the pics tomorrow again. I'll know my answer by then. I think. And then feel guilty all over again for wanting this NOW.And what DO you do when you spot things you want like, real real bad and you know you just, well, shouldn't?

augh.

(feel free to offer your opinion or 3 on how to change over to more white with the least amount of $ and effort. The yard is calling me too you see..)

__________________

Rhoda at Southern Hospitality wants to know what recent finds you've discovered. Go see what others are loading their buggies with!

Fun with Photo Transfer~

Just thought I'd share this little project I made for my AD.OR.AB.LE neice who just turned one!

It was so simple, and turned out so cute!!


Using my favorite iron-on image transfer paper (Avery brand), I found a photo of my cutie-patootie niece and printed it out on the paper.


I cut it out and followed the package directions to transfer it to some fabric.


Then I just made a little "pillow" out of it by cutting out two pieces of fabric and sewing them with right sides together.


I then turned them inside out and stuffed with polyfil.


I always finish by handsewing the opening shut with an invisible stitch.


I made a very small pillow because I intended it to be an "ornament". But you can make them any size. I didn't add the ribbon, however, because I thought my sister might want to choose the ribbon to match her daughter's bedroom.


Look how cute it is hanging in my tiny neice's room! Love it~


Photo from Holly's Haven

Have a great Wednesday~

Be My Guest

This may look like a continental breakfast for house guests but it was just a little Sunday morning treat for my family. I thought it would be nice to spoil them a bit and treat them like guests.
Embracing a beautiful lifestyle
doesn't have to cost a lot.
All of the food was bought on sale. All of the serving dishes came from the thrift store.
I enjoyed giving my family a little surprise that was easy, delicious, and pleasing to the eye. Their reaction? One son told me he was disappointed because there wasn't any waffles. Did I let his comment take away from the happiness that I received by creating the treat? No, but next time I'll know who to assign the task of making waffles.

For those who wanted to know how I made the monogram wreath on yesterday's post, it was made with the leftovers from this wreath. I just wired them onto a wooden form of the letter A.

Monday, April 27, 2009

Inspire-Me Tuesday~

I just love architectural salvage pieces! But sometimes I'm left wondering what to do with such goodies. In this month's edition of 100 ideas Flea Market Style by BHG, there were a couple of fun ideas for salvage pieces that I thought I'd share!


First up... Look at these awesome outdoor lanterns! Made from table legs and newel posts. So clever!

I especially loved this idea because it takes no work. zero. zilch. Just place an old, chippy piece of porch railing on your desk, and VOILA!~ a mail sorter. No work...now that's my kind of decorating!

All pictures from BHG
This issue is chock full of great ideas (and lots of eye candy too!) You might want to go grab yourself one!

Have a great Tuesday~

The easiest, cheapest, custom drapes EVER.

Have you ever lived with something in your house for years and YEARS, not in love with it, but liking it OK, just fine with it?

And then you change one little thing in the room and it sets you off on this roll that is very unbeneficial to the pocket book?

That's me.

I've been transforming our loft into the toy room and am trying to walk the very fine line between a cozy space for the adults and a total kid space.

I had drapes in the room that I bought for our previous place that were a faux silk (I think the fancy name is polyester) and were very shiny.
Like I said, for years, I thought they were just OK. Especially when it was just an extra room we only used once and a while. But then when I started making changes, they were too heavy and all wrong for the lighthearted space I was trying to create.

So I went looking and found exactly what I was looking for -- muslin! It's basically just a cotton, gauzy-type fabric. And whoooeee, it is CHEAP! I didn't even hem it -- I love the frayed edges:
I found fabric for the toppers long ago -- they are my favorite part:
This is SO EASY. I promise you can make these by yourself in less than 20 minutes. Just find a fabric you love, and get about a yard an a half of it (18 inches or so) for each treatment. (You can do whatever size you want, but I like to stick with this measurement.)
Use your hemming tape to hem up all the edges:
Then just hang it from the clips, like I showed you here, on top of the main drapery fabric:
Then, to make sure they stay put and look like they are sewn together, just use a pin on each side:
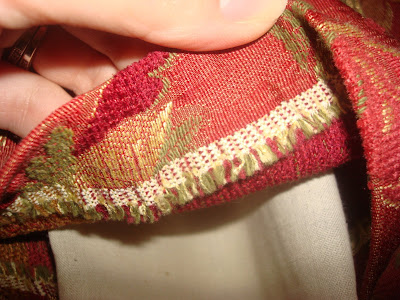
You won't even remember they are there, let alone anyone else noticing them!


The great thing about this project is you can use just about anything for the main part of the drape -- sheets, old window treatments -- any fabric. Then you can splurge on a loverly fabric for the topper (on sale, with a coupon of course).

The muslin was only $15 for five yards. And it was 108 inches wide, so I really didn't need that much. I could have easily gotten away with three yards (these are really long drapes) and spent less than $10 for both:
I usually add lining to my drapes, but I love the way these let the light in the room:
I'm almost done with little tweaks in the toy room, and will show you soon. (I know I keep saying that!)

P.S. Remember the phone I taped together, in a sad, sad effort to avoid spending money on a new one (so I could spend it on other things)?? Well, this is it tonight:

My sweet, loving, two-year-old threw it. Outside. On the concrete. See those two wires sticking out? Those were the only things holding it together. And when I made him pick it up and bring it to me, he decided to pull the two parts apart. SNAP!!

New phone. Tomorrow. Dang.