Yes, I have made quite a few lately. This time around I made sure to take a lot of photos and here is a brief tutorial, in comparison to the drapery panel instructions! If you think drapes are beyond your ability, try making a pillow. It's a much easier and quicker project. It is also a great way to use up a small remnant or left over bit of fabric from another project. And really, can you ever have too many pillows?

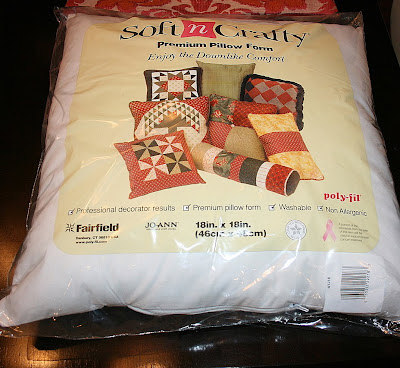
These pillows are made from the Carlisle brocade and a cotton velvet, Como in Rust, both from Calico Corners. For the inserts I picked up two 18 inch Soft n' Crafty Pillows from JoAnn Fabrics. FYI: Currently on sale for 50% off!

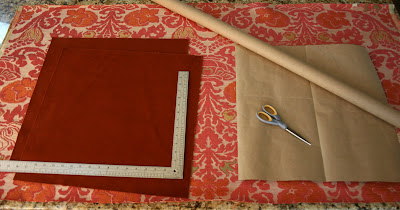
To make the 18 inch pillows, I cut 19 inch squares of fabric to allow for the 1/2 inch seam allowances. To make the cutting easy, I used a 19 inch square paper pattern.

The hardest part of the project was to decide the placement of the pattern on the pillows. I ordered such a small amount of the Carlisle print I was barely able to place the pillow center where I wanted. The bottom of the pattern lined up with the bottom of the fabric, and then I had to ensure that I could cut another identical square out of the fabric to the right. It was just possible...I did get lucky with this one. If you are using a solid fabric, obviously this attention to placement is not necessary.

To line up the pattern I found the center point of the 19 inch square. The pencil tip indicates the center point. The paper is folded to find the center point of the pattern. A pin is pushed through the pattern center...

and pinned to the fabric center point. The pattern is then lined up with the grain of the fabric.

The corners are pinned as well to hold the pattern in place while cutting.


The first pillow front is cut. The process is repeated to cut the second identical pillow front.

The fabric showed signs of fraying, so a stay stitch is sewn around the edges of both pillow fronts.

Then the Carlisle pillow fronts are pinned to the Como pillow backs. I used the endless amount of pins because sewing velvet is a complete pain. It always shifts while sewing, whether sewing two layers of velvet together or sewing a layer of velvet to another fabric type. (The layers could also be basted together prior to sewing on the machine.)

The two layers are sewn together, making sure to get the fabrics sewn together as they were pinned. It felt like I was fighting with the fabric! It is the nap of the velvet, it just pushes the fabric forward or backwards, depending on which direction the nap is running compared to the direction it is being sewn.

I run a stitch around the edges of the two fabrics twice...just to make sure the seams hold up to use and also to straighten up the stitch lines. During the fight to sew the fabrics together the stitch is not always that straight.

I also sew the pillow corners with a curved line. It helps create nice clean corners when the pillow is turned.

The bottoms of the pillows are left open to allow for the pillow to be filled with the insert.

Sometimes I use fill for smaller pillows, but inserts are best for a nicer result. Using fill can make for a lumpy pillow, not the best look. Obviously I removed the plastic from the insert...just left it on here for the photo!

The first is filled...

followed by the second.

With the pillows filled, the final step is to stitch closed the opening at the bottom of the pillows. I use a simple slip stitch. Of course a zipper would be great here, but I'm too lazy to sew one in. If I ever need to clean the pillow or insert I can just cut the stitches, restitching the opening closed afterwards. It's easy to do, I stitched these up while checking my email.
Tomorrow, photos of the finished pillows in the Living Room Redesign. Do you have any fabric laying around that would make a great pillow or two?
No comments:
Post a Comment