Welcome to the Workshop Series, brought to you by


Funky Junk Interiors and Mustard Seed Creations!
This week, Miss Mustard Seed has a special guest that is going to talk about living in a world of whites. I'm personally going to be in the front row seat on this one!
This week on Funky Junk, we're diving into a special effect kind of topic. :)

Faux Painting 101
Faux painting is all about fooling Mother Nature. What you're doing is painting in such a way where you'll achieve a look that you think is real. The deal with this one? It's all about the paint.
Faux painting is a VAST topic and is achieved in several ways:

(pic from The Magic Brush's website)
Adding texture, glazing for depth, gilding, stenciling, stamping and so much more are all techniques used to fool the eye.

And don't forget about specialty paints on the market! This is one small example of a CNC routered letter sample, painted in a special paint that creates real rust. You can make anything rusty! Or look like metal, or stainless, or gold. Many of these specialty paints can be found at Michaels or Hobby Lobby.
Here are some gorgeous examples of faux painting.

Faux and antiqued cabinets

dramatic dresser treatment


amazing wall technique
All pics courtesy of The Magic Brush
As you can see, there's alot of depth to this topic, so let's start with a simple tutorial any beginner can try. And who better to show us than a pro faux finisher!
~ Faux finishing metal spindles ~
~ Faux finishing metal spindles ~
Welcome, Jennifer, from The Magic Brush!


What an honor to be asked by Funky Junk Interiors to be a guest blogger today! Thanks Donna! I hope my post will do your blog justice!
I wanted to give Funky Junk's followers a project that they could do at home themselves. Sometimes people just need to see something once for that "aha" moment to click and empower them to go try it themselves. Let's get started!

Many of my faux finishing clients are replacing their wooden spindles with iron ones. The cost of iron spindles depends on the number you need, the design and the paint finish you order on them.
One way to save on the cost of iron spindles is to order them in RAW iron and paint them yourself! We changed all of the white spindles in my house to this a few years ago for a couple hundred dollars.

We ordered them in raw iron like this:

And then I got to work faux finishing them! I always use at least 2 metallic paints to faux spindles. These 2 colors are my favorite.... "Antique Bronze" and "Blackened Bronze". They are both made my Modern Masters and available in most paint stores (Sherwin Williams or Benjamin Moore dealers). I know there are many metallic paints on the market... but these, in my opinion, are the best!
Donna ~ "Another great brand I've personally used is Sophisticated Finishes" found at Michaels. It's a similar product. These metallics have the most amazing shimmer ever! Very realistic coppers, silvers and golds."

The secret tool for faux finishing spindles is this (drum rollllllllllll please):

A men's shaving thingy-ma-jig! They can be found at Walmart, garage sales, eBay, etc. They make pouncing paint on a round surfaces a breeze!
We dip the brush in the paint and pounce it on the spindles. Remember... less is more. Use very little paint on your tool. In fact, dip it in paint and wipe most of it off the tool with a rag first. Too much paint with look "goopy". And goopy is never good!
I usually work in sections.... doing the entire top half of a spindle with both colors. Feel free to double dip using one tool for both colors. Double dipping is totally allowed in faux finishing!
It took me literally 10 minutes to change my spindles from this:

To this:

Here is a closeup.
Donna - "The glowy warmth has an amazing effect against the wood! Nice choice!"

Donna - "Take note how the lighter colour was used in areas the sunlight would hit. This creates a pop of dimension, especially to objects in darker areas of your home. You can make the sunlight come in wherever you choose. :) "

This is a picture of another spindle job that we did where the clients ordered the iron in black for the base. We did 2 metallic colors over the black as well. Don't cover up all of your base color... when it shows a little, then you see 3 colors which is really pleasing to the eye!
Even though this tutorial is centered around spindles... you could use this technique on anything small. Picture frames, iron bar stools, plant stands, ceiling medallions, etc. etc.
At the risk of ruining any TV career I may have (ha!)...... I had my son tape me fauxing the spindles in my basement that I had never gotten around to doing. It is a complete and utter disaster of a video. Because I love you all..... I'll forewarn you of my mistakes:
- 1) Always clean up the room you are taping in (this was right before Christmas when we were in the middle of our basement remodel).
- 2) Always put on some makeup before being taped for a video.
- 3) Always put a really loud, but precious, 2 year old in another room before beginning to tape.
- 4) Always teach your 8 year old how to say goodbye before he just stops taping.
Bless you for even watching it. It was really a slow moving train wreck... but my first ever video on a blog! Donna you are a peach for airing it! I will take your advice and invest in a tripod and a babysitter before I get videoed again!
Donna - "Hahaha! Great work!"
I hope you enjoyed my spindle tutorial. Be sure to stop by my blog at The Magic Brush to see more painting projects!

Thank-you Jennifer! I've long been a stalker of your work. Your blog and website are amazing, not to mention your relaxed humorous ways. You are the real deal. :)
Know what I really like about this gal? She writes about failures on her blog too. I just read this one again and I was gasping for air... (right click/new window the link so you come back! We aren't done yet!!)


How funny are those?!? Her blog is loaded with them. :)

~ This post is sponsored by ~
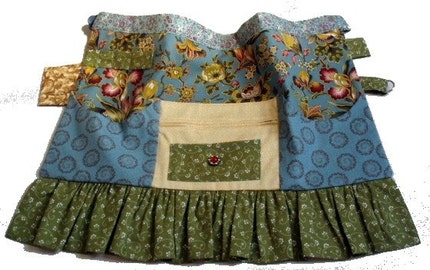
Make Mine Beautiful's DIY Work Aprons
* Special pricing for this week *
Workshop Series Apron giveaway event - March 31st
No comments:
Post a Comment