
You are in for a treat!
Today, Julie from
is taking over to show us how to build a tool box the right way.
Now just so you know, Julie isn't a builder hack like me. I must make her grit her teeth when she looks at my stuff. :) While I may saw and not even bother to sand something afterwards, she'll be busy doing dovetail joins and biscuit something or others. She knows her stuff and she is GOOD. So, we are in excellent hands.
Julie's created a welcome post so you can learn abit more about her work and her motives behind her blog. Click HERE if it's your first time over!
Why you should build one
Now, I realize tool boxes, or tool totes can be found and sometimes really cheaply, so I hear ya if you think, "Why make one if I can just buy one?"
No one understands that more than I do. In fact I live by it 99% of the time.
BUT!! There's going to come a day when you can't find what you're after. And you'll wish you had the skills to build it instead.
This is your chance to do just that. This project is EASY and it's my bet you have all the tools you need on hand. If you need to, ask someone to show you how to work with the tools required, then try this on your own.
Once you build this thing, you'll claim ownership on a skill you'll impress yourself with and you'll be braver to build something a little more challenging next time.

My first build were these gate window screens. (with some cheating - framework was premade) I had guts. What can I say.

My 2nd build was this pallet desk. No cheating. It's all from scratch.
How I feel now? I feel I can build nearly anything with simple lines! And it feels really REALLY awesome!
You are in good hands. Julie knows her stuff and I'll invite her back to watch for your comments and questions, so please feel free to ask anything you'd like! We will both be here for you.

Also, join me/us on FJI Facebook. I'll be checking in on the progress of your build so we can help you any way we can until reveal day.
While it will be perfectly ok to share your premade tool totes at the link party, I'd like to suggest you try and build one too!
Lead the way, Julie!

~ Let's build ~ a tool box! ~
Part 3 - link party to celebrate your new creation!

Rated - Beginner
Supplies needed:
- wood planks old or new (we'll get to the dimensions later)
- plywood
- something for the handle (ie: a dowel, old rake handle or branch)
- jigsaw or handsaw
- drill
- drill bit
- hammer
- nails
- pencil
- scrap of cardboard (to make the template)
- measuring tape or ruler
~ Measuring the wood ~

You will need:
- 2 pieces for the sides (front and back)
- 2 pieces for the ends
- 1 piece for the base
- 1 handle

Here are some old barn boards I had. The top two will be the sides and they measure at 3 1/2" wide. The 3rd piece will be the bottom, measuring at 5 1/2" wide.
You want the side pieces to be narrower than the bottom.
~ Cutting the sides and end pieces ~

1. Cut the length of your side boards to the desired length you wish your tote to be. They can be cut with a handsaw or jigsaw.
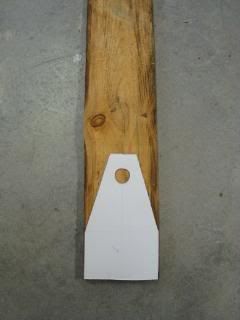
2. Decide how tall you'd like your tote to stand. Create a template (I used a piece of cardboard from a cereal box) of the shape and size desired.

3. Start the angle after you have reached the height of your side pieces.
The height of my piece and template is 9 1/2".
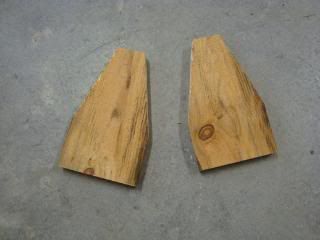
4. Trace two around your template onto the end pieces of wood, then cut.
~ The base ~

A piece of plywood works well or a 1" x 6" would also be good.
Wait to cut it to size until you've put the rest of the tote together. This way you get the perfect size.
~ The handle ~
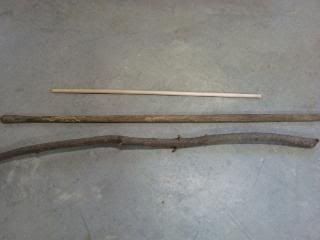
shown: a dowel, rake handle and a branch
Don't cut the handle until you've made the other pieces.
~ Cutting the holes ~

shown: The forstner bit is on the left and the spade bit on the right
You will now need to cut out a hole for your handle piece.
You want to make your hole for the handle just half-way through the end piece. So that is approximately a 3/8" deep hole for a 3/4" thick end piece. This way the handle is stuck between the end pieces and cannot fall out.
The best way is to use an electric drill or drill press with the correct drill bit, which would be a forstner bit if you have it. They cut a nice clean-bottomed hole.
Donna - "I'll be using a spade bit with my cordless drill."
If you use a spade bit, the hole will go right through your side piece. You will need to plug the smaller hole or put a screw into the end of the handle.
~ Building the box ~
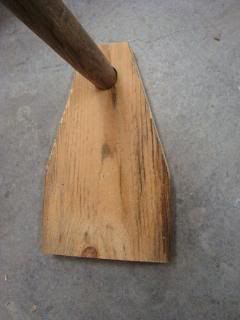
1. Mark the hole on your wood first so that you can center it and both sides will match. I put mine about an inch down from the top:
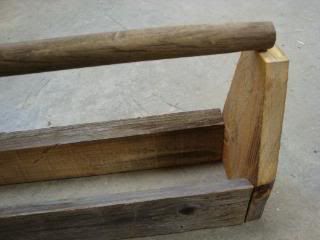
2. Stand up your end pieces and loose fit in between the two side pieces.
3. Measure the length of your handle by resting it on top of the ends. Mark the length and saw.

4. Drill the holes.
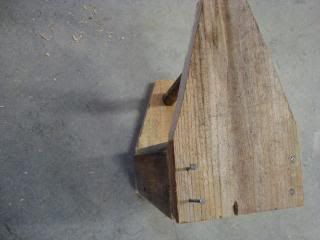
6. Put one end piece down on a firm surface and nail the opposite end piece into the side pieces.
Tip:
I used old, used nails. You can also use a nail gun or screws.
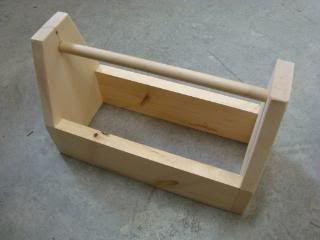
7. Flip and nail the other end piece on. Here's the pine version.

8. Turn the tote upside down, measure, then cut the plywood the size of the bottom.
9. Nail it on with smaller nails if you are using plywood. I used finishing nails.


divided tote tutorial is HERE
These totes can be finished in any way you can think of!
You may find that if you cut old wood, the cut edges are lighter than the rest. The plywood also might not match. I explain how to fix that in another post HERE.
Everything I make is for sale, so if you see something you like, please contact me.

~ next up ~
Tool box link party
Fri, June 4 during SNS
That didn't look so hard, did it?
Will you be building one too?
What's holding you back from trying?
Any questions? We'd love to help!

No comments:
Post a Comment