
When Julie introduced the idea of all of us trying to build a tool box, my first thought was, "But I like old authentic stuff... and I can make most anything work that I find, so why build one?"
Well, Miss Julie made me put my thinking cap on. I've never built one before but my criteria quickly became all nit picky like and soon realized I needed to build my own after all. :)
I wanted it a certain size.
I wanted it to look old, authentic and in my trademarked woodsy preference.
I wanted it original in some way.
I wanted it to be easy to build. (read: CHEAT)
Could I do it? Well by golly, I was gonna give it my best shot!
How I built my toolbox...
Front, back and bottom
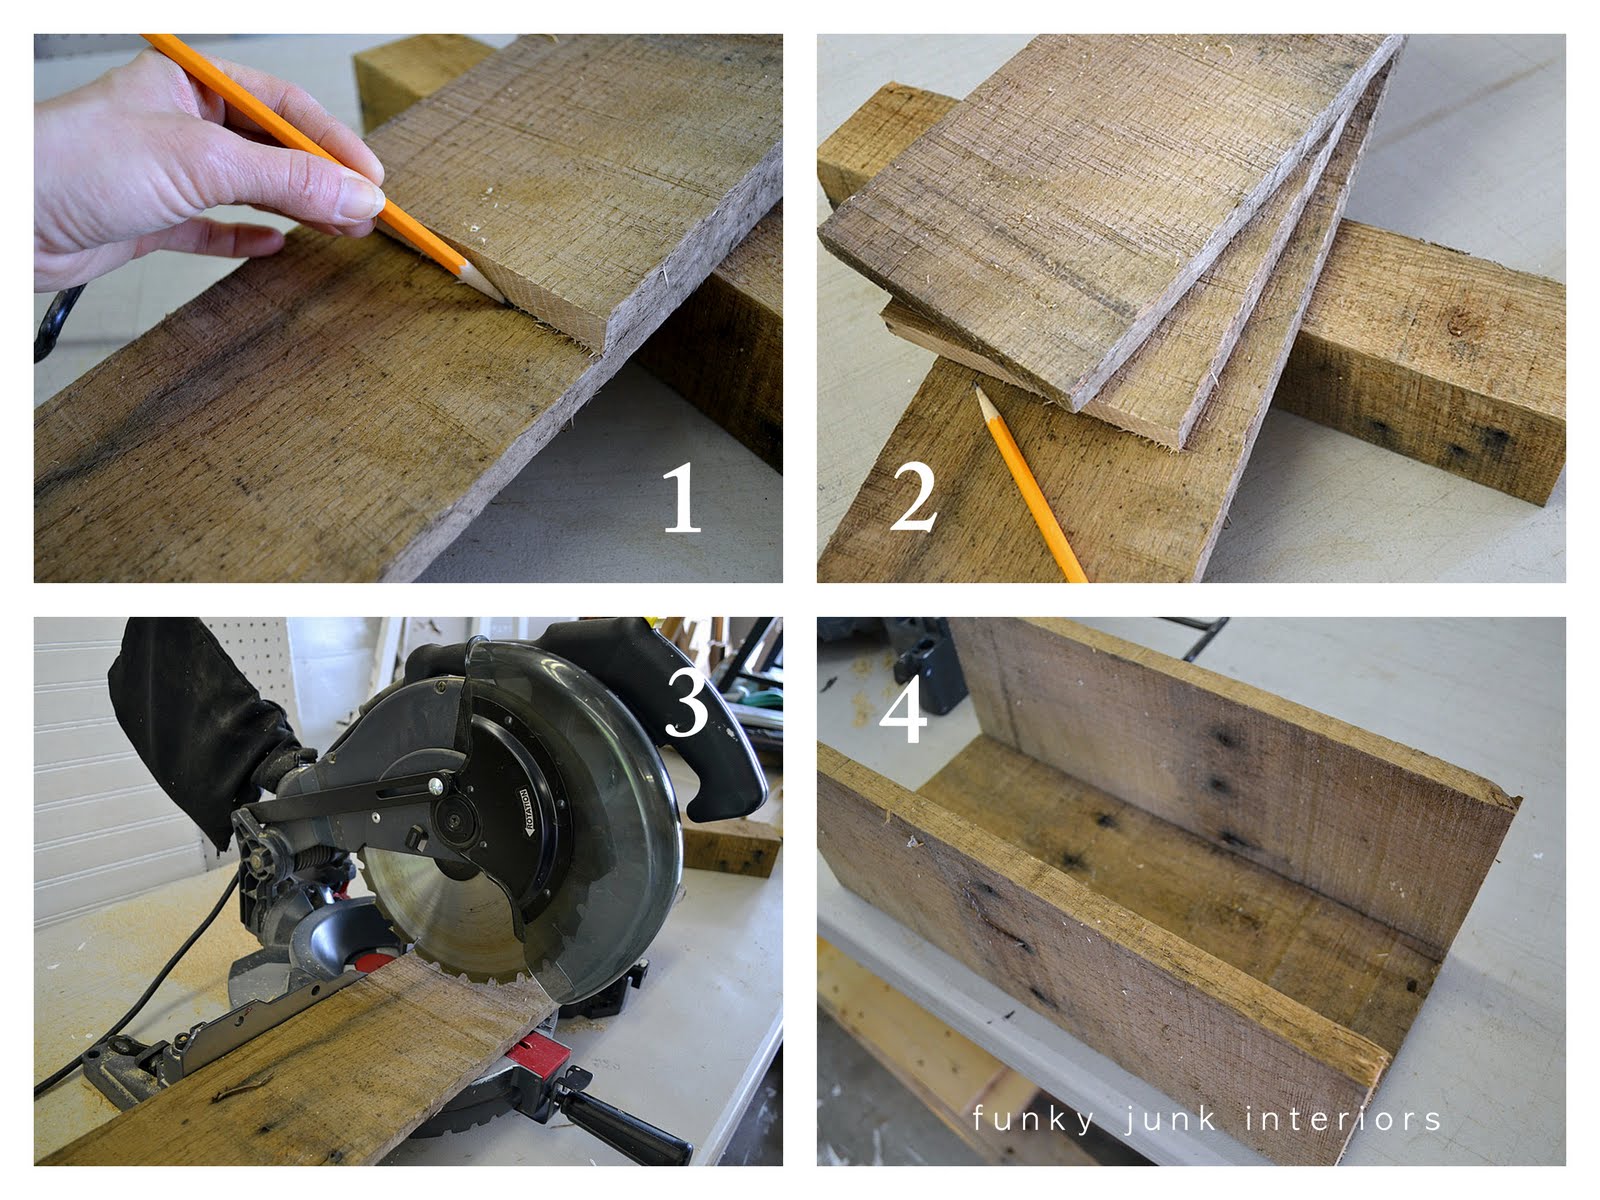
1 2 3 - I measured out how long I wanted my toolbox and cut the first piece. I then used that piece as a guide for the other two. These pieces would become the front, back and bottom.
4 - I dry fit it to get a visual. LOVED the wood patina and nail holes. :)

Sides
Once I decided how tall I desired the sides to rise, I cut a board twice that long so I could make both sides at once.
5 - The board was clamped to two sawhorses for stability while cutting with a jigsaw. I drew one side, then cut it. (with a dull blade... use a sharp one!)
6 - I used the cut piece to transfer the design to the other side.
7 - The old board got a good sanding.
8 - The middle of the board was measured out.

9 - The board was cut in the middle, creating the two sides.
10 - Everything got another good sanding, especially the edges and ends, but care was given to not overdo it as I wanted to maintain the squareness of the edges.
11 - I dry fit to ensure it was working. It was! So hmmm... what's that old tyme drill for anyway? You shall soon see. :)
12 - I used a spade bit in the cordless drill to drill the holes in the sides for the handle.

13 - After one hole was drilled, I used it as a template for the next hole position.
14 and 15 - I didn't drill right through this time. Yet.
16 - I re clamped the board back onto the saw horse and jigsawed two small cuts leading up to the intended hole.

19 - the drill handle of course! The blade end of the (VERY DULL) drill slips into one hole, and the handle slips into the slot of the other.
20 - I predrilled and nailed all of the pieces together....
And called it done. :)


I loved it but it needed a small tweak....

So I added an authentic cow tag from my parent's farm onto the box. Perfect!
It now tells a story. My dad's back shed was all about rusty tools. This little tool box most certainly brings back farm life memories.

And with an authentic keepsake from that very place. :)

While I loved it as is, I really needed the toolbox for a different purpose.

So it became a kitchen essential.

It's the perfect little telephone companion!
It holds just what I need with junk style, looks pretty authentic, is indeed original with that handle, and I now can proudly say I built a tool box! Thanks Julie!
But that's not all.

Tune in Friday night at Saturday Nite Special to see the OTHER one I made for the flowers. :) Make sure your builds are ready too cuz we're gonna party with them!
Did you miss the toolbox series?
Part 1 - inspiration
Part 2 - how to build one
Are old boards safe to use? Read HERE on how to work safely with pallet wood.
The one board toolbox build. Way easy.
What's stopping you now? :)


No comments:
Post a Comment