I have a few pet peeves when it comes to interiors, and high up on the list is harsh lighting. I don't care what else is done in the space, if the lighting is wrong, the space has no way of living up to its potential. This is where the beauty of a little thing called a dimmer switch comes into play. Super cheap and super easy to install!
Back when we were having our first house built, I remember my surprise at the upgrade charge of sixty dollars to add a dimmer...per switch! Seriously, I thought? I've seen those things at the hardware store for under $10, how hard can they be to install? I quickly found out not hard at all, as I had none installed while the house was built, but went to town adding them afterwards.

When I purchased the cute little round bulbs for the fixture to be hung in the dining room, I realized I would need to also install a dimmer in this room, so picked up one at the same time.

Now while the actual dimmer only took me 5 minutes to install, finding the right switch to turn off at the breaker box took several times longer. Irritating! I literally tried every single option until I found the one that turned off the dining room light. Turning one off, coming back in to see if the light was off. No. Back out. Again and again! Talk about bad guessing. Obviously 'dining room' was not labeled on the panel, but it is now!

Once I was out of danger of shocking myself, I refreshed myself with the directions...
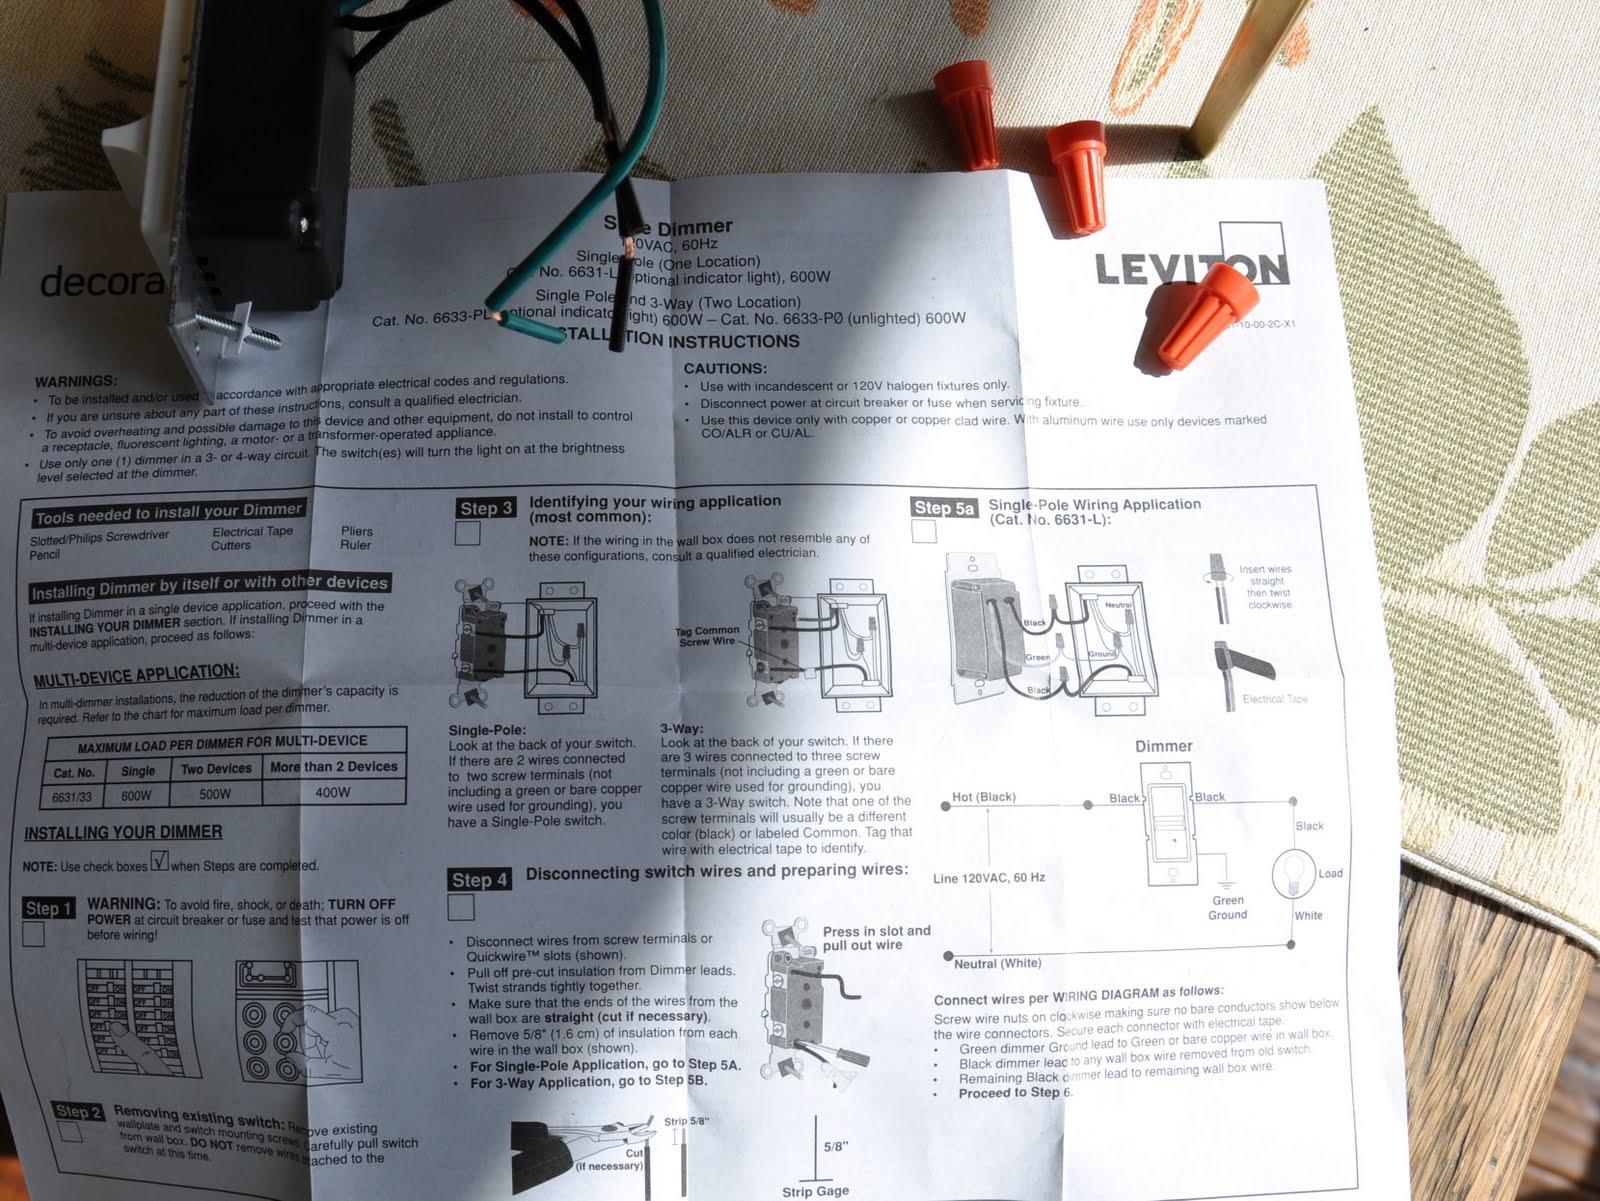
...and removed the wallplate to pull out the switch.


The hardest thing, apart from the breaker box issue, was releasing the wiring from the original switch. You are supposed to insert an object into the tiniest of holes to release them. Digging around in my tool box I finally saw one of my Allen wrenches was small enough to fit in and do the job.

Then the new dimmer switch was installed, connecting the wiring by screwing wire nuts over them clockwise.
{Disclaimer: Before trying this project, obviously refer to the directions provided in the purchased dimmer!}

Tip: Test to make sure the dimmer has been installed correctly before proceeding, by turning the power back on to see if the fixture lights up. I've not done this before and have wasted a lot of time!

Once I knew the switch had been installed correctly, everything was tucked back into the wall box, the switch secured with screws...

...and the wallplate put back into place.

Bright.

A little less bright...

...fading to soft light.

Dim.

And finally, barely there light.
It will be even better once the new fixture is installed, and I just got a call, the chain has arrived!
No more delays.
No comments:
Post a Comment