
This is a little greenhouse I have tucked in my backyard. I use it to store my firewood. And it's currently an eyesore. I knew I wanted to eventually do something to it, but wasn't quite sure what. When my friend Vic gave me that old window, I knew exactly what I needed to do. Put the window to great use!
I then visited The Back Porch that houses many adorable character buildings for the perfect inspiration.

Today my little pile of free old fencing wood came out of hiding.

I took a scrub brush to it and removed all the moss and yuck while my son removed the nails. It was a beautifully warm overcast day, perfect for such a project.

Meet my best friend of today! I love this saw. If you don't have a circular miter saw, you need one. Just do it.
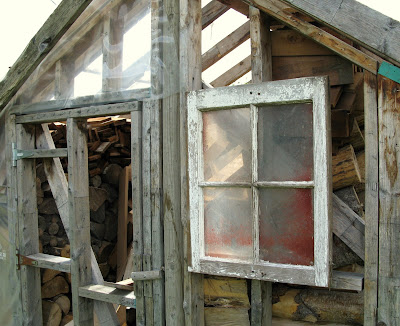
First thesmall window got a home... yup, looks good right about there. I predrilled holes first, then used screws to gitter done. Always use screws. It makes repositioning effortless. I positioned this window approx. 4 times if not more. Trust me, use the screws.

Anyone that knows anything about real wood construction would definately cringe. I don't have alot of building skills, but I'm pretty comfy with a cordless drill and measuring tape and the saw became 2nd nature fairly quick. I simply premeasured each board, and cut them to size, tapped the tonque and groove wood together and screwed them in with wood screws. I think they were wood screws... they were black, is that enough info? I don't care if they rust. All part of the added charm. I ensured I staggered the board joins where longer lengths were required.

Look! Cute!! I scooped up that funky gate from the dump too.
I had another old window with no glass in it which can be easily taken care of later glasswise. Remember, I screwed the window frame in so it's easy to remove! Then I cut the wood to fit around the positioning of the window.
The proper way to add windows would be to cut into the framing and add the right supports. I didn't desire to LIVE in this thing, so I didn't care about that part. The eventual glass will hide the framework. And I plan for the glass to get really dirty and stay that way, like that little window. It's all good!
I'm off to a great start! I plan for homemade shutters, window boxes with flowers, and a pretty little garden of sorts around this building. Perhaps even hang my garden tools on the outside during the summer months. And to find some old relics to decorate the outside with. I'm also on the lookout for some broken pathway stones. I have loads of dreams for this building!

Stay tuned for part 2, after I land abit of extra wood. A neighbour may replace their old shake roof shingles. How cute would the above effect be?!? Remember, I used screws. Anything is possible. Even partial redos...
____________________
Part Two is here!
____________________
Wendy at The Shabby Nest is having a Frugal Friday Linky Party for Friday, May 29, 2009. I thought I'd share my very frugal makeover of this little shed coming to life. Be sure to check out the party for some incredibly creative projects going on!
Kimba at A Soft Place To Land is having a Garden Party, June 15 2009 edition! My addition isn't the blooming variety, however go check out the link to see the latter!
No comments:
Post a Comment