This is a really great solution if you have a little window that needs some extra love and you don't desire your traditional window treatments.


1. Trek off to your backyard wood pile.
Please tell me you have one of these. They are musts! I collect old fence boards, shake shingles etc. Just remember to remove the nails before storing it for safety's sake. This, my friends, is called STOCK.

2. Select the lucky chosen dream boards.
These are old fencing boards that I got from a neighbor out of their own backyard wood pile.

TIP: This wood is notched with tongue and groove so they can scooch up nice and tight.

3. Mark the measurement you desire on your wood.
Measure your window from top to bottom including your moldings, and also figure out a good width.

4. Just cut it.

5. Attach your Z on top of your base.
a) Look for more wood to create your Z frame. Start with a small piece that runs across the top. Screw it in. I like how that cross piece has a stamped word. Incorporating oddities like that simply makes your little shutter all the more uniquely yours.

b) Under that first cross piece, lay out your next piece on an angle. Loosely position your bottom cross piece but don't attach yet. Mark the angle for your angled piece and cut, upper and lower. Note how I figure out angles. No fancy whatevers here. Ruler on top, draw, done.
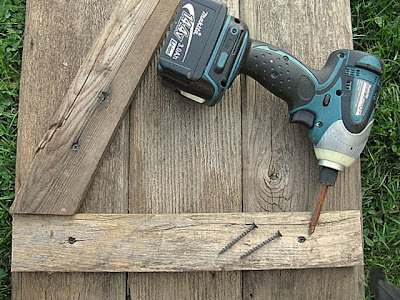
c) Attach the angle first, THEN your last piece so the fit is perfect.

6. Screw your cute little rustic shutter to the wall.
My cheat sheet method? I used really long screws, and when I screwed the shutter components together, I didn't go all the way. So once I held the shutter against the wall, I simply continued and screwed them right into the wall. No extra screws to litter up my lovely wood with! Add hardware too if you have it. I just had a little hook on hand but you can bet I'll be searching for more!

TIP: When I cut the wood to size, I ensured the cut pieces were on top so I could hold onto that natural wear right where you'll see it. And now the fun part...

Decorate!

What was once a poor sad lonely little window at the far end of a room...

.... now wears loads of charcter and rustic charm.

UPDATE!
I found some old fabulous hardware!

Perfect.
Have you done anything out of the norm for a window treatment?
I'd love to hear about it!
No comments:
Post a Comment