Showing posts with label board and batten. Show all posts

Wednesday, November 11, 2009

Bedroom makeover Part 2 ~ the wall


I've been busy working on this new bedroom look of mine! Remember Part One?


Let's move on to the wall. I wanted to create a feature wall to highlight the headboard. Something neutral but interesting. So I grabbed a few odds and sods from the garage and laid them in place for a visual.


While I knew it would work, (this is where I sound abit weird), the repeated perfect pattern bothered me. Yes it did. So I added my own flair to this idea.


Much better! Makes you eyes dance abit rather than bam bam bam. (am I making any sense to anyone out there?!?)


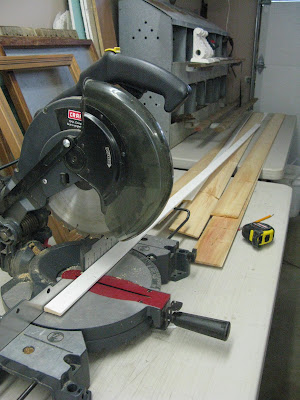
Off I go to my workshop (garage) to cut the pieces down to size. (tutorial on the how to at a later date... I sure have alot to teach you!! Trial and error is the best lesson ever... yikes.)


Off topic... Did you notice this in the background?!? It's a metal chicken coop for tool storage I scooped from a garage sale. The racks come down, perfect for painting small projects and keeping them off the table tops. HOW COOL IS THIS. It's nearly too good to keep in the garage. I have a spare wall in the living room... hmmm...


Ok, back to the wall. The attached version.


Remembering my inspiration (here's the quilt peeking through as well)...


My chippy and worn favorite elements were dragged into the room so I could capture it all in one spot.


And here is the wall after the first coat of primer and paint. It's coming together! I LOVE the random pattern of the board and batten!

~ To be continued ~

Not sure I'll be finished in time, but if I am, (I'm going to try try try!) I'll post the result of the headboard on this weekend's...


Are ya comin'? Theme is anything goes! I'll be highlighting my favs and the highlight post is getting a whole lot of attention! So bring forth your past or present projects, and see you Friday around 10pm my time! More info HERE.

Sunday, August 2, 2009

Board and batten backsplash

Welcome to my first attempt at board and batten! For a kitchen back splash. Starting small is a good thing, no?


This was my inspiration. I have a bank of 3 windows along one side of the kitchen. And I fell in love with these distressed wooden boxes. This is one of 3. I knew it was a great way to get more whites into an otherwise fairly woodsy looking interior.


I had these cedar whatever they are given to me by a neighbour. They were rough as can be so I started by sanding the heck out of them. Then I gave them a coat of primer, as well as a good quality exterior semi gloss. The white I used was tinted JUST enough to knock out the blue coldness of the white.

TIP : You can still have white but just the tiniest knock down can make all the diff.


Here is the area I worked on. Boring indeed. But I wanted something I could do myself that didn't take 10 years and was over the top expensive. So I just waited.


First I did some crack filling (that I hadn't done right the first time because I swore I was going to tile this area).

TIP: Sometimes you can NOT cheat, darn it.


I then gave the wall 3 coats of semi gloss exterior. And I used some leftover moulding I had from a project I never did. This is old style boring door moulding. I simply flipped it upside down so I'd get the beefier end facing up. I used finishing nails, then countersunk the nails, then filled it with a whipped lightweight wood putty.

TIP: (Putty sands smooth, so don't use caulk for this part because you want to sand the holes smooth)

Then I cut all those little boards to size with my circular miter saw and treated the install the same as the base moulding. I was going to caulk around the edges of all joins but I decided not to in case, you know, I changed my mind. :)


Tadaa!


Just a little touch of elegance makes all the difference.
Sometimes I think I may replace the cedar boards with perfectly smooth ones, but the texture from them does add abit of interest.

Here's a shot of what's adjacent to the stove wall, so you can see how nicely the white ties in.

Tip: Wouldn't The Nester be proud of me for those lamps?!?
__________________________

~ post is shared with ~