Showing posts with label organizing. Show all posts

Wednesday, October 26, 2011

Mission Control: How to Create a Family Command Center~

It's not like we didn't have papers... and photos... and invitations... and such... floating around before we had children.  But, once we had kids those sorts of things seemed to multiply.  And once our children started school, they seemed to multiply exponentially.  Anyone else experience that phenomenon?  And since I am one of those people that likes my refrigerator to stay clear of all of that kind of stuff...I had to find a place for it.  That's where my Family Command Center comes in.  I've had one in every house that we've lived in.  And here's my version for this house.

I knew that I wanted to  have a bulletin board.  And I wanted one that was fairly substantial in size.  Then, when we were visiting my parents last weekend, I lucked upon this old corkboard sitting unused and dusty in my parent's basement, so I grabbed it and ran asked nicely if I could take it.
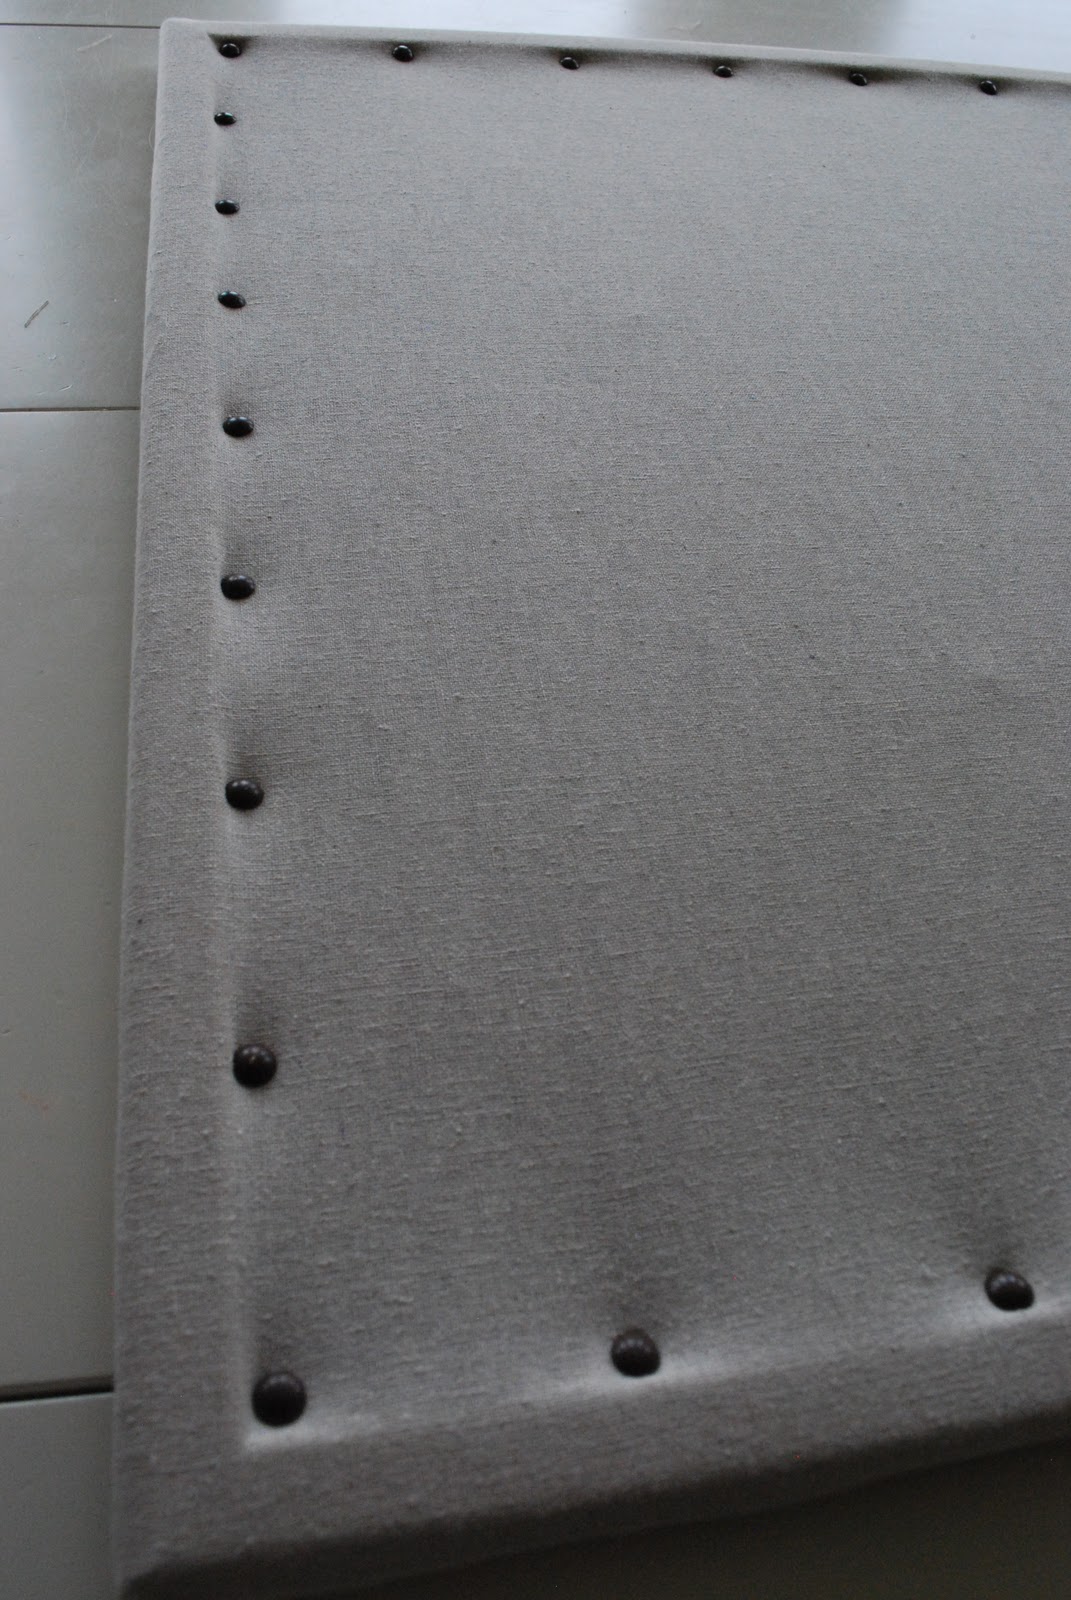
Of course, the old corkboard was looking a little worse for the wear after sitting in the basement for so long.  And so I covered it with some fabric that I repurposed from my boys' old headboards.  I just wrapped the whole thing and stapled it on the back with my trusty staple gun.

Then to make it a little fancier (because fancier is always a good thing, right?) I added some nailhead trim.  And voila!  A much prettier bulletin board was born.

I put it up, along with a magnet board from IKEA that I already had, and our family calendar.  But the overall effect was a bit dull, so I had to "pretti-fy" it by adding in the DIY vinyl silhouettes I made of the kiddos, as well as a pretty stamped metal banner from Lisa Leonard, and my beloved Anthro "H" monogram.

The overall effect was happy, and fun, and definitely prettier than just having those boards and our calendar hanging there.  And now all of those papers, invitations, photos and what-nots will have a place all their own (and my refrigerator door will remain clean). 

Hooray for organization!! Can I hear a "woot woot"?!?

Monday, May 23, 2011

Decluttering Tips~

It's crunch time.  T minus 5 weeks until our move.  Now that we're starting to pack, it's the perfect time to declutter.  Moving is a great time for a fresh start,  a great time to get yourself clutter-free.  But you don't have to be moving to get that clutter out of your house.  In fact, it's much easier if you declutter a little bit at a time instead of having to do it all at once like me.   If you want to get rid of some of that clutter (and who doesn't, really?)  here are a few of my go-to tips for decluttering your house.


A Place for Everything and Everything in its Place

1. Declutter for a few minutes at a time.  Let's face it, the prospect of spending hours going through your closets and cupboards is enough to keep you from decluttering all together.  So make it easy on yourself and declutter for 10- 15 minutes at a time instead.  Take time and clear off one shelf, or clear out one drawer at a time.  This makes the process less daunting and more doable.

2. Finish decluttering one room at a time.  Continue working in one room at a time until that room is clutter free.  The next time you take your 15 minutes to declutter, move on to the next drawer or the next shelf from the one you worked on last time.  This way you won't have random clean drawers or shelves strewn throughout the house.

3. Set aside a weekly time.  Or if this works better for you, try scheduling a time weekly to declutter.  It could even be part of your weekly cleaning routine. 

4. Multi-task.   Rather than sitting while you chat on the phone, try cleaning out the junk drawer.

5. The clothing rule.  If you haven't worn it in the last year, get rid of it.  I finally convinced the hubby to do this.  He holds on to his clothes for.ev.ah.  But last week, he finally did it.  Went through his clothes and got rid of tons of old (and unworn for years) clothes.  He was actually smiling...and couldn't believe how good it felt.  Really.  Mission accomplished.

6. Deal with paper immediately.  Now, I must admit, I am a bit of a paper hoarder.  I have a hard time parting with paper.  But nothing builds up clutter quite as quickly.  So even I, who looooves my paper, have had to implement a system.  I have three boxes:  a bills box, a to-do box, and a file box (you can see them on the shelf in the photo above).  When my mail comes in, I deal with it immediately I put bills to be paid in their box, other papers that need dealing with in their box.  Then once I either pay the bills or deal with the paper it goes in the file box...and gets filed weekly.  (And for those bills that can be taken care of online - I do that.)   The rest gets shredded or goes in recycling. 

Except magazines and catalogs.  This is my real weakness.  But I am trying to be better.  I have been going through my old magazines and tearing out the pages that inspire me.  It was a bit challenging for me at first, but it feels good to get rid of them.  I will admit, that I do keep some of my favorites in tact, but I try to limit myself.

7. Donate and Recycle.  This brings me to my last tip.  Donate or recycle.  It's much easier to get rid of things when you don't just trash them.  Take your clothing, old toys, books etc. to your local goodwill.  And recycle all that paper!  Knowing that you are doing your part to be green is always a good thing.

Are you feeling inspired to organize?  Try these websites for some great decluttering and organizing ideas:

FlyLady.net

Organized Home

Get Organized Now

Okay, now that I've preached my little sermon on decluttering...I'm off to do as I say. 

Have a great day~

Tuesday, May 3, 2011

A Well-Labeled Pantry~

Some time ago I got a bee in my bonnet.  My cupboard was a mish mash of cereal, pasta, baking supplies,  hot chocolate...you name it.  I couldn't take it any longer and I decided to get organized.  I grabbed some baskets and plastic bins, I purchased a few containers to put my baking supplies and cereals in.  And the pantry cupboard looked better.  No doubt about it. 

But when Dymo sent me their Plug and Play Label Maker to try out.  I knew exactly what I needed to do with it. 

You see, even though the cupboard was now nice and organized...there was a little issue with the baking supplies.  Turns out, powdered sugar, flour and granulated sugar can look very similar when they are placed in containers without labels. (Really, you say?  Bake much, Wendy, you say?)   Luckily, I never grabbed the wrong container - like say, powdered sugar when I needed flour...but that doesn't mean it couldn't happen. 

So I pulled out that little Plug and Play Label Maker.  It was so easy to use, I couldn't believe it.  It has built in software, so all I had to do was plug it into my computer (it's PC AND Mac compatible). 


A window popped up for me to type in my label...there were a number of fonts to choose from...and even an option to add graphics from your computer.  (Below is a screen shot of the software window...)


I opted for simple labels...but I used Curlz for a font to give them a little bit of fun.  Then I just clicked the print icon and the label popped right out.  There's a button to push on the machine that cut the label for me.  That was it!  I got all the labels done for my baking supplies in a couple of minutes, but I was having so much fun that I made some for my cereal as well.

Mr. Three (my 4-year-old) came up while I was in the midst of my label-fest and wanted me to show him how the machine worked.  He giggled when he saw the label pop out, and wanted me to make labels for everything in the kitchen.  I was having so much fun with it, I just might have...but I decided I better save the label tape for some other  projects I have up my sleeve.

So here for you to admire is a collage photo of my well-labeled pantry.  It's a thing of beauty, no?

I just love getting organized, don't you?

Discaimer: Dymo provided me with their Plug and Play Label  Maker in exchange for this review, but the opinions expressed are entirely my own.

Monday, December 27, 2010

My obsessive-need-to-organize-everything-in-my-house-and-life phase~

Normally, my obsessive-need-to-organize-everything-in-my-house-and-life phase hits about mid-January. But this year, it started about mid-December. I don't know if it's because 2010 was a very rough year in our family and I was just ready to cleanse our life... or exactly why it started early, but I have been on an organizational rampage for the past few weeks.


This is good, because I have already accomplished some of my New Year's goals and it isn't even the end of December...and because it is going to give me a lot of blog content for you all in the upcoming weeks, but also because I have started to feel the satisfaction of life-control that organization brings. Do you know what I mean? Or am I the only one who feels more competent and in control when things are in their places?


via The Lettered Cottage


For example, I have already oganized my pantry cupboards. I have my new mudroom area 3/4 of the way finished. Here's a little sneaky-peek of the bench in it's almost-before state (I had actually started to prime it in this pic.) Wait until you see the after!


I have also almost completed the living room. I have gone through the kids rooms with them and organized. It's almost like a nesting phase...except that there are NO new little Hydes on the way. Let me repeat that...NO new little Hydes on the way. ;-)


Of course, there are lots of things still on the to-do list. There always are. Not the least of which are health-related. The hubby and I are entirely revamping our diet. With three little boys that have Alpha-1, and with the fact that we aren't getting any younger, we felt like it was high time that we took inventory of our food intake, and changed it for the better.


Are you still there? Bored yet?? Hope not.

Because along with all of the changes around our house and in our lives, I have been obsessing over the direction I want to take this here little old blog in the new year. Don't worry, it will still feel basically the same. After all, it is me....albeit a digital, edited version of me. ;-) But I have some fun ideas that I have been wanting to implement for a while, and I think that the new year is the perfect time for that. So look for a few FUN changes to be coming your way here on the blog. Things that will make it a little bit more me.

via Southern Living


Okay, if you actually read all of my rantings, you are a wonderfully loyal reader and you deserve a star on your forehead. If you just couldn't get through all of that, then you're not reading this sentence...but you are a wonderful reader too. ;-)

Coming your way tomorrow....my two Christmas presents....and how they changed my living room for the better. One of them rhymes with Bar Pet and the other rhymes with Toffee Mable...and I'm super excited to share them both...so y'all come back now, ya hear?

xoxo
Wendy

Sunday, May 16, 2010

A really useful cabinet~

Happy Monday, dear readers! It's been a jampacked weekend here at the Shabby Nest...full of party after party...some for the kiddos...some for the whole family...but somehow, despite the craziness, I managed to get in some good old house cleaning.

And while I was cleaning, and putting away wonderful, clean-smelling, fluffy piles of freshly washed and folded towels, I thought it might be fun to share my makeshift linen closet with you all.

I have mentioned before that the one thing this house truly lacks is closet space. So when we moved in, I had to figure out what to do about a linen closet.

Enter our antique salvaged cabinet. We saved this baby from the Hubby's parents' shed which was being demolished. It has had many reincarnations since we saved it. It has been a coat closet, a pantry, a china cabinet, and now it serves as my linen closet.


During one of the cabinet's reincarnations, I had the hubby add the second shelf. It serves as a perfect spot for towels. But because I have yet to convince the hubby that he wants to build another shelf, I had to be a bit creative for the rest of the storage.


Bed linens are piled high in a pretty basket, while smaller linens like pillow cases, light blankets, and shower curtains are stacked in wire baskets rescued from a now-defunct refrigerator at our former house.

On the top shelf? Pretty blue toile boxes that hold special treasures...the blessing outfits of my three boys (the Princess' blessing dress is on display in her room.)


I just love this very useful cabinet...and its latest role as linen closet. Do you, my dear readers, have a particular piece of furniture that you use and reuse in many different ways?

Have a great Monday~

Tuesday, February 17, 2009

Waiting for spring~

The Hubby gave me these lovely tulips for Valentine's Day. Tulips are my absolute favorite flower. As I look at them sitting on the table, I find myself longing for Spring. This winter has been a fierce one in New England, and this girl just can't wait for some warmer weather!


But the more I look at these little lovelies, the happier I feel. Studies have shown that having fresh flowers in the home is actually a mood elevator and that the flowers act as a stress reliever.


So go buy yourself a few flowers...a few dollars spent to chase away those winter blues isn't such a bad deal!


And while I'm on the subject of spring, I'm getting started on my spring cleaning a little early. I was so inspired by Shannon's pantry organization project, that I quit procrastinating, and finally started organizing my kiddo's rooms!


Lest you think that the Shabby Nest is always spic and span...here is a before photo of the boys' closet/reading nook.
After a good hour or so - and a lot of purging of unused toys and papers etc.-here is the AFTER! Now I'm even inspired to paint the inside of the closet...another project I have been procrastinating! The closet cleaning led to a good thorough clean of the whole room. And then the Princess' room got the same treatment. I'm on a roll! Thanks for the inspiration Shannon!

Edited to add: M.L over the House of Whimsy has a darling post about the Crown Pillow she bought from my Etsy store. Pop over and give her a visit! It's so wonderful to have a happy customer!!!

Have a great Wednesday~

Sunday, February 1, 2009

Conquering Kid Clutter

First I wanted to thank everyone for their wonderful comments and support of my new Etsy store! I feel like I had a very successful "Grand Opening" thanks to my wonderful readers!!!! I still have to sift through all the comments...so I'll have to post the winner of my giveaway a little later this week.

In the meantime, Wednesday is the Taming Kid Clutter linky party that I am hosting with Pretty Organizer here at the Shabby Nest! In preparation for the party, I wanted to share a few children's rooms that do a great job of incorporating tons of stylish storage.

Here are three FABULOUS designs from Candice Olsen. I *heart* Candice Olsen! Check out these fantastic ideas...
This nursery has a gazillion storage options...I love the little storage "tent" by the bed...something like that would be fairly simple to make with a wire shelf system and fabric. But she didn't stop there...no no no. See the skirted window bench on the right side of the photo...that has storage underneath as well. Then there's the bedside table, the little trunk, the changing table, the small cabinet under the window. Catch my drift? Storage galore!
I have always loved this shared space that Candice did for two little sisters. The bed under the eaves is a built in...and I love the stylish storage she has incorporated underneath...(I also think there is a trundle under that bed although I haven't seen this episode in a while, so I could be wrong...) Again, more storage in the little chest under the window. And the carpet? A great idea for kids...carpet squares. If one gets ruined, just pull it up and replace it...something like that would come in handy at my house.

All rooms by Candice Olsen. Photos from HGTV.

I borrowed an idea directly from this last room. We are lucky enough to have a walk-in closet in my boys' bedroom, and it happens to have built in shelves. I took off the door, replaced it with a curtain, put a kiddo-sized desk inside, and put books and toys on the shelves. VOILA! A secret-hideaway-study-play area. And it still holds clothes too.

Thanks for the great ideas Candice!

I'm guessing that you readers have ideas that are every bit as clever as these. So let's link up here on Wednesday and share...share...share!!! I'm looking forward to seeing what you all come up with!

Have a lovely Monday~

Monday, January 26, 2009

Inspire-Me Tuesday~

I'm taking a bit of a different approach to Inspire-Me Tuesday today. I have been thinking a lot about the nurturing the creative process in my life. I also feel the need to foster creativity in my kiddos. I think that one of the best ways to do that is to allow them to see their parents being creative and to show them the value we place on our creative pursuits.

So today I wanted to share a couple of the ways that I nurture the creative process in my own life.

First, I have an inspiration binder. Well actually I have a few. The one I'm sharing with you today is my decorating binder. (I also have one for crafts, and one that just miscellaneous inspiring stuff...photos, images, whatever I find that tickles my fancy.) I have it divided by rooms. When I get ready to throw out my old magazines or catalogs, I go through them and tear out the pages that I love. Then I stick them in page protectors and put them in my binder. This binder has inspired many a project in my home. And when I look through it, I see all images that I love, so it has become a "happy place" or sorts also.


Second, I wanted to share my notebooks. As you can see I have three of them. The large plaid one sits on my night stand. It is for miscellaneous ideas that occur to me in the middle of the night. I don't know about you, but that's when some of my best ideas occur. But I have to write them down, or they stir in my head all night and I can't sleep. Once I know they are safely on paper, I can finally settle down. The other two are divided into sections so that I can "file" my ideas and sketches (or I would never find them again.) I transfer any and all ideas jotted in my night-time notebook or on bits of paper throughout the day into these notebooks for later. I can't emphasize to you all how important these books are to my creativity. Ideas grow, you know. From a partial thought or a sketch into a full-blown something-or-other. That's how I get inspired!

Now, on a completely unrelated note. I have had several people ask me for ideas on how to tame kid clutter. You might think I know how to do this because I have four little kiddos. Well, I'm no expert by any means, but I do have a few tricks up my sleeve that I'd like to share. Thing is, I bet there are plenty of people out there in blogland who have wonderful ideas on how to store toys, and books, and art supplies and all other manner of kid paraphenalia, sooooooo....I'm holding a linky party. My very first. I'm working with Pretty Organizer from Pretty Organized Palace, and hosting it here on Wednesday, February 4th! So, my dear readers, be getting your ideas ready to share, and let's all meet up here on Wednesday and use that fun Mr. Linky thingie to share all our CREATIVE ideas on taming kid clutter. Hope to see you all here!
Now, go forth, inspire, and be inspired~

Sunday, November 2, 2008

The Library~

We live in THE trick-or-treating neighborhood for our town (and some of the surrounding towns as well) so for the two Halloweens that we've lived in this house, we've invited a bunch of friends over for a potluck dinner and trick-or-treating. Just a little matter of oh, say, about 30 or so people. The normal person would simply clean the house for a party. Yeah, that's what the normal person would do. But not me and the Hubby. Nope not us, because I let him talk me into rearranging our library on the day of the party.

Perhaps some of you remember a few posts back when I asked for advice on what color to paint this great little table in the library. Well, the Hubby has never liked it there. Don't get me wrong, he likes the table, just not in the library. We thought if we painted it, he'd like it better, but we decided to put that little project on the back burner and simply move it out of the library all together. We've also been planning to make some built-in bookshelves ever since we moved in. But it hasn't happened yet. And neither of us were happy with the cheapy bookcase that we had in there, but perhaps the day of a big party wasn't the best time to move the nice Pottery Barn bookcase out of the Princess' room and into the library. Perhaps not. But we did it anyway, and I'm so glad we did. It ended up looking fabulous...and everything still got cleaned in time for the party. BARELY.

So here's a little bit of the library makeover.


This bookcase just fits better in this room. Above it is one of the Hubby's photos. And in case you're interested, you can find an article I wrote for Blissfully Domestic on making your bookshelves beautiful here.

Does this little beauty look familiar? It was one of my Literary Pumpkins from Halloween...I just took off his jack-o-lantern face, and now he looks great in my bookcase!


Here you can see where the bookcase sits in relation to the Hubby's chair!

This old grain bin makes a great place to stash my magazines.


Here's a close-up of all of the doodads on top of the bookcase.

And what room is complete without a barn star or two? ...Well, actually, lots of rooms are, but not this one ;-)

Happy Monday~

Sunday, September 7, 2008

It's a good idea

I've mentioned before the fact that my mother says "ideas are like germs, they float around in the air, and all you gotta do is catch 'em. " Well, here's proof positive. Remember these little clipboards?


So the other day I was checking out one of my favorite blogs, when I noticed this little post. It seems Martha -yes, that is Martha Stewart- had a similar idea. I love how she put them over a desk. I have a little space over my desk...maybe I'll make myself some more and borrow her idea!


A lot of bang for the buck... it cost me less than $2.00 per clipboard...can't beat that!


Photo from Martha Stewart Living (via Oh Happy Day)