Showing posts with label mini-tutorial. Show all posts

Wednesday, October 26, 2011

Mission Control: How to Create a Family Command Center~

It's not like we didn't have papers... and photos... and invitations... and such... floating around before we had children.  But, once we had kids those sorts of things seemed to multiply.  And once our children started school, they seemed to multiply exponentially.  Anyone else experience that phenomenon?  And since I am one of those people that likes my refrigerator to stay clear of all of that kind of stuff...I had to find a place for it.  That's where my Family Command Center comes in.  I've had one in every house that we've lived in.  And here's my version for this house.

I knew that I wanted to  have a bulletin board.  And I wanted one that was fairly substantial in size.  Then, when we were visiting my parents last weekend, I lucked upon this old corkboard sitting unused and dusty in my parent's basement, so I grabbed it and ran asked nicely if I could take it.
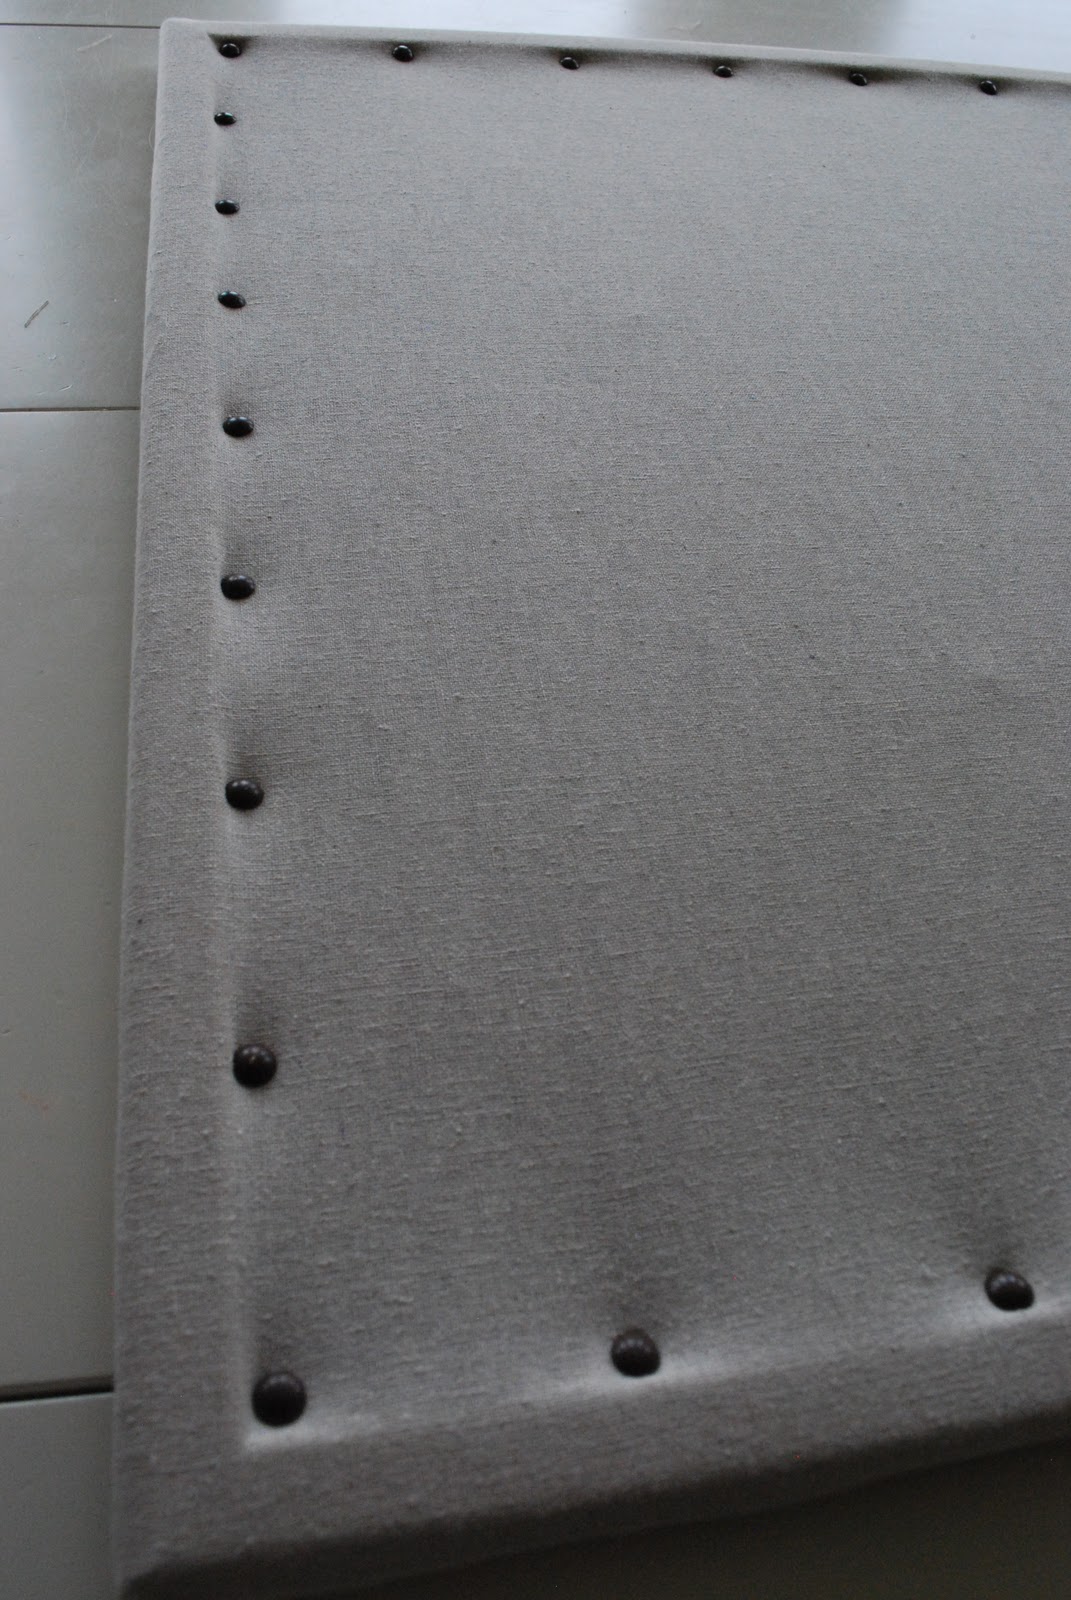
Of course, the old corkboard was looking a little worse for the wear after sitting in the basement for so long.  And so I covered it with some fabric that I repurposed from my boys' old headboards.  I just wrapped the whole thing and stapled it on the back with my trusty staple gun.

Then to make it a little fancier (because fancier is always a good thing, right?) I added some nailhead trim.  And voila!  A much prettier bulletin board was born.

I put it up, along with a magnet board from IKEA that I already had, and our family calendar.  But the overall effect was a bit dull, so I had to "pretti-fy" it by adding in the DIY vinyl silhouettes I made of the kiddos, as well as a pretty stamped metal banner from Lisa Leonard, and my beloved Anthro "H" monogram.

The overall effect was happy, and fun, and definitely prettier than just having those boards and our calendar hanging there.  And now all of those papers, invitations, photos and what-nots will have a place all their own (and my refrigerator door will remain clean). 

Hooray for organization!! Can I hear a "woot woot"?!?

Wednesday, June 29, 2011

Easy Up-do~

It's been hot here. I mean hot. So I've been trying to find fun new ways to get my hair off my neck.

Here's a super easy (and pretty) style that I found.

It's so easy to create.  Simply divide the hair into three sections at the nape of the neck, then twist each section until it wraps back on itself and pin in place leaving ends loose.

That's it!  If you've got long hair, this could just be your new go-to summer style...I know it's mine!

Frugal Friday goes live tomorrow at 8:00 pm MST as usual.  And we'll be moving this weekend...so look forward to many decorating posts to come!

xoxo
Wendy

Tuesday, February 8, 2011

Making Valentines~

The kiddos and I finished their Valentine's cards yesterday. For reals. I honestly don't think we've ever been ready this far in advance. Aren't you impressed? ;-)


But before I get to that...I had a lot of questions about how I applied the wrapping paper to the wall in my last post...I did it the same way as I did the first time (you can read about it by clicking the link about gift wrapped walls in the post) I used my staple gun. I just stapled the paper around the edges, and a couple of times in the middle. Because the space I was covering was relatively small, it worked like a dream, and it's easy to remove, which is important because this is a rental house.

Okey dokey, now on to the cards.


I saw this very cute idea floating around blogland last year, and mentally filed it away to use for this year's Valentine's cards.


So first things first, I took photos of each of the four kiddos with one hand extended in a fist. (They are wearing their Sunday clothes because I grabbed them right after we got home from church...not a bad idea...their hair was combed, their faces were clean, they looked presentable.)


Then I used Picnik.com to add borders and text to each.


I poked holes in each card at the top and bottom of each child's fist. And then the five of us had fun putting lollipops on each card by weaving the sticks through the holes.


Didn't they turn out ADORABLE?!? (If I do say so myself.)


And the best part is, they are completely, 100% personalized. No one else in their classes will have cards exactly like theirs. I love that.


Have a great day...

Go eat a lollipop.

Monday, November 22, 2010

My Take on the DIY Sunburst Mirror and a Winner~

So I've seen all of the fabulous Sunburst Mirrors cropping up around blogland...and I knew that I was going to have to make me one. Trick was, I could only use things that I had hanging around the house. Luckily, I've found that having limitations like that, often works in my favor. I am forced to think outside the box...so I thought. and I thinked. and I thunk. and then I remembered this pretty little thing!


I made this wreath at the beginning of the book-wreath-craze last year. I even shared a tutorial on how you can make one of your own, so I'll spare you all the repetition here, but you can check it out if you'd like to know more.
I've been in love with this wreath ever since I made it, but I thought that perhaps it might want a little sprucing up. I mean who (or what) doesn't want a little bling, right?


My mother is always a great source of free goodies, so I asked her if she "happened" to have a round mirror that she didn't need. Of course she did. I was in luck.


Then all I did was whip out "old blue" my trusty glue gun, and glue the mirror onto the wreath. Simple.


And now I have a fabulous sunburst mirror.


Love.

And the winner of the EcoNaturals Soap giveaway is Melissa who said "I'd love to try out these products. Especially the lip balm!" Congratulations, Melissa!!! Please drop me an email and we'll get you set up with your fabulous prize!

Have a great day~

Monday, October 11, 2010

Pie Bunting and a Little Hubby Update~

John turned 41 last week. Because of his injuries, we kept our celebration low key. But when his parents came into town a couple of days later, we had the whole family over for a little celebrating...and I took the opportunity to make a bit of a fuss over him. He has been craving pie lately, so that's what we had in place of cake.


But how to make a pie look festive? I have seen several darling cake buntings around blogland lately. In particular, I saw this fun tutorial over at Susie's blog last week. Since I happened to have all the supplies on hand, I decided to whip one up. (Now don't look too closely...because when I say I whipped one up, I'm not kidding...I put it together in about five minutes before the family started to arrive). But it sure did add the little sumthin' sumthin' I was hoping for.


And now for a little update...John has been able to get around a little better lately, so this last week we stopped by to see my Mom and Dad. I snapped this picture of my two favorite men and their matching walkers. I think it's cute!


(For those of you who may not know about all that has happened with my hubby and my dad this past month, you can read more here and here.)

But after spending the night in the Emergency Room last Thursday, we discovered that John has a blood clot in his leg. It's small, but we have to keep a close eye on it. SCARY!

So progress is coming, but it's very slow. Just trying to keep my chin up. But I gotta keep it real...it's tough. Thanks to all of you who keep my spirits up with your sweet comments and emails! I sure am grateful!

Something fun headed your way tomorrow! Make sure and stop by!!

Wednesday, March 24, 2010

How To Make Your Own (Pretty) Art~

Okay peeps...today I'm going to tell you all how I created the piece of art in my master bedroom redo. (or that damask thing-y hanging above the bedside table.)


This is a great idea to keep in mind when you really want a piece of art that will complement a space, and you just can't seem to find the right one. (Although my father-in-law who is an honest to goodness real life artist and Professor of Fine Art would roll his eyes at the concept of choosing art to "go with" a room...his decorator daughter-in-law, that would be me, does it all the time.)


In the case of my room, I really wanted to incorporate gray damask. I was hoping to use it for the curtains, but with the amount of yardage I needed, my budget would have been sunk. So I decided to bring the damask into the room in a stylized piece of art.

Here's what I did...


1. I found myself a piece of wood in our back room that had a smooth surface (you could also purchase a canvas, but I was aiming to use what I had)


2. I found a damask pattern I liked. In this case, it was a picture of a fabric sample, Natele from Duralee, which I printed out so that I would have a pattern to work from. As you can see, the pattern was quite intricate, so I tried to simplify it as I drew it out...but I'll get to that in a minute.


Natele from Duralee

3. I painted the piece of wood (or canvas) the background color of my pattern. In this case white. I used the same paint from my bedroom project...interior latex in white and dove gray. I would suggest using a graphic print and limiting your painting to 2 colors...unless you are a real artist. It will make the project look more professional in the end.


4. Here's where you can go a couple of different ways. In my case, I have a photo projector. I placed the print on the projector and then traced the projection onto the wood. Or if you are good at this sort of thing, you can look at your picture and freehand it in pencil onto your wood. Finally, if you don't have a projector, and aren't good at freehanding stuff, you can draw a grid on your picture and then draw each section of the grid onto your wood. (I wouldn't suggest drawing a grid on the wood - it's difficult to remove the pencil lines - but the grid on your picture will help you get the proportions correct when you draw onto the wood. )
In my case, I used the projector, and actually wish I had just freehanded it because when you compare my inspiration pattern to the actual painting you can see how the projector distorted the image. I also had a difficult time actually seeing all the lines I needed to trace. In the end I had to fix a few things, and the image is still a little off. Oh well, live and learn right?


5. Now use your other color and fill in the pattern. It's simple...just like coloring in the lines...except with a paintbrush. You'll notice that I reversed the colors in my painting using gray for the motif and white for the background. This is because I actually wanted the finished painting to be more gray than white. You can also see that I rotated the design 90 degrees...that's just because I liked the composition better that way.


6. VOILA! A custom work of art.


Don't forget tomorrow is Frugal Friday again!! MckLinky goes up at 12:00 am EST for all you night owls.

And this week's winner will be announced at So You Think You Can Decorate on Saturday...next week's challenge goes up on Sunday. You can vote until Friday at 12:00 MST.

Have a great day~

Thursday, October 1, 2009

Frugal Friday...How to turn a Christmas wreath into an Autumn beauty~

My front door was in desperate need of an Autumn spruce up. But my pocket book put the nix on purchasing a new Autumn wreath. So what's a gal with Frugal OCD* to do?
*Obsessively Consumed with Decorating.


Enter this old Christmas wreath, which was looking a little worse for the wear. Some of the berries had lost their red coating and were left as just little white styrofoam balls. Some of the "branches" were loose and threatening to drop off. But I looked at the wreath, and I saw possibilities...Autumn possibilities.

I searched through my stash of Autumn decor and found a bag of fake fall leaves that I purchased at the Dollar store last year. I grabbed my trusty glue gun and went to work.


I pulled off the berries that were now nothing but white styrofoam. I secured the loose branches. And then I just added in the fake leaves. I started with the largest leaves, gluing them into the largest empty spots on the wreath (making sure that they were all tilted the same direction.) After that, I added in the medium size leaves and finished it up with the smallest leaves. And that's all I did. But I was pleasantly surprised.


Now my sad Christmas wreath has a new lease on life, as an Autumn beauty. And my front door is thanking me!


Have a great weekend~

Edited to add:  Linking up to the fun at Rhoda's Fall Linky Party...

Sunday, September 27, 2009

An Eye for Pretty~

One of my favorite compliments I've ever received from a reader was being told that I have "an eye for pretty." I just love the idea of finding the pretty in the everyday. And when it comes to this little lamp that was certainly the case.


On Friday I showed you this little lamp in its "before" stage. Too sugary. Too precious. Too....brass.


BEFORE


So I gave her a few coats of spraypaint.


The spraypaint helped. But now the pretty lamp needed a lampshade that suited her new look. And the lampshade I had planned on using just wasn't going to cut it. So I thought, and I thunk, and I thinked. And it hit me. I had to make the perfect lampshade for this little beauty.

Now, I have purchased and used self-adhesive lampshades before, but when I went to buy another one, I was surprised at how expensive they were. I REALLY don't remember them being that costly. And this lamp IS a Frugal Friday project afterall. So I had to rethink my plan.

I was still mulling it over as I ran to Target to pick up such glamorous items as pull-ups and AA batteries (yes, I know, my life is sooooo glamorous!) when I happened to walk past the lighting section and see a small, plain white lampshade that was just perfect - and half the price of the self-adhesive version.


I had to make my own pattern for the fabric (which was actually very easy to do...I just rolled the fabric around the lampshade and cut it to fit. I could have been much more technical, but I am not a patient person when it comes to these sorts of things...sigh.) Then I hot glued it on to the shade. But the shade would be nothing without the addition of three sweet little rosettes. They made it just perfect. A little shabby, a little chic, a little romantic. Perfect!


Linking to DIY Day at A Soft Place to Land.


Have a lovely day~

Monday, September 14, 2009

Tick talk...and a 300th post giveaway~

I love mattress ticking! It has such a wonderful vintage feel to it...even when I purchase it new at JoAnn's. Ha!


This past weekend I was working on a special order for my Etsy shop....vintage-firetruck pillows. Some of you may remember these sweet little pillows. They are made with mattress ticking and photo transfer paper. Two of my favorite things!


As I sat at my table with cotton ticking everywhere (I'm kind of messy when I'm in creative mode), a thought occurred to me. I make birthday shirts for the kiddos to wear on their special day, and I had been having a hard time deciding what I wanted to do for Mr. Two whose birthday is coming up in just a few days. I have had the t-shirt for a while, but none of the fabrics I had on hand really worked. Well, the ticking and the photo transfer called my name and I came up with this...


I made a patch with the ticking which I appliqued to the t-shirt using Heat n' Bond Lite .
Then I just sewed around the edges.

After I had the patch in place I printed out a reversed "4" on some photo transfer paper and ironed it onto the patch. ( I learned the hard way that I couldn't put the photo transfer on first...)


Here's a close up of the patch...so graphic...and kind of sporty...I couldn't be happier with the result.


But that ticking was still calling my name. Can you guess what I might be doing with this little rosette?


Why I'm making new pillows for my Etsy, of course! Actually, since yesterday was my 300th post (yeah, I didn't notice that until today)...I think I should give away one of these new rosette pillows...don't you?

Just leave a comment on this post and you'll be entered for the drawing! Blog about the giveaway, or mention it on Twitter or Facebook (or all three) and I'll give you one additional entry for each. But please make it easy on me and leave one comment for each thing that you do.

The drawing will be open until Wednesday, September 16th at 11:59 pm.

Edited to add: THE GIVEAWAY IS NOW CLOSED. Thank you to all who entered!!

Have a great Tuesday~

Thursday, July 30, 2009

From the Archives....A mini-tutorial~

On Vacation so here's a post FROM THE ARCHIVES...

This post originally appeared on August 21, 2008~

I have been wanting to decoupage something on a barn star for a long time. I have looked endlessly at scrapbook paper, but I just couldn't find the right thing. Then I remembered this beautiful toile wrapping paper my lil' sis wrapped my birthday presents in this year. When I saw it, I was instantly in love. I unwrapped my gifts very carefully and tucked the paper away waiting for the perfect project. And here it is...


I cut each section of the star's rays separately (next time I try this project, I'll only cut out one large diamond for each ray rather than two triangles) then Mod Podged them on. I sealed it with a coat of Mod Podge as well. It turned out beautifully and now hangs proudly across from my mudbench.

Happy crafting~

Thursday, April 2, 2009

Frugal Friday~

I decided to start a new series of posts called Frugal Fridays ~ Decorating ideas for little or no money! The economy being what it is, and me being what I am (ocd - Obsessively Consumed with Decorating), I decided to give you all ideas that cost very little, if anything, but give your home unique "designer" touches.


I have shown this picture by designer Heather Chadduck before. I *heart* this picture beyond words. And one of the things I love the most is the numbers on her chairs.


Because you all know how much I love typography...especially numbers. Hence, the pillows in my shop.


The other day I was looking at my kitchen chairs and thinking that they needed a little pick me up. So I did what any person who is Obsessively Consumed with Decorating would do. I added a little something....NUMBERS!


This was so simple.
I printed out the numbers on cardstock first (FONT: Century Schoolbook Bold FONT SIZE: 250) . Then I cut them out with an xacto knife to make a template. I used my template to trace the numbers onto the back of the chairs and then painted them in. It took a bit of a steady hand, but I adore the results. I don't think I have been this excited about such a simple project. I just go over and stare at my chairs now. I'm a little wierd that way. I didn't even need to distress them...the kids took care of that for me ;-)


Have a great weekend~ And if you have any great ideas for a Frugal Friday post...please send them my way!
OH, and if you didn't get a chance to enter Thursday's giveaway...you have until midnight EST tonight. Just leave a comment on Thursday's post!

Tuesday, February 10, 2009

A Little Valentine Project~

Early in January I found this cute Valentine wreath on the Williams Sonoma website.


Image from Williams Sonoma


But I decided I could make one I like even better (and save myself a little $$). So I set to work trying to find some vintage Valentine printables on-line. I had no luck until a couple of days ago when Heather Bullard posted some free vintage Valentines. They are so cute! So I printed them up for my wreath.


I didn't want to use as many Valentine's as they used in the WS wreath because I thought it was a bit "busy" for my taste. So I just used one of each. They made a circle just the size of one of my dinner plates. So I traced one out on some cardboard and used a small bowl for the inner circle. I cut out the wreath shape, and simply used stick glue to adhere the cards to my cardboard wreath.


It was very cute, but I decided that it needed a little something more, so I used some Mod Podge and glitter...of course! Added a pretty little bit of ribbon and VOILA! I just love it!


Happy Crafting~

Wednesday, January 21, 2009

Valentine's Votives and a New Platter~

Here's a quick and easy project to pretty-up your Valentine's table. I posted these ages ago...back when I first started this blog. But because it's a pretty safe bet that virtually no-one saw them back then, I thought it was probably safe to share them again.

These are one of my favorite projects to do with the kiddos, but they are pretty enough to use on a grown-up-ish table. Now, I used baby food jars to make mine (because I had plenty of them handy at the time) but you could use honest-to-goodness, real-life votive holders to make yours.

All you need are a few votive holders, some tissue in pretty Valentines-y shades (I used pinks and reds), Mod Podge, a paint brush (or sponge brush), and scissors.

WARNING: This project is goopy...so if you want to try it with little ones, realize that you better cover their clothes, and also realize that you will actually end up doing a lot of the project yourself.

  • The best way to do this is to work in sections.
  • Apply a little Mod Podge, then add a piece of torn tissue.
  • Continue in this fashion varying shades of tissue. Make sure to overlap the tissue so none of the glass is showing. (This also helps to diffuse the light from the candles and casts pretty shadows.)
  • Take special care to only go up to the rim of the votive holder...DO NOT FOLD THE TISSUE OVER THE EDGE INTO THE VOTIVE HOLDER...that would be a fire hazard with an open flame...and we're not aiming to cause fires here.)
  • I like to cut out a little heart shape and place it on top of the other tissue.
  • Then seal the entire thing with another coat of Mod Podge.
  • Allow holder to dry thoroughly before placing a candle inside.

Then enjoy the soft glow these create. But please make sure not to leave candles unattended.

Now for one other little tidbit. Some of you may remember in my post about the shelves in my kitchen, that I mentioned needing another platter for the bottom shelf. Well, the cute Hubby was listening (or reading my blog) and guess what he got me for our Anniversary? Yep, a cute little square platter for the bottom shelf. Melts my heart, that guy!


Have a lovely Thursday~