Showing posts with label crafts. Show all posts

Tuesday, November 29, 2011

Reindeer Wall Art~

It's no secret that I'm a bit of a silhouette fanatic.  I think I may have talked about it a bit here and there on the old blog. ;-)  So given that it's the jolliest season of the year, I thought it would be fun to create a reindeer silhouette.  And due to the popularity of deer heads in decor right now, the fact that a reindeer and a deer look virtually identical, means that this little bit of holiday goodness can easily translate to year-round decor.

My holiday palette this year is basically silver, white, green and black.  So the colors I chose for my reindeer might not look holiday-ish to you...but that's all the better if you want to use it year round...and keep in mind that it can be translated to any colors you wish.


To make my reindeer art you will need:

  • an unpainted, stretched canvas (available at virtually any craft store)
  • paint and paintbrush
  • adhesive vinyl in a the color of your choice. 
  • scissors

I basically followed the same method as I did to create the silhouettes of my kiddos with a couple of minor tweaks.


First of all, I didn't have any photographs of a reindeer head to go from, so I found a picture that I liked online and freehanded the silhouette onto a piece of paper. 

I realize that the idea of freehanding a silhouette might be nervewracking to a lot of people...so for those of you who feel this way, try following the instructions from my kiddo silhouette post.

After I got the silhouette looking the way I wanted it to look, I cut it out.  Then simply traced it on the backing of my adhesive vinyl and cut it out again.


I had previously painted my canvas with a graphic design...and you could do this too...or simply paint it a solid color. (which, in retrospect, would probably work better with the silhouette - live and learn, right?)

Then just stick that cute reindeer right on there.  That's it.

Of course, you could also do what I did with my kiddos silhoeuttes and purchase an empty frame...then stick the silhouette onto the glass. 

That way you can switch out the backing paper to match  your whims.  A Christmas print during the holidays...a different pattern in the spring.  Etc.  As a matter of fact, I might do this myself. :-)

Happy Crafting~

Tuesday, November 22, 2011

Wallpaper Sample Wall Art~

It's Thanksgiving week...so I'm giving you, my readers, a couple of  fun reasons to be thankful: Two giveaways in Two days.  Today's giveaway (offered by Elmer's)  is at the end of this post...and tomorrow I have a sponsor giveaway to share. Happy Thanksgiving!

I'm constantly on the look out for ways to beautify the home without breaking the bank.  And that is definitely true when it comes to wall art.  The key is, however, to make it look like you spent some money.  Caviar decorating on a tuna fish budget, I like to call it.

So when it comes to wall art, creativity is key.  And that's where wallpaper comes in...wallpaper samples to be precise.  Here's what I did with some free Anthropologie wallpaper samples, a frame that I already had, and some crafting products provided to me by Elmer's Glue.


First I found a combination of papers that was pleasing to my eye.  (I was going for a simple, uncluttered look, so I chose to use just four samples, but you could get creative and use many more- in all different sizes.)

Then I used my X-ACTO knife to cut the backing paper to size. After finding an arrangement that I liked, I used the Elmer's Tacky Glue to adhere them to a foam board backing, and popped it into the frame.  Seriously easy.


The thing I like about this project (besides its simplicity) is that the end result doesn't look like it was crafted.  It looks like it was purchased. It is interesting to look at, and it's one of a kind - so I won't see the same art in my neighbor's house.


Elmer's has created a fun 101 Uses for Inspired Users Guide that has tons of great - and very creative- ideas for things you can create with their products.  There's even a great advent calendar idea that I think I'm going to try for the holidays.  And today, Elmer's is giving away a craft pack to each of two lucky readers of The Shabby Nest.  These would be a great jumping off point to create some amazing holiday gifts or decor.

The packs include:
·         Foam Board
·         Foam Tri-Fold Display Board
·         Mini Bi-Fold Foam Board
·         CraftBond Extra Strength Glue Stick
·         X-ACTO Gripster Knife
·         CraftBond Tacky Glue

If you'd like a chance to win one of these craft packs, just leave a comment on this post. Easy-Peasy.  Happy Thanksgiving!!

For more crafting fun, you can learn more about what Elmer's has to offer at Elmers.com, and you can also find Elmer's on Twitter and Facebook. 

Disclosure: Elmer's provided me with the supplies I used to create this art.  The  opinions expressed were entirely my own. 

Monday, October 31, 2011

53 Days

Hello and Happy Halloween! Hope you had a wonderful day and evening! :) We had a great time chasing a very excited pirate around the neighborhood. And I ate a LOT of food. I mean. Lots.

Well, it’s about that time folks. It’s now November…uhhh, well it will be when most of you read this…so I’m allowed to say the “Christmas” word. I’ve actually been talking and thinking about it for a good month now, but November 1st gives me the go ahead to hide it no longer!

I’m freeeee!!

I’m a Christmas fareeek, so bear with me. And yes, I know a little holiday called Thanksgiving comes first, but I’m thankful every day, so I don’t get as excited about that one. :)

This time of year I’m always thinking about the countdown -- I love checking out all of the advent ideas out there. Because many of us love to DIY, I thought I’d share a few of my favorites (old and new) now so you’ll have plenty of time to get crafty. (OR pull out the bank card and order one – I feel ya.)

Click the pics to see more about each one!

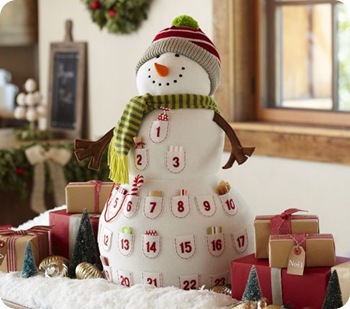
Pottery Barn never fails with the countdowns – this snowman advent is too cute!:

img14b

The price is not…but there’s gotta be some way to DIY this! I just can’t think of one right this second. My mind is a mush of Halloween candy. :)

This one is adorable and could be knocked off for sure:

Felt cut into stockings and glued on – love it!

This is an oldie but goodie, and SO doable. I searched for mini buckets last year to do this one and couldn’t find what I wanted (for cheap). I even asked the folks at Logan’s Roadhouse and they wouldn’t sell me some – boo!:

Anyone seen mini buckets at a good price?

I love this advent pillow at Ballard Designs:

And I know some of you crafty chicks could pull this one off! I on the other hand, am still working on the sewing a straight line thing.

I found this one at Meijer the other day:

It’s just a round metal sheet and there’s a magnetic glass piece that goes over the numbers and magnifies them. I think it was $10? Super cute!

I’m always blown away with the handmade ideas I see every year. I used cardboard boxes, paper and stickers from the craft store to make these years ago:

They have held up great! I used to fill each one with small toys or treats, but we need more itty bitty toys in this house like we need a poke in the eye.

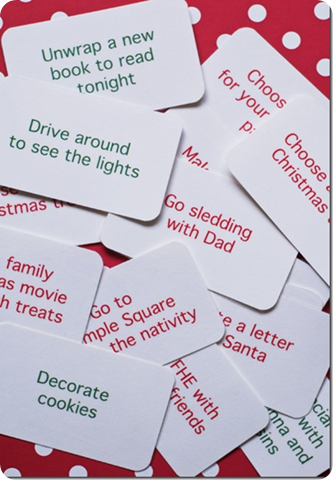
So I loved these simple activity cards with holiday themes instead:

Sooo doing this! Along with a few treats and toys…just a few. ;)

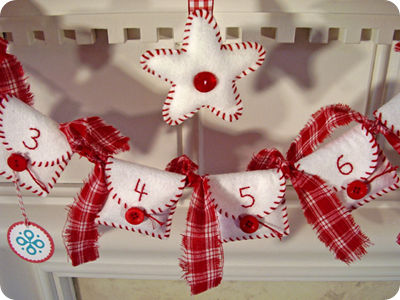
I’ve found a few more ideas on Pinterest over the past few weeks – love these little felt envelopes!:

Oh, they are too precious!

These Christmas trees are something different, and would be SO easy (and cheap!):

Wouldn’t they be fun across a mantel, in all different sizes? They’d have to be up high in this house – little hands wouldn’t be able to resist peeking underneath. :)

This one is simple and lovely:

Just clothes pins glued to a board, decorated with a bit of ribbon. Clip the little treats up each day – too sweet! I may have to try this one.

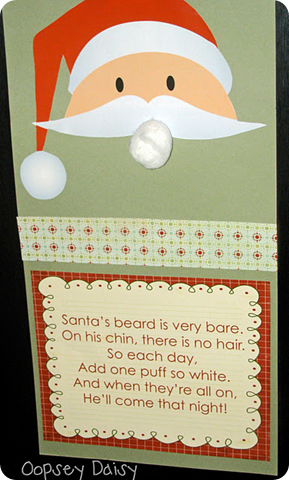
But my favorite yet is this idea:

OH my…the cuteness!! This one WILL happen at our house. Just adorable. And it doesn’t involve treats or presents…just one-on-one crafting time with the kiddos for a few minutes a day. LOVE.

Do you have a favorite advent or Christmas countdown tradition? I’d love to hear! If you’ve blogged about about one, feel free to leave a link in your comment. And I promise not to mention the C-word again for at least 24 hours.

:)

Monday, October 3, 2011

Before & After Party: Ghosts in the Trees!

Well hello! I hope you had a wonderful weekend! I got SO much done around here. DIY-wise anyway. You can’t walk through the house without stepping on a toy or a piece of clothing – but the projects went very well! ;)

It’s time for the October Before and After Party, and I’m also linking this up to Kate’s fall craft party tomorrow! Linking a party up to a party --  not sure that’s even allowed.

Breaking the law! Breaking the law! (90’s flashback anyone?) ;)

fall linky party

Anyway, I’ve got a super quick, super cheap, SUPER FUN Halloween project for you today – it’s adorable. And the kids will LOVE it.

I had this idea last Christmas, and I doubt I’m the first to come up with it. But, really, am I ever? I doubt it. Too much awesomeness out there.

I bought a package of small Dollar Tree ornaments last year just for this project, and the rest of the stuff I had on hand:

halloween ghosts using ornaments

I used some scraps of batting (I knew they would come in handy someday!), and some muslin. If you don’t have these – you can easily skip the batting, and the muslin is SO cheap.

I just wrapped a piece of batting around the ornament, and made a hole so the top could stick out. Then I covered that with the muslin:

IMG_7250 IMG_7251

Later I snipped a hole in the muslin as well, so I could hang them.

Like I said, the batting is not necessary – I just thought it would make the ghosts a little more chunky chunky. (Which is never a bad thing.)

I used some Halloween ribbon I had to tie a “neck” around the ghost:

I ran out of that after the first few, so I just used some twine for the rest.

Then…you take a cutie patootie I could just squish him Bub and have him draw faces on them:

IMG_7258

So cute I could squish them faces!:

The faces were so precious, I just couldn’t bear to leave them outside in case it rained. So these stayed in, and we made more (without faces) for outside.

I taught the Bub how to use my camera the other day, and now I have to fight him for it every time I bring it out. (GREAT idea, really. Gah.)

He’s caught some surprisingly great photos though!:

DIY ghosts in trees 

We hung them with twine throughout the trees:

ghosts from trees muslin

We loved them so much, I dug a few more little ornaments out of the Christmas bins to make a few more. :) They hold up great to the weather too – we’ve had a ton of rain and they are doing great.

They are SO CUTE swaying in the wind. They make me smile so BIG when we drive up to the house.

I’m thinking about adding some felt faces to them, or maybe some googley eyes. Wouldn’t that be adorable?

So here’s my (FREE to me!) Halloween/fall craft before and after! From cheapy Christmas ornaments:

To cutie friendly ghosts swinging in the trees:

I can’t wait to see what you’ve been up to! Any fall goodness this month? And don’t forget the craft party at Kate’s place on Tuesday!

If you would, please link this post to the post you are linking up – I really appreciate it! You can copy and paste this button in as well if you’d like!:

beforeAndAfterButton

Wednesday, September 28, 2011

Paper Fall Wreath

Well hello!! Thanks so much for all the wonderful comments on our deck and patio over the past week or so. We are just pinching ourselves – everything turned out so beautifully and we couldn’t be happier.

I am so not worthy of the awesomeness. :)

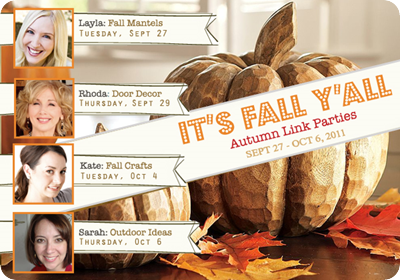
The next party on our Autumn Linky list is the Door Decor shindig over at Rhoda’s!
image

I had an idea for a couple DIY fall wreaths this year, and the last one turned out to be a total pain in my booty. I thought the second one would go much faster.

Well. It was. Kinda. ;)

No really, it was much faster. It was still time consuming, but the fact that it cost less than $5 made it totally worth it.

Can I get a WHOO?!

I didn’t have a form for this wreath, so I improvised. I saw a little trick on Pinterest (sorry, I don’t think I pinned it so I don’t have the source) where someone took a pool noodle and taped it together:


It worked like a CHARM. In the photo I saw, they cut the noodle at an angle at both ends and then taped it together, but I just put end to end and taped it with duct tape.

Cost = FREE. ;)

And if you don’t have one, they cost about a buck at the dollar store (although I’m not sure if there’s any left right now).

I found some fun fallish fabric at Hob Lob a few weeks ago, and just got a bit of it. I cut it into strips:

And wrapped it around, just to give it a pretty backdrop:

Cause a blue pool noodle doesn’t exactly scream FALL. :)

Then I grabbed my hole punches:

And my scrapbook paper (also from Hob Lob, half off!), an started punching.

Punch punch punch:

I used red, yellow, orange and brown – all warm luscious fall colors of course!

Using the end of a pencil, I wrapped each cut out around the eraser end:

Then dabbed the back with hot glue and stuck them on everywhere.

I LOVE it:

IT’S SO FLUFFY!!!!!

You’ll notice that the density changes throughout the wreath. ;) I started on top and made them really tight next to each other. I realized very quickly it way going to take EONS if I kept that up, so I started spreading them out a bit more.

Then half way in I realized using more of the larger circles and less of the smaller ones meant it would go even faster, so you can see how I used more of the large ones on the right.

Whatever.

It adds interest and dimension. That’s my story and I’m sticking to it.

I took a few hours total, most of which were spent sitting in front of the TV, so I’m not complaining. If you used bigger circles it would go even faster!

You can see here that I didn’t do the sides – that’s why I wrapped it:

Now, our porch is covered and the front door gets NO rain – so keep that in mind if you try something similar.  Obviously this wouldn’t stand up to the elements. I think this would look AWESOME over our mantel as well!

I’m not sure which what decor will go on the door for the rest of the season – it could be my felt wreath:

Or my beauty from last year – the dollar store wreath:

I love my Southern Living at Home container stuffed with fall fillers:

And here’s a couple more ideas from a couple years ago:

So many choices!

I am leaning toward my square wreath or the paper one, just because of their beautiful fall colors:

I can’t wait to show you the porch next week at my party! I have a few changes in store. Buwahahahaaaaa!! Not sure why I just buwaha’ed you – but I’m pretty excited. ;)

Can’t wait to see your fall door ideas at Rhoda’s place tomorrow!