For the rest of you, here is where I left off last Friday. After cutting and sewing together the panels which will cover the headboard, it was time to start building the frame.

And what was the first thing I did? Call for help! With limited carpentry skills, unlike some amazing bloggers I know such as the Thrifty Decor Chick & Centsational Girl, I knew I would need some assistance. Plus, isn't it just more fun to work with another person?! We began by bringing in two sheets of 1/2" plywood, cut down to fit the height of the wall the headboard will be attached to. The finished headboard will measure 95 inches high by 83 inches wide.

Then pine 1x4's, trimmed down to 1x3's, were attached with screws to build a frame around the edges of the plywood. Now we were ready to fill the space inside the frame with two inch high density upholstery foam.

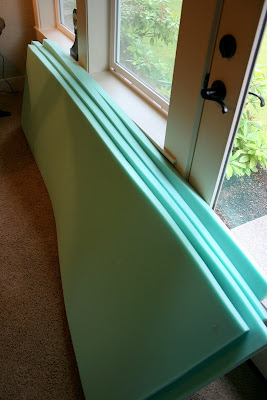
I learned something new during this project, foam is not cheap! Then take into account just how much of it was needed to run up the height of the wall...yikes. Luckily my mom and friends saved their JoAnn coupons for me. Prior to building the headboard I made several trips to JoAnn fabrics with a coupon in hand, so that each piece could be purchased at 50% off. This added up to a big difference!

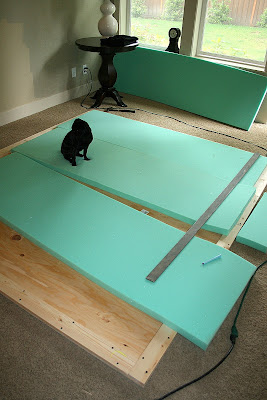
Of course my favorite fan was on hand to watch. "I know, it is soft and warm, but please get off before you damage that expensive foam!"

Then the foam was cut so that it filled the frame snugly. And as a side note, looking at these photos I am reminded how much I dislike carpet. Wouldn't it be wonderful to bring a beautiful hardwood floor into the room, with a soft area rug placed under the bed? Oh well...another day, another project!

But back to the foam. I had intended to use an adhesive spray to attach the foam to the plywood, but once placed inside the frame it didn't seem necessary. The batting and fabric would hold it in place just fine.

Laying the batting over the frame was the next step. I used two layers, for strength and softness, but I also wanted to make certain none of the green foam color showed through the fabric. The batting extended about four inches past the edges of the frame on each side, allowing enough ease to wrap around to the back side of the frame in a later step.

Now to the pretty stuff, the Bocce fabric! However, once this geometric print was layered over the batting I realized that using solid fabric or a print, without such strong horizontal and vertical lines, would have been much easier to work with! Now the challenge was to get the fabric attached to the frame without dips and curves in the pattern.

We tackled this challenge by determining what point of the print would look best ending at the top edge of the frame. Next the center point of the fabric was lined up with the center point of the frame, down the length of the headboard. Doing this ensured the pattern would end at the same point on each side of the frame. Having another person to help adjust the placement of the fabric made this step doable without getting frustrated!
Next the fabric was stapled into place along the top edge of the frame. This edge will be flush to the ceiling so the staples will not show. Then I was ready to begin hammering...and a lot of it!

First a line of nail head trim was nailed into place along the top edge of the headboard. This held the fabric in place as I worked around the rest of the frame. The nail heads were positioned as close to the inside edge of the 1x3 boards as possible, to create a nicely defined border on the finished headboard.

Afterwards I began working down the sides of the frame and around the bottom, pulling the fabric firmly as I went, tentatively placing the nails at wide intervals.

To make it easier to nail the trim in an even line, when going back to fill in the areas between the initial nails, a guide was drawn with an temporary fabric pen from point to point.

A tuck was made at the corners, allowing the fabric to be wrapped around the corners. Nail head trim was applied down the top of the fold to hold the tuck in place.

After the 700 plus nail heads were hammered into place, this task actually got done a lot faster than I thought it would, I decided to glue the batting to the frame...

...and the fabric to the batting, to stabilize the fabrics as I proceeded to the next steps.

After being glued, the edges were tucked under the frame to dry overnight.

In the next steps the headboard will be turned over, the edges wrapped around to the backside of the frame and stapled into place. Finally, the last step will be to attached the headboard to the wall. Again...so far, so good! It just may all work out!
No comments:
Post a Comment