Very simple, yes, but don't these dressed up roller shades add a nice finishing touch to the design? And then there is function. I can't believe how much darker the room is in the morning. Perfect for helping an active girl get a little more sleep!
Showing posts with label Decorating Roller Shades. Show all posts
Tuesday, August 17, 2010
Roller Shades Made Pretty
Very simple, yes, but don't these dressed up roller shades add a nice finishing touch to the design? And then there is function. I can't believe how much darker the room is in the morning. Perfect for helping an active girl get a little more sleep!
Monday, August 16, 2010
Dressing Up Basic Roller Shades
Every since completing Isabella's Girl's Dream Bedroom last year, I've been wanting to return and hang roller shades on the windows, layered behind the drapery panels.

The day finally arrived to add them and it ended up being a very fast and simple project. I began by gathering the supplies: basic roller shades, decorative shade pulls, trim and fabric glue.

A mark was made at the center point near the bottom edge of the shade.

The pretty decorative pulls were screwed through the shades at this point and secured on the back side.

I considered using numerous trim styles but, with Isabella's help, I ended up selecting a simple ric rac in a pretty bright green. There is already an abundance of color and pattern in the bedroom and this selection is just enough to add color and interest to the shades while avoiding becoming too busy for the room.
A length of trim was cut just a bit longer than the width of the shade.

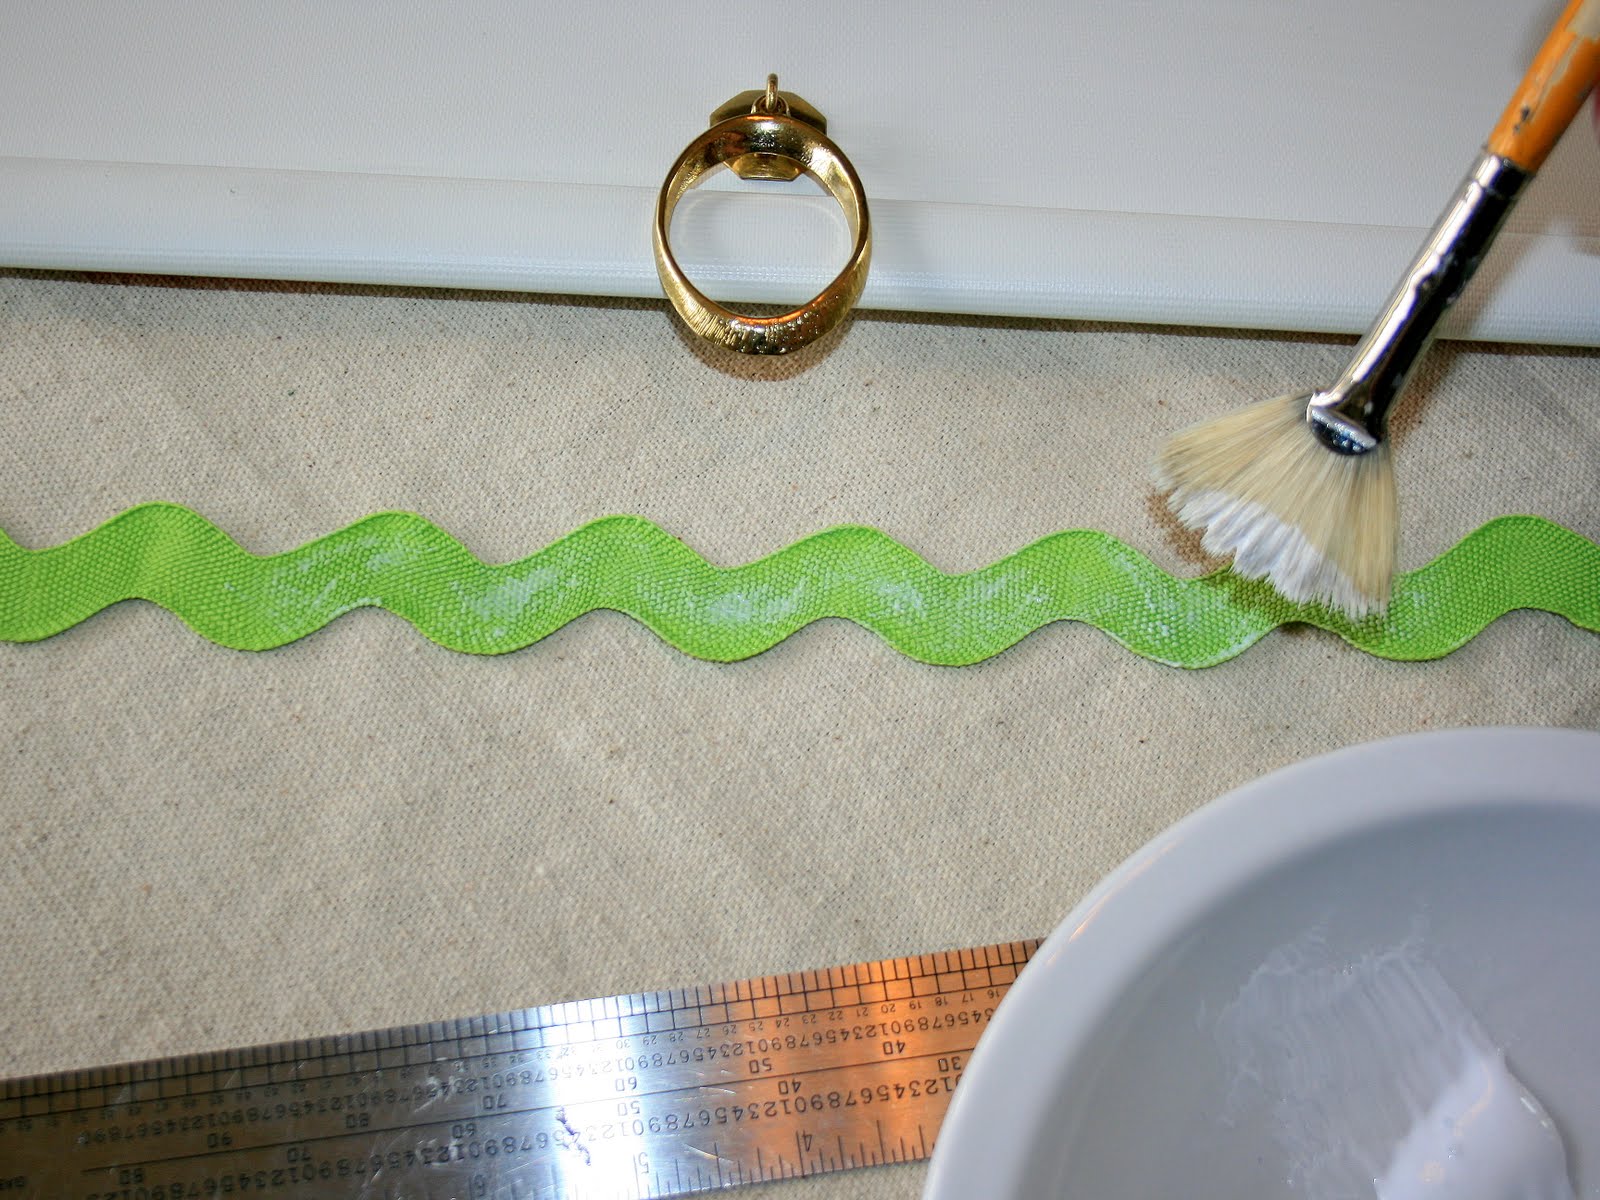
The trim was turned over and fabric glue brushed on with a fan brush.

Next the trim was positioned in place above the decorative pull with the sides being glued and attached next.

The trim was pressed firmly onto the shade to help the glue adhere...

...and a few quick measurements were taken to ensure the trim ran evenly along the shade edge.

The ends were cut, leaving approximately 1/2 inch of trim extending past the shade.

Fabric glue was applied to the backside of the trim...

...and turned under and pressed into place as the glue dried.

The same steps were repeated for the other two shades. Then a second row of ric rac was attached to each shade just above the first, following the same steps.


I also considered adding a thinner turquoise ric rac to the shades, but it looked too busy for this room. However, I can imagine having a lot of fun by adding multiple layers of trim to create shades that become a focal point of a room, paired with simple drapery panels.

If I had known how easy this project would be I wouldn't have waited so long, and before I knew it the dressed up shades were ready to be hung in the room. This also ended up being quite easy, except I need some better tools. My battery powered screw driver gave up, requiring charging, half way through the installation. An "old school" screw driver came to my rescue because I was too impatient to see them hung in place and take some photos, which of course I'll post tomorrow!
The day finally arrived to add them and it ended up being a very fast and simple project. I began by gathering the supplies: basic roller shades, decorative shade pulls, trim and fabric glue.
A mark was made at the center point near the bottom edge of the shade.
The pretty decorative pulls were screwed through the shades at this point and secured on the back side.

I considered using numerous trim styles but, with Isabella's help, I ended up selecting a simple ric rac in a pretty bright green. There is already an abundance of color and pattern in the bedroom and this selection is just enough to add color and interest to the shades while avoiding becoming too busy for the room.
A length of trim was cut just a bit longer than the width of the shade.
The trim was turned over and fabric glue brushed on with a fan brush.
Next the trim was positioned in place above the decorative pull with the sides being glued and attached next.
The trim was pressed firmly onto the shade to help the glue adhere...

...and a few quick measurements were taken to ensure the trim ran evenly along the shade edge.
The ends were cut, leaving approximately 1/2 inch of trim extending past the shade.
Fabric glue was applied to the backside of the trim...
...and turned under and pressed into place as the glue dried.
The same steps were repeated for the other two shades. Then a second row of ric rac was attached to each shade just above the first, following the same steps.
If I had known how easy this project would be I wouldn't have waited so long, and before I knew it the dressed up shades were ready to be hung in the room. This also ended up being quite easy, except I need some better tools. My battery powered screw driver gave up, requiring charging, half way through the installation. An "old school" screw driver came to my rescue because I was too impatient to see them hung in place and take some photos, which of course I'll post tomorrow!
Friday, August 13, 2010
Returning To The Girl's Dream Bedroom ~ Adding Shades!
While designing the Girl's Dream Bedroom - No Boys Allowed, one item I really hoped to include were window shades. I thought basic roller shades, made pretty by adding trim, would look great layered behind the drapes and be very functional as well. But...as is often the case with a design project...the budget was spent before every item on the wish list could be placed in the room.

Fast forward a year. When I was asked to submit several projects I would consider doing to write tutorials, I recalled this idea and added it to the list.

As a result, I'm excited to be finally installing shades in Isabella's room! First reverse roll roller shades were ordered from Smith + Noble, then decorative pulls were found at Zwick Window Shade Co., and with Isabella's help I chose some bright trim at JoAnn Fabrics.
You may recall this post, 'A Little Decorative Jewelry For Your Shades', featuring several decorative pulls. I simply LOVE this pretty hardware! Here is the style I selected to attach to the shades, but check out other wonderful styles available here.

This project ended up being sooooo easy! I'll post all the details and the final result next Monday. In the meantime, look for my latest Ideabook for Houzz in tomorrow's post. Happy Friday!
Fast forward a year. When I was asked to submit several projects I would consider doing to write tutorials, I recalled this idea and added it to the list.
As a result, I'm excited to be finally installing shades in Isabella's room! First reverse roll roller shades were ordered from Smith + Noble, then decorative pulls were found at Zwick Window Shade Co., and with Isabella's help I chose some bright trim at JoAnn Fabrics.
You may recall this post, 'A Little Decorative Jewelry For Your Shades', featuring several decorative pulls. I simply LOVE this pretty hardware! Here is the style I selected to attach to the shades, but check out other wonderful styles available here.

This project ended up being sooooo easy! I'll post all the details and the final result next Monday. In the meantime, look for my latest Ideabook for Houzz in tomorrow's post. Happy Friday!
Subscribe to:
Posts (Atom)