A bead of caulk was run around the inside edges of the frame. I once caulked and painted a house full of crown molding after hiring help to install it, saving a bit on the bill. So this I know how to do.


Having a damp rag nearby is helpful, to wipe off excess caulk from fingers as you "tool" over the caulk. I've tried various tools to do this job, but I find this method works best for me. (However, I could certainly use a manicure. If I keep taking pictures showing my hands can I write them off?!)

After letting the caulk dry for a couple hours, frog tape was run around the edges of the frame in preparation for painting...

with masking paper taped over the surface which will become the chalkboard.

The frame was painted and after drying a layer of protective finish was applied.

I just love unwrapping projects to see how things are beginning to look!


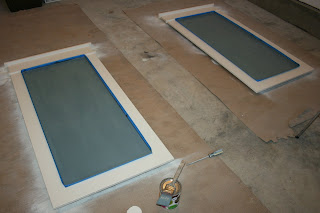
Then more tape, this time to cover the painted frame as the chalkboard surface is primed with tinted primer.

And finally, the part I'd been looking forward to, brushing on the colored chalkboard paint by Hudson Paint.


I was loving the color, but it did require two coats. The paint also gets sticky and starts to create clumps quickly, so don't overwork if possible. But then again, this is nothing a quick sanding between coats can't fix.

After the paint dried there was one final step before letting the writing begin. Following a tip I learned when first using chalkboard paint, the entire surface was covered with chalk and rubbed in. This really does helps make the chalkboard surface fully erasable.

If you were expecting photos of the finished chalkboard today, sorry! I haven't taken the photos yet and after all this work I have to get at least a few posts out of the project...tomorrow, I promise.
No comments:
Post a Comment