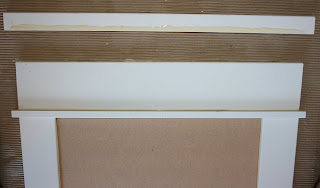
One of features of our home that really appeals to me is the design of the door and window casing. Using this millwork as the inspiration for the design of the frame will help the message board blend into the decor of the home.

I have also been wanting to try the colored chalkboard paints by Hudson Paint. This was the perfect opportunity and I selected Rayogram Grey, which looks great with the newly painted island.

After determining the finished size for the message boards, I headed off to Home Depot with my measurements. Using primed MDF baseboard for the frame and 1/4 inch hardboard for the chalkboard surface, I had the materials cut down to size. Wow, having this done was great and all of a sudden I saw a whole new category of projects become possible!
Once back home the pieces were laid out on the garage floor. As you can see, two message boards are being made. I figured I might as well make two while I was at it. The second message board will be hung in Isabella's and Max's bathroom. (They keep asking for places to write down their list of chores so they won't forget to do them. We'll see if this helps!) More on that design project later.

Using heavy duty wood glue the pieces were glued together.

First the bottom and sides of the frame were assembled. After applying glue on each edge of the various pieces, they were pressed firmly in place for a couple minutes and then magazines were set along the outer edges to hold them tightly together while the glue dried. Unorthodox? Well...I'll refine the process in time. For now this worked.

Next the pieces forming the top of the frame were attached.


Once the message boards were assembled I have to say I was pretty pleased all the pieces fit together! (And looked like they might stay together.) So I took a break and let the frames dry for 24 hours.


The next day the boards were turned over...

and any glue that had seeped through to the back was quickly sanded down.

Then a second piece of hardboard was glued onto the backs to stabilize the message boards. As you can see I was feeling inspired by Jackson Pollack as I applied the glue.


The edges were measured, centering the hardboard. Then the corners were taped down to hold the boards in place as the frames were turned over.

Next the whole thing was weighted down. I went a little overboard...you think?! I just wanted to ensure the hardboard backing dried flush to the backs of the message boards. Are you laughing at me yet...you wood-making-project-building pros?!

If so, don't miss tomorrow's episode where I work through the next steps of assembling these message boards. But I'll have the last laugh, the finished message boards are looking pretty fabulous!
No comments:
Post a Comment