Showing posts with label tools. Show all posts

Thursday, May 5, 2011

New tool storage! And a guest post.


 I worked on  something today amidst all the mayhem of garage sale pile making.


Remember this picture? The pile is MUCH bigger than what you see here today.

But there is one thing missing out of this little pile. I may have lost some friends because I know a few locals were really REALLY interested in that tool caddy. Well...


 With the deadline of losing it looming,  I decided to roll up my sleeves to see if I could give it a shot.

Let's this say this shelving unit was soooo stuffed with crap it was pretty much spring loaded and ready to blow.


 Something I'm sure you didn't catch (scroll up for a peek) was the fact that this massive watermelon box was stapled to the back of the cubby. It did look really cool with the picture showing through the slats and all. Problem was, it was moldy as I had left the caddy out in the rain for... a year? Whoops.


 It was quite amazing. And was attached with a bazillion little rusty nails.


 I had a few sheets of bead board I thought I'd see if I could use as a backer instead. And know what? They fit PERFECT. Isn't that crazy?


 I just reused the little rusty nails over again. What the hey.


The unit required 3 sheets with one I cut down with the jigsaw in just a few minutes. No big deal. Crooked as all getout, but no big deal.


 I mean, look how the piece fit! See the switch plate to the right? Check the door to the left. We were squeakin' in! But it FIT.


 And the bead board backer looked amazing!


 I really like all the original writing on the label slats.  Just a very cool cool piece!

By the way, I do believe my brother said he made it. Which is another reason I wanted to keep it if I could.


 And here it is in all it's new glory. Alongside a freshly painted wall no less!

I have more plans for this area, perhaps shallow shelves for paint cans all the way up to the ceiling...


Awww... my little rusty cogs and jar full of beat up nails even have their own bedrooms now. :) Nighty nite guys!

This next photo is dedicated to my dear friend Miss Mustard Seed. She was scoffing in this post about some guy wanting to buy a decadent shelf she was after, and had visions of him using it in his workshop to house rusty screws and bolts inside an old peanut butter jar.


 How about rusty nails in a pickle jar instead? Is this better? :) I'm totally MMS's worst nightmare I can tell!


Remember my little chicken coop? It got emptied into the tool caddy thing so....


...this area is my new wood storage area!

I'm in love. I even have the wood separated by type. :)


A little hack trick to get these boards staying put is to just use a screw or nail in between them to keep them from falling over. 

Well now fellow woodworkers, it worked so well, I plan to go to the hardware store and get those BIG HONKIN' nails I always laugh at when out yonder. That will do the trick even more awesome as the stacks grow deeper.


 I call this one "Nightmare on Funky Junk Street."


MUCH improved! Thanks little garage sale, for inspiring this one!


 And where this is going... who knows!

Hey. Speaking of all things crusty and rusty...


I'm guest posting over at Freckled Laundry today, and I'm talking about RUST.

Oooh yes I am. For you see, Jami is hosting a Vintage Chic Series, and this week it was about metal.


Her slideshow of metals is to DIE for and very pro. Jami shows many examples of how she infuses metal to get her decadent look in her own home. 


If you love whites, you are in for a treat at Freckled Laundry! Goodness...


I've showcased how I use rust and why in my own home.
You can check out my rusty guest post HERE.

No worries MMS! No cob webbed food jars in sight. :)

Sunday, April 10, 2011

How to build the easiest clothes closet EVER


At long last, my closet dilemmas are OVER!


This was my bedroom closet for about 3 years. After painting it, I never replaced the closet innards because I didn't have a place for these linens.


 You see, the linens needed to go here, and I didn't have anything for that yet.


 I decided to finally build a linen closet...

(how-to  HERE)


... which left no place for my clothes. So my version of a walk through hallway closet came into effect. After hitting my head umpteen times on the clothing, I got fed up and head to Walmart.

You see, I had anticipated making something really cool and outlandish even, however at this point I didn't desire more delays.


So I went retail and picked up a $50 kit. I mean.. it's a closet. It's behind closed doors. I'll save cool for where I can see it this round. :)

Now, what I DO love about kits is that they're fool proof. Holes are predrilled, hardware is intact. Just add your tools and prepare to spend 1 hour of your life reading directions and building it and call it done. Works for me!


Tools required

  • cordless drill and bits/drills
  • measuring tape
  • pencil
  • level

I really love tool kits that travel. This Makita drill kit has both drills and bits so everything is easily mobile and intact. But it doesn't last forever... I'm well overdue for an upgrade as most of my bits are stripped. It's on the list!

Assembling the shelving


I chose a closet style that had shelves in the middle of all the hanging apparatus. Deadly simple to install with your cordless drill!


This kit had two shelves stacked on top of each other. They're held in place with a peg in hole trick which worked like a charm.

Hardware and rods


When attaching the rods to different surfaces, you need:

  • Wall mount side - left - thicker drill, long screws, anchors
  •  Shelf mount side - right - thinner drill, short screws


The rods were adjustable white enamel, oh so pretty and smooth! The little hole is designed to clip onto the lower hinge tooth.


Installing the shelf brackets -  first

  • decide where to place the bracket
  • pencil inside the holes for reference
  • predrill wood
  • screw bracket on
Installing the wall brackets - 2nd

  • measure height off floor vs how far away from the wall shelf bracket is
  • pencil location on wall
  • predrill drywall
  • mount anchors by pounding them in with a hammer/rubber mallot
  • screw bracket on

Check the level of both rods and shelving before making their placement permanent.

There were also brackets to attach the shelving unit to the wall. (no pics)

Reveal


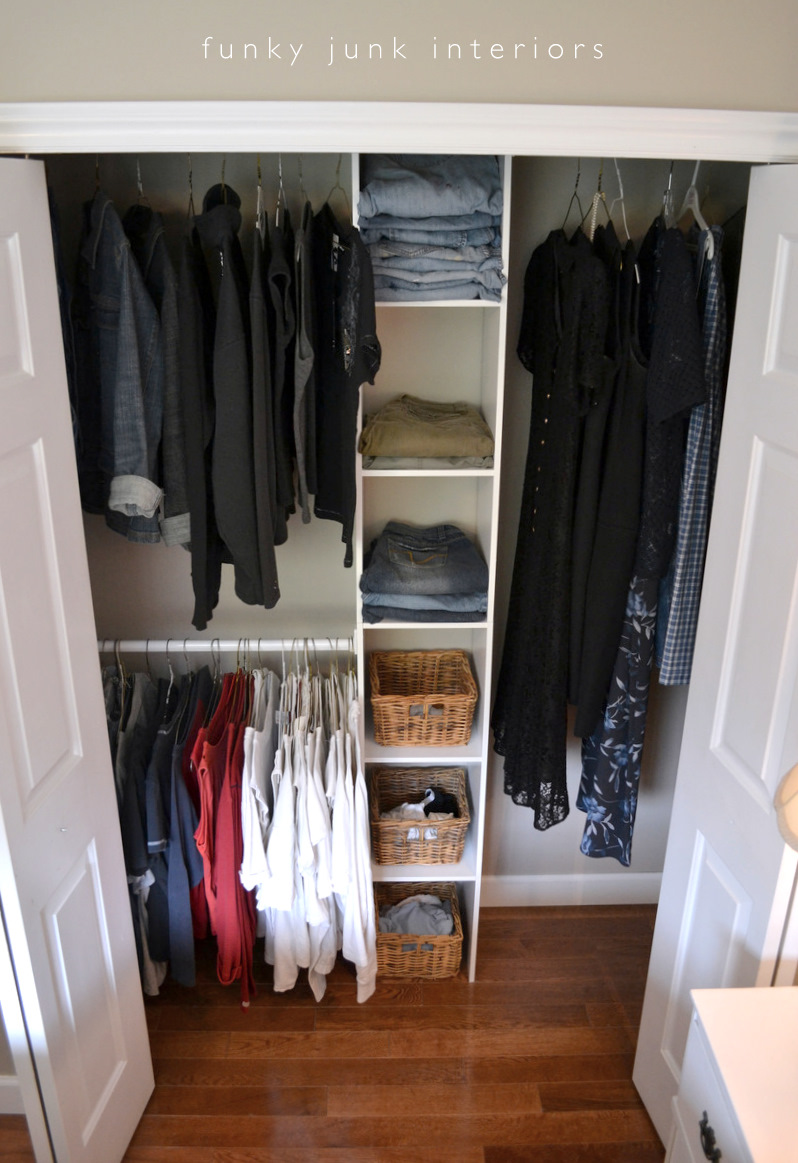
Tadaaaa! Isn't it pretty?!?


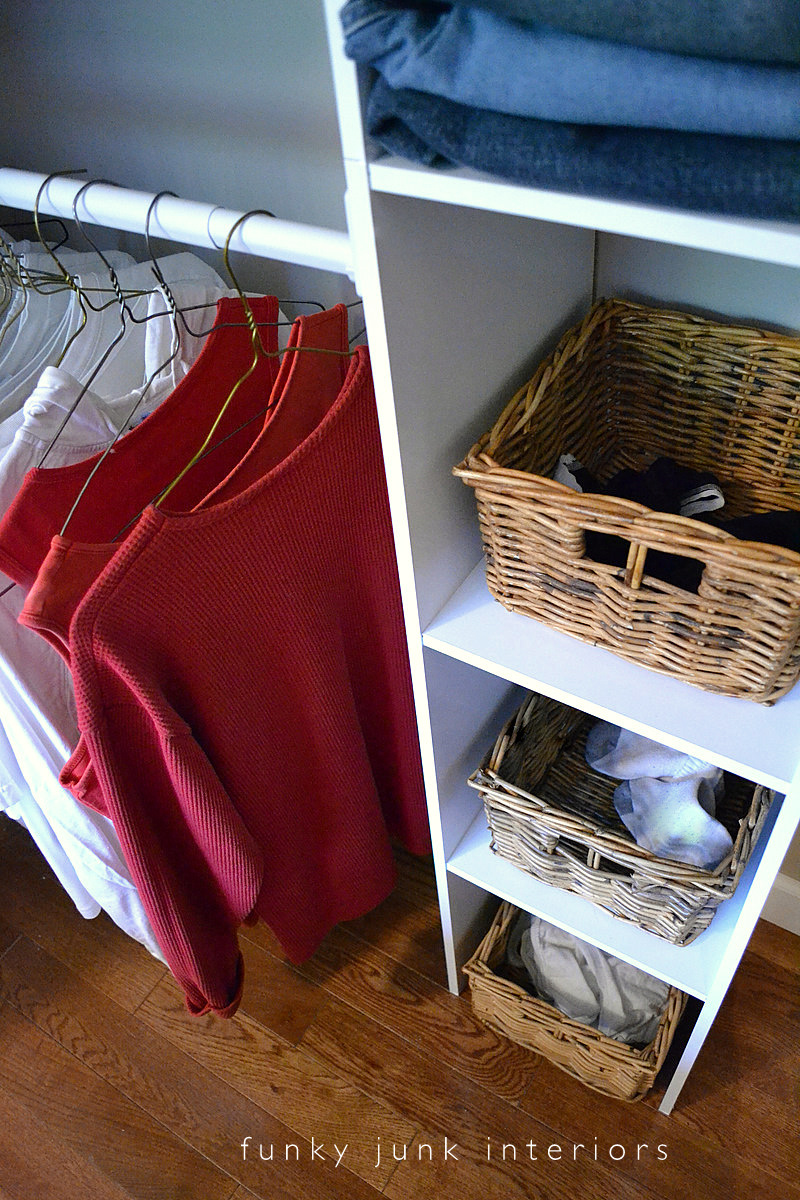
These Ikea baskets I've had for a bazillion years fit perfectly in the shelf. Great for socks, etc.


And then it was time to move in! YES.


With room to spare! And yeah, I even color coded my shirts. :)

I also made myself a deal. I could slowly upgrade my wardrobe as I could afford it AFTER my closet was put in. No more excuses!!

I can also see this system working awesome for the entry way closet. Nice shoe and mitt storage!


I love my new closet! This system suits my simplistic needs and fits perfectly for this space. Additional and wider shelving appear to also be available as per the website, however I didn't see those options in Walmart.

This closet system was affordable at a whoppin' $50, easy to slap together, and cost about an hour of my time.  Don't procrastinate as long as I did. Just do it!


Did you join the Parade of Homes link party? 
Andy also revealed her own colourful home! Don't miss it!

Sunday, January 9, 2011

How to remove a wall (that only took 5 years) with video


This little project has been a want for 5 long years. Allow me to explain.

With only one child in this home, it was a no brainer to give my son 2 of the 3 bedrooms upstairs. 


They were both decorated up to the hilt of what they could be. 

But I'll admit, we didn't really enjoy the rooms. While my son slept in his bedroom just fine, the playroom was more the size of a big closet. Who wants to play in one of those?!?

I long desired to remove the wall in between the two bedrooms, but that little resale voice kept squawking in my ear, telling me to play it safe... for the NEXT owners. Before they even bought the place. And my home wasn't even for sale! Ponder that one if you will.

And then, my son grew up. A couple weeks ago he came walking out of his room with the pretty clouds ripped off his wall and the cutesy stars laying on the floor. He asked if I could help him make a teen room.

I hugged him and told him I couldn't wait!

Because, I've been dying to take down that wall. And now was the perfect excuse.


So... we did!

So... here's a little video tutorial on how we removed a wall in between two bedrooms!

Music version (copyright issues in many areas)


No music version:


We did it!


And the space is AMAZING. And for those wondering, it is NOT a load bearing wall. My builder friend told me so.


Disclaimer:

Please seek out additional advice before attempting this. :)

Tool Tips: I vote to use both of the following

Sawzall

pros - cuts in a downward motion the best, safer trigger release
cons - bulkier, longer blade can be tricky

Jigsaw

pros - unit more compact, smaller blade easier to guide, plate guide, cuts upwards and sideways best
cons - button release (trigger style imo is safer in case you drop it)

The Boy's Room Part 2
Next - Removal of the studs and electrical. Yeah... I got help with that part. :) 

Thanks to the Facebook crew that's been following along with this one! It's been fun!
Like sneak peeks? Join us HERE.

Anyone else have a desire to remove a wall? 
Any additional tips on removing a section like I did? 
Go ahead pros, guide my avid DIY friends!


This eternity procrastinated project totally qualifies for GD! 

Will you be at the party too? See you there Friday. :)