Showing posts with label fireplace mantels. Show all posts

Tuesday, December 6, 2011

Christmas mantel decorating ... with snow


Most of us are dreaming of a white Christmas.

But when you live in balmy BC Canada, it's quite by chance that snow actually materializes. So here's how I made my own winter wonderland on this year's Christmas mantel.


The easiest way to achieve snow covered evergreens is the snow spray you use for window stencils.

I sprayed it on thick and uneven, so it had a chance to build up in clumps, as if the wind blew it around.
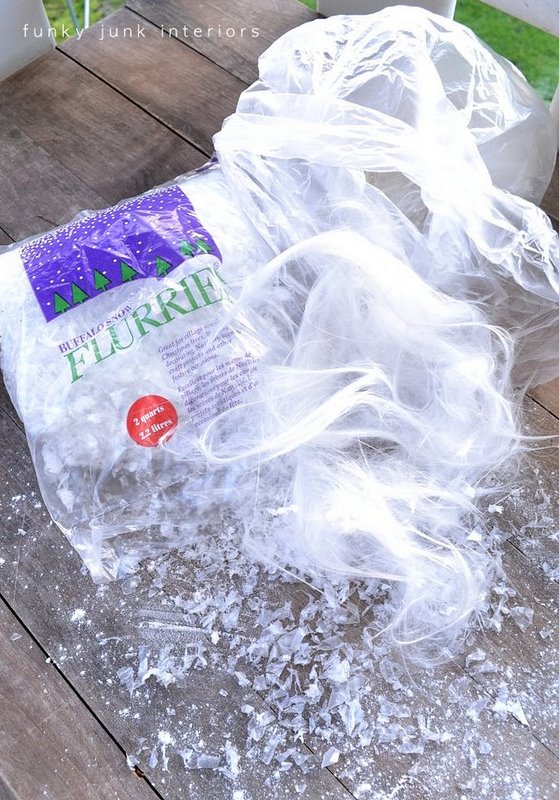

The plastic shredded snow offers realistic thickness. 

And the amazing haze to the right is glass angel hair,  extremely difficult to find nowadays. 

I generally find my stash at thrift stores.


Some trial and error was practiced with flour, baking soda and baking powder.

And here's the result.


After I had the greens positioned, I placed newspaper behind the branches and sprayed.


  I had no intention of using the spray at first. 

I gave it a go after I found the fireplace too dark for my liking.


The floor is where I added a recipe of plastic snow, flour and baking powder.

After sprinkling the light powders, I ran the vacuum cleaner attachment JUST over the surface, picking up only the very fine dust, which left more definition on the floor. The plastic snow was added last for bulk.


flour


plastic snow


Let it snow indeed!


Update: the greens have officially dried to a crisp. I expected to take it apart when that transpired, however the snow has hidden the dried appearance beautifully! The lights are now off for the duration and the display is staying up!


(last year's snowy footprints)


The snow on the floor was just for the photos hoot and didn't stay. But I'll put it back for Christmas morning, complete with baking soda Santa footprints. :) (sprinkle soda around perimeter of boot) 


The pets were not attracted to it. No issues.
Complete Christmas 2011 reveal is HERE.

All your amazing comments on the Holiday House Walk completely overwhelmed me! 
Thank-you! My inbox feels VERY loved. :)


Monday, February 7, 2011

Fakin' it with fake plants


During the Copy Me Challenge, I noticed one poster mentioned she liked my use of plants and had wondered if I had real or fake.

Allow me to answer... FAKE all the way and proud of it. :)

It's been years since I've had real plants in my home.

I use to be quite the green thumb. I'd have a virtual jungle of those tree type plants, spider plants, succulents, you name it. I think the turn away from real came when I got cats. :)


 I recently redid my fireplace mantel and kinda jumped on a spring feel. With, you name it.. fake plants.


I'm wild about this 'overgrown' ivy. 
It has the illusion that it's been growing here for a very long time.

 LOVE ivy, period.


 It's tumbling effect always has nearby objects looking like a million bucks.


How fun is that  green gear? It's my favorite. :)

Other fakers...


Remember the snowdrop centerpiece? You guessed it. Fake. 
This one fools alot of people, even in real life.


I do use alot of plants in my decor. They just seem to warm up cool spaces, especially softening otherwise somewhat sparse surroundings.

How I clean fake plants

Now, these fellas do indeed get nice and dusty, especially when you reno as much as I do. My way of cleaning them is to haul them into the tub, swish the leaves in soapy water, then spray them down with the hand held shower. Easy! And they generally air dry right where I display them.

Where I find mine

I have a torrid tale to tell. It's been years since I've purchased plants. You see, I had a sign customer long ago that stopped paying his bill. He had a futon/plant store. (don't ask) So I went to pay a visit one day with two empty vehicles. I came home with $2000 worth of trees and plants of the best quality ever. :) (He closed his doors the following week)

Aside from that horror story gone kinda fun, I look at warehouse type stores that specialize in fake plants. Michael's is also good however can be expensive. Homesense (HomeGoods for Americans) has some nice stuff too.

The trick to getting away with fake is to purchase the best quality you can find. If it can fool you, it can fool anyone.

Are you a real or fake plant person?
Any tips on caring for your own greens?

Monday, November 29, 2010

Creating an old gate for the (Christmas) fireplace mantel


I have a challenging fireplace.


While I love my fireplace rock, it's dark and tricky to work with. Add in the fact that the scale of the fireplace is large, makes working with it even more of a challenge. Most everything disappears into thin air if the accessories aren't equally hefty.


I did however desire something new for the fireplace mantel this year to help brighten things up, so when I came across Pretty Handy Girl's barn door she made, I was immediately inspired! Thanks Brittany!

And here is my version!


I found the wood and hinges at that  great junkin' bonanza next door I told you about HERE. Free stock! Doesn't get any better than that. :)

 ~ Decorating tips for a dark fireplace ~


 Mini lights are your best friend. They glow like candlelight yet are much safer than flames. I set them in place first,


then decorate around them. The greens are hiding the light strings but you can be sure, the lights were making a big difference! The curvy glass jar filled with pinecones catches the light to offer a nice contrast to the rust.

See that rusty star burst thing? I have a special post coming up about that! It was sent from Iris over at Treasuring The Journey. LOVE it Iris!


My chosen theme this year is 'vintage whatcha already got' so the Pepsi bottle makes an appearance to help catch some light. The lights behind the ripply glass have a pretty neat effect. Plus it can even serve to hold a candle if desired. :)


 This galvanized bucket (thanks Vic!) is holding a live evergreen branch in water. The burlap was simply cut and placed to appear like a rootball was present.


 And there you have yourself a merry little junkin' Christmas! For free. :)

Would you like to make an old gate too? It's so easy!

~ How I did it ~


Tools I used:

  • palm sander
  • cordless drill with screw fittings and small drill bit
  • circular miter saw


Supplies:

  • 2 hinges
  • a pull handle (not shown)
  • screws gone wild in a magnetic bowl :)

 1. Decide on the size.

I started with these precut cedar boards I had. They were the perfect height, so I simply decided on a width.


A little trial with something in front and I deemed it 5 boards wide.


2. Dry fit the boards.

Lay out your design so you know where you need to make your cuts.


3. Mark your cut areas with a pencil.


 4. Make your cuts with a circular miter saw. 

While any saw will do, I highly recommend one of these! Don't own one? Ask Santa. I couldn't live without mine. If you upgraded to one that pulls towards you to engage in longer cuts, I'll trade ya... :)


5. Dry fit once again with your cut pieces.


6. Lightly sand the boards.

I desired texture on these boards for a distressed look, so I went over them with the palm sander very lightly just to take the 'slivers' out. If you go overboard on this one, you'll end up with brand new boards, so just decide what look you're after prior to sanding.

I also like sanding outdoors and find this collapsible table totally invaluable for lickety split setups.


7. Decide on the screws  and drill you will use.

While you can use nails, my personal preference is screws. If you mess up, it's easier to fix. :) Plus with this method, your mounting will be hidden.

Ensure your screws are more shallow than your overlapping boards by simply holding them to the side to check. (see diagram below)

Predrilling holes is a good idea so your boards don't split on you. Choose a drill with a diameter slightly under the screw thickness. I used one alot smaller because the right one was 'missing.' :)


8. To attach your boards, simply slide the works towards you over the edge of the table and get your son to work below. :)  (predrill all, then screw all)

If there's an easier way dear real woodworking friends, please speak! I always move the boards if I try to flip them over so this was just easier for me.


9. Paint if desired.

While the gate was pretty cute left in it's natural state, I required something abit lighter for my space, so I went  with white.

I LOVE working with ceiling paint! It's got a finish that is amazing, and I never bother to prime. This stuff has body. Pretty amazing stuff.


I chose to paint just down the middle of the boards so I didn't have to sand away as much for a distressed finish. I wanted lots of wood exposed.

10. Sand your finish as desired.

Ceiling paint dries quickly, so you have to work fast. If you let it cure for too long, the finish is tough as nails and you just have to work harder. :)


The gate turned out exactly the way I envisioned it,


white twig chandelier


blogging office


old gate screens

and it looks great with all the distressed whites upstairs. Love it!


I'll be tweaking the mantel after I put up my tree. I really prefer to work on them  together and my tree is still buried deeeep under the stairs. (I may hold out for a real one this year!)

So stay tuned for the permanent update. Coming soon!

Now to make some free junkin' tree ornaments... hmmm..

How do you deal with a dark fireplace? 
I'll take any tips I can get! 


Kim over at Us in Otto was inspired and made her own!


The Lettered Cottage