Showing posts with label Kitchen Island Pendant Project. Show all posts

Tuesday, July 13, 2010

Kitchen Island Pendant Lights Revealed

I got up quite early in the morning to take these photos of the newly hung, fabric covered pendants. Why? Because once the kids wake up, breakfast and all their various projects will quickly take over the area. (Can anytime tell me just how early?)


Before...


and after.


I love how the Cat's Cradle fabric looks on the pendants and in the room, both with the lights turned on and off.


There was just one little surprise after the project was complete. When showing off the result to my husband this is what he said, "I've never been a fan of pendant lights."

What?!?!?

This was news to me and I had to wonder why this didn't come up before the "reveal". This never happens to any of you, right?

Oh well, as things tend to come and go in this house, I suspect they will eventually be sold when I come up with another idea for island lighting. But for now...I'm loving them!

Monday, July 12, 2010

Kitchen Island Pendant Project - How To Cover Pendant Shades With Fabric

Are you ready for a tutorial on this Monday morning? I'll try to keep it simple!


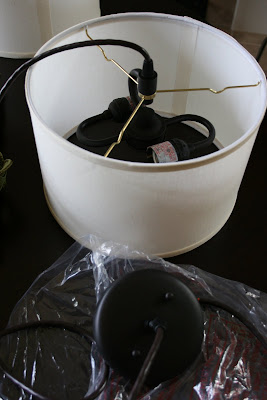
The project began by hanging two pendant hardware kits, from Shades of Light, above the kitchen island. Any lampshade with a washer ring can be hung on these fixtures. (fyi: shades do not come with the kit.)

The above picture shows how a shade is held into place...very clever!


Okay, here we go. In this project a drum shade is being used, as opposed to the tapered shade used in the Lamp Makeover project. Begin by measuring the diameter and height of the shade.


Taking these measurements, add two inches to the diameter and subtract 1/4 inch from the height. The shades I'm using measure 35 x 7 1/4 inches. After adding to the length and subtracting from the height, I will cut two pieces of fabric 37 inches long by 7 inches high.


If a print is being used, determine the desired placement of the pattern on the shade before cutting. Then trace a line 37 inches long with a temporary fabric pen.


Cut along the line.


Measure up from this cut seven inches and trace a second line 37 inches long. Cut along this line.


If using multiple shades, repeat the above steps for each additional shade.


Attach one end of the fabric to the shade by applying fabric glue to the wrong side of the fabric.


Press fabric firmly onto the shade and temporarily tape into place with tape.


To secure the fabric around the diameter of the shade, brush fabric glue along the top and bottom edges of the shade and press the fabric firmly into place.


To create a finished seam the fabric needs to overlap at the seam approximately one inch. Trim off any excess fabric from the unattached edge. Apply fabric glue to the wrong side of the fabric along the cut edge.


Turn under 1/4 inch.


With a brush, apply fabric glue to the underside of the seam and press down firmly.


The last step is to attach trim, covering the unfinished fabric along the edges of the shade.


Brush glue evenly along the outer edges and wrap the trim around the shade.


All done! Next they will be hung on the fixtures, look for those final photos tomorrow!

Friday, July 9, 2010

Kitchen Island Complete & Fabric For The Pendant Shades

The cabinet door and drawer fronts were installed yesterday, and I am so happy with the result of this project! As promised, here are photos. The color difference between the main cabinetry and the island is subtle, with the contrast stronger in some light than others.


The change has certainly lightened the entire look and feel of the kitchen.


And up next, continuing the push to customized the room, the pendant shades hanging above the island will be covered with Robert Allen's Cat Cradle fabric in Amber.


The geometric print in brown and ivory looks great alongside Thomas Paul's Aviary print on the roman shades, and relates well to the subway tile.


The brown will also help tie the walnut toned wood on the stools into the room. One surprise result in painting the island was that suddenly the beautiful wood on the stools was noticeable, no longer blending into the dark surface of the island.


Next week I'll post a tutorial on how the pendant shades are covered with fabric.


The project shouldn't take too long as it will be a simplified version of how the lampshades were covered with fabric. I will also have a few new photos to post showing the lamps and headboard in the master bedroom, as I needed to get some "beauty shots" of these two projects for the articles written on them for HGTV.com.


Also, look for my new Houzz Ideabook tomorrow, which will feature homes with fabulous outdoor cooking and dining areas. What a dream, I'd say!

Have a great weekend! Janell