Showing posts with label Big Boy's Bedroom. Show all posts

Monday, July 25, 2011

Is Anything Really New & Original When It Comes To Design?

I was hanging out on the beach when I got two separate emails. One from a past client and another from
fellow blogger Autumn, both basically saying, "Hey, have you seen the latest Pottery Barn Kids catalog?" 

Ah, no. I'm watching the kids and dogs and the surf. Oh, and checking email thanks to my iPhone.

The client said they could have at least said thanks while Autumn noticed an EERIE similarity. 

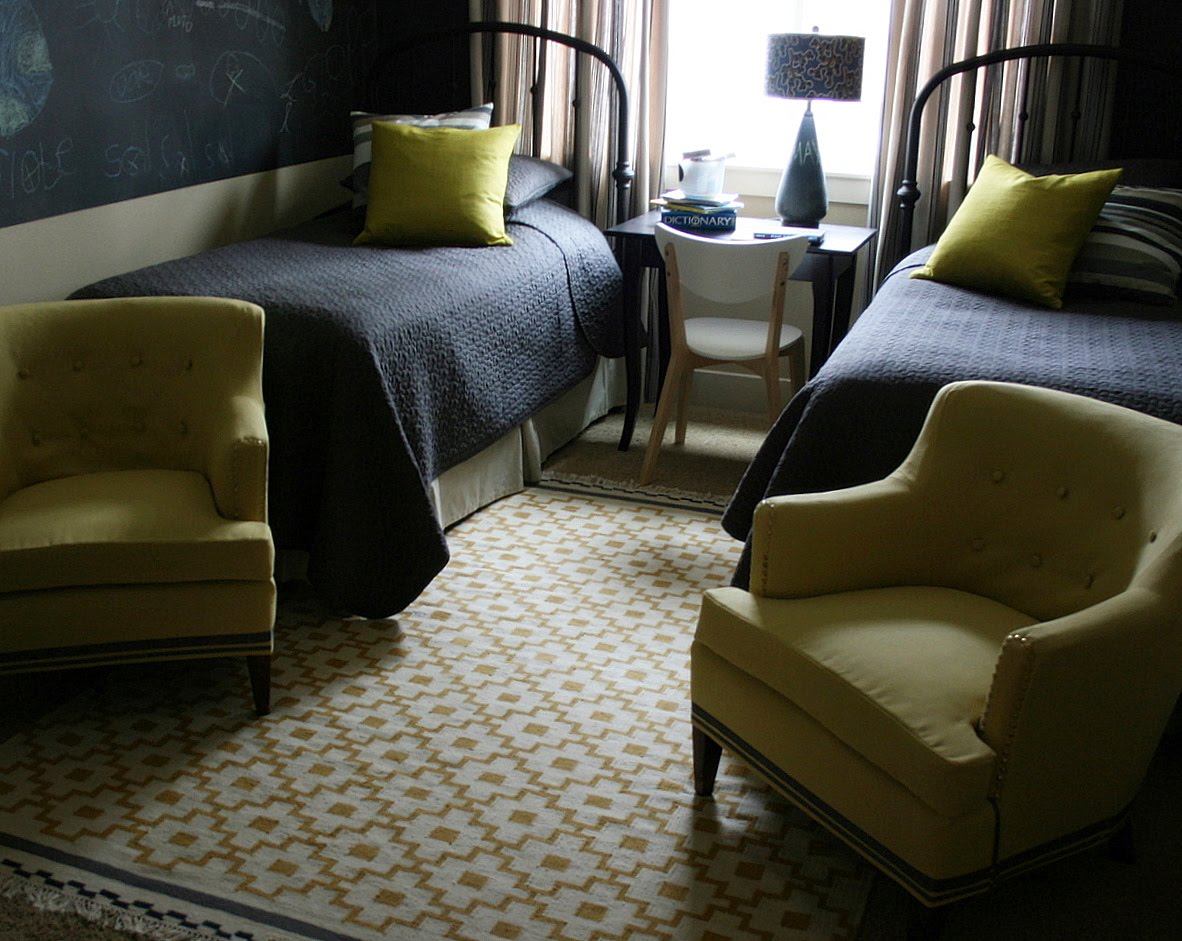
{photo sent to me from one of my favorite bloggers, Autumn of Design Dump}

 Thanks for the compliment Pottery Barn! Imitation is indeed the highest form of flattery, I say.


Whether the room in PB was actually inspired by Max's room or another, who inspired me? I'm sure I saw something, somewhere, that sparked my imagination.

So while I could repeat Max's sentiments from a situation with his sister:
"IT'S NOT FAIR!!"...

Is anything ever truly original?

Monday, March 7, 2011

An Addition To Max's Room!


Last week I showed how Modern Bird Studios had transformed one of my favorite photos of Max into a wonderful piece of art.


As soon as it arrived Max knew exactly where he wanted it hung. I find it very sweet how proud he is of his portrait.


Saturday I got out my bag of OOK hanging hardware...I love this brand...and hung the portrait on the wall. In Max's words, in a spot "where everyone can see it when they come into my room!"


Yes, it is kind of an odd place to hang the piece, isn't it? But it works and I just love how great the colors look in the room.


{And as a reminder, time is running out to enter the Modern Bird Studios $250 gift certificate Giveaway, to have one of your favorite photos turned into a memorable piece of art. The giveaway runs through Tuesday night at midnight, PST, see this post to enter!}

Thursday, February 17, 2011

Max Rants...


I love Max's room and there have been a lot of fun things written and drawn on the chalkboard.


The explorer explores...how sweet. 


But then...

"Izzy got me in trouble for nothing. If you forget about me I'll forget about you."


"IT'S NOT FAIR!!"

No it's not, it isn't easy being a little brother. Hang in there Max.

Tuesday, October 5, 2010

Get out! One of my DIY Tutorials Featured On TheNateShow.com!


How to Make Chalkboard Lamps
Give your old lamps a new look with help from design blogger Janell Beals.

What a thrill, I am exited to share that my post showing how to make chalkboard lamps has become a tutorial on thenateshow.com! Check it out here...


When I painted the chalkboard lamps it was on a whim. I had a pair of lamps that needed an update to fit into the new design plan for Max's room and I just happened to have some extra chalkboard paint on hand, left over from painting the chalkboard stripe in his room. Nothing like needing to figure out how to use what you already have to inspire creativity. I'm certainly happy I thought up the project now...


Okay, I promise, no more Nate for awhile! Maybe...

Thursday, May 6, 2010

Big Boy's Bedroom - Complete!

By now I must have posted at least a hundred pictures of this room, but here it is again, job done. What a fun room this has been to work on, made even better by an appreciative "client".


The project needed to stick to a pretty slim budget and Ikea was offering up some great solutions. This gave me an idea for a challenge: design the space using Ikea products whenever possible, with the goal of creating a high end look. It was a fun challenge which I think was pretty successful!


If I were to match a vehicle to this room, it would be the Land Rover parked down the street! Apparently it has driven the world.


On the days something new got done in the room I had a lot of fun announcing this news to Max, as he got off the bus. Once home, we'd all run upstairs to take a look. He always had something great to say about the various additions. He simply loved my working on his room! Thanks Max, it was a pleasure.


Sources:

Chalkboard Paint: Benjamin Moore
Wall Paint: Sherwin Williams 6142 Macademia
Bedding and Pillows: Ikea
Drapes: Ikea
Desk: Ikea, Leksvik Desk
Chair: Ikea, Nordmyra Chair
Ceiling Fixture: Ikea, Large Melodi Pendant Light
Fabric on Lampshades: Ikea, Patricia Fabric (no longer found on website)
Chalk Bowl: Ikea, Djarv Plant Bowl
Lamps: TJ Maxx
Headboards: Crate & Barrel, a few years ago
Chairs: Vintage, recovered with fabric from JoAnn Fabrics
Globe: Target World Market (an event that seems to have gone missing)
Day of The Dead Art: Mexico
Dresser: San Francisco Garage Sale

Wednesday, May 5, 2010

The (Hybrid) Slipcover Project - Thankfully Done!

I am very happy with how the chairs for the Big Boy's Bedroom turned out. But what makes me really happy? The fact that it only cost about $35 a chair to recover vs. the $1000 a chair estimate that my upholsterer quoted me!


To wrap up the project all that was left to do was cover the seat cushions, and I wanted to do it as quickly as possible. To make this happen the cushions were laid directly on a double layer of fabric, the shape traced and cut out with a one inch seam allowance. No time for patterns!


For some odd reason I kept thinking of baking and decorating cakes...


Next the circumference and height of the cushions were measured to figure out the dimensions to cut the cushion cover edges. One inch seam allowances were added to these measurements, at the top, bottom and ends of the strips. Then two were cut, one for each cover.


The strips were then sewn onto the top sides of the covers. Afterwards the seams were pressed open and slipped over the old cushions to check the fit.


Seeing the fit was fine, the bottom sides of the covers were sewn onto the opposite edge of the strips. Then all the seams were pressed and the covers turned right side out. The final step was to insert the old cushions into their new covers, stitch up the back openings and place the newly covered cushions onto the chairs.


Someday I'd like to get the chairs professionally redone to perfection. But for now, this is just fine.

Tuesday, May 4, 2010

The (Hybrid) Slipcover Project - Part 4 of 5


The finish line for these chairs is nearly in sight! Since the last chair post, the arm fronts have been covered with strips of fabric backed by a stiff interfacing and attached to the chairs with nail head trim.


Fabric covered buttons were also made and sewn onto the chairs.


The only remaining step is to cover the seat cushions. Once this task is finished, not only will the chairs be done but the Big Boy's Bedroom will be complete. And not a minute too soon. Someone in the house is wondering when his Home Office is going to get some attention...