Sunday, August 31, 2008

Too Optimistic

I hate to let y'all down, but the Hubby worked like a dog on Saturday and still couldn't get all of the bathroom finished. He told me perhaps I was a little too optimistic about having the bathroom finished today. It is really close though. He only has to reinstall the baseboards. Then we - and by we, I mean I - have to paint. (Sounds like kind of a big job, but it really isn't too bad.) Sooooooo....I should be able to post the BIG REVEAL in a couple of days. But, just so I don't leave you hangin' too badly, I want to post some "in progress" photos - we really don't have any before photos. The Hubby had the old linoleum and vanity torn out before we even moved in and I didn't have presence of mind enough to take pictures of the empty room before he started redoing it - what with moving in to a new house and all. So, the bathroom has been a work in progress for over a year now. But I was "optimistic" it would be done this weekend. This week for sure though! If I have to be something, I guess being an optimist isn't too bad!


Yes, I did actually let a picture with a basket full of dirty laundry get posted on my blog...but remember it is a before photo. I never have dirty laundry in my laundry room anymore (ha ha ha ha ha!!!) Okay, and both of these photos are of the 1/2 bath side of the room... that's because the Hubby was working on the other half this weekend, and I couldn't get in to take any photos!
See....in this photo the room's not even done yet and NO dirty laundry ;-)


The rest of the week should be more exciting! I have some other "before and after" projects to share. And tomorrow... an exciting announcement!


Oh, and before I forget, Darlene at Darlene's Days tagged me.
I'm supposed to list 6 unspectacular things about myself.

1. I have freckles - and a love/hate relationship with them ;-)

2. My favorite author is Jane Austen.

3. My favorite color is pink.

4. I am the 4th of 5 children. Two sisters and two brothers.

5. I love to do Pilates although I have been hard pressed to find any work out time since having my youngest!

6. I am an aspiring children's book writer. and photographer. etc. etc.

I'm not sure who to tag, so if anyone wants to play along, go ahead and then leave me a comment so I can see what "unspectacular" things you had to say!

See you tomorrow!

Who doesn't love a good before and after?

I can't get enough of "before and after" pics -- if they made books or magazines with just pictures and pictures of every little detail before and after, I would be in heaven. (Kind of like the look and find books my son is obsessed with right now -- I'm all about the details.) I found some older pictures from our house the other day, and thought I would share some of my own transformations with you.

I'm always growing and expanding decor-wise. Especially working in the decorating field, I feel like I've gotten more creative over the past couple of years. Sometimes I look at old pictures and want to cringe...I hope I don't feel that way a few years from now! :)

One of my favorites is our corner fireplace in the family room. We both thought a corner fireplace would be great and put it there on purpose. And then I realized what a pain it was to work with. My solution was (SHOCK) molding!

BEFORE:


AFTER:


I'll share more of my own before and afters soon -- there are some doozies!! Yikes.

Friday, August 29, 2008

Picture Yourself Organized

It's the last holiday weekend of the summer.
Are you wondering what to do?
You could spend some time reading some of the blogs
that were late to the paint party.
Then, you could make something pretty and useful.
Yes, I think it's time for...

ANOTHER TUTORIAL!


Today we're going to create some beautiful organizational tools.

First, gather your supplies. You'll need:
*a large picture frame
*your choice of spray paint
*a heavy duty stapler (doesn't everyone have one of these?)
*a roll of hardware mesh or poultry wire---both can be found in the fencing section of home improvement stores
*wire cutters or tin snips
*saw tooth hangers (optional)
Next, paint your frame the color you desire.
When it's dry, unroll the wire "fabric"
and measure and cut it
to fit inside the frame.
The poultry wire can be cut with wire cutters, but
the hardware mesh is more easily cut using tin snips.

Pull and staple the wire to the back side of the frame.
You may need an extra set of
helping hands for this step.
You can get fancy and add some ribbon
to the front of the frame if you'd like.

I also added some S hooks that I squeezed
one end shut onto the wire.

Are you wondering what we just made?

Well, if you used hardware wire and added S hooks,
you just made
a great frame to hang your jewelry on.
If you used poultry wire, just add some binder clips
and you have a pretty memo board.
You can even customize these.
The addition of a knob makes a plain frame
look like a cabinet door.
Instead of binder clips, you can use clothes pins.
You can even paint and cover your clothes pins
with scrapbook paper.
That's the beauty of this project, it's very versatile!
If you want to hang your frame, add sawtooth hangers.
Or just lean your frame against the wall.

Congratulations!
You've just been framed for organization.

Thursday, August 28, 2008

One of my favorite spots and bloggy love for my mudbench


This is the Portland Headlight in Maine. Isn't it lovely? I decided to share these photos with you in celebration of the Labor Day weekend. This beautiful lighthouse always looks patriotic to me with its fabulous red roof against the blue ocean. Hope you all have a lovely holiday weekend. Join me here Monday for what I hope will be the grand reveal of our laundry room/half bath makeover! That is if the Hubby and I get to work like we should !!!


A little side note: I recently found out that my "wicked awesome mud room" project has been featured on both Ohdeedoh and Organizing Junkie! Wow! Who knew? Thanks guys. I'm glad that my little idea has given inspiration to others :-)


Back to Basics

It's been great to take a break from the basic black routine. I've enjoyed painting with new colors. And after all the inspiration from the party, I'm looking forward to trying a few more. But sometimes only the color black will do.
I've been looking for some stools for my kitchen for some time now. I finally found some that had a great design and were well built. The best part about my find was that these nice little stools were at the thrift store!
There was only one drawback. The stools were a dark blue and I don't have any blue in my kitchen. I do have black. I have a black table and a black cabinet. So it only made sense that these cute little stools had to be black.
I used the handy dandy liquid sander before I painted because these stools will get a lot of wear and I don't want the new paint to chip. Liquid sander works like sanding. It takes the gloss off the original finish and prepares it for a new coat of paint.
I like my little stools all dressed in black. They'll fit right in with the other black furniture in my kitchen.
It's always nice to find what you've been looking for, and get it for a great price.

Wednesday, August 27, 2008

Back to School

I'm sure by now, many of you have heard of the terrible airplane crash that befell Nie of the Nie Nie dialogues. I have been following her blog for a while, it is beautiful, and I love her ideas. I was deeply saddened when I learned of the accident. Even though I don't know her personally, I feel a connection. We share the same faith, the same number of children that are similar in ages, and the same love of life. It has been wonderful to see how the blogging community has rallied around her and her family during this difficult time. So when Gabrielle from one of my favorite blogs, Design Mom, designated today as Nie Nie day, I thought I'd join in.

Since I now have two kiddos in school, I was looking for a fun new tradition to send them off in style. I planned this back to school dinner for my kiddos after seeing Nie's post about a similar dinner she had for her girls. I waited to post about it until today so that I could make it a part of Nie Nie day. (Give credit where credit is due, I always say.)

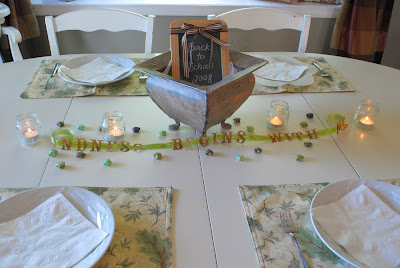
So on to the festivities...


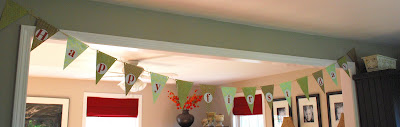
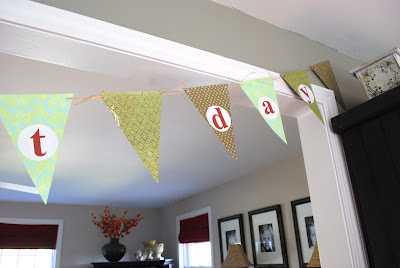
I love pennant banners, so I made this cute one out of scrapbook paper and raffia. It's hard to tell what it says in these photos...even though I took pictures of it from all different angles...but it says "happy first day". I cut the triangles out of 12 x 12 paper (I was able to get 3 out of each piece). Then I printed out the letters and cut them out in circles (boy, it really made me wish that I had one of those giant circle craft punches or a scrapbook circle cutter.) Finally, I punched holes in each flag and tied them with raffia. It turned out really cute!


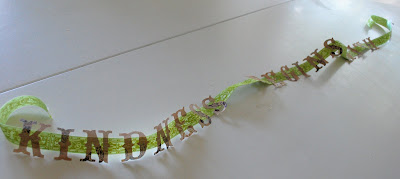
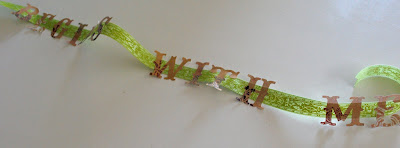
I don't know about you all, but the beginning of the school year always feels more like a new beginning to me than the real beginning of the year in January. So, borrowing another idea from Nie, the Hubby and I decided to introduce a new family theme. Our theme for this year is "kindness begins with me". And as long as I was stealing, ahem, I mean borrowing ideas, I decided to make a similar table top banner to the one she made. I used a piece of ribbon that coordinated with the pennants, and some sticky letters to spell out the theme.


Finally, I'm all about paper crafts, so when I saw this cute little idea in this month's Family Fun magazine, I was all over it! I used the leftover paper to make these tiny three dimensional stars. They added a really fun look to the table - and they were easy-peasy!


Our menu was not overly fancy, but consisted of some of my kids favorites...parmesan chicken, lemon pudding salad, and a green salad (not their favorite, but necessary to get in those vegies!)

After dinner I presented the kids with new backpacks full of school supplies AND their nifty new clipboards! It was so much fun! And by the end of dinner, the kids were EXCITED to go back to school! This will definitely become a new tradition at our house.

For those of you that saw yesterday's post...did you "spy" the baby food jar votives and the chalkboard? Yes, I really do use them ;-)


And look at this! As I was cleaning up after dinner I put the little stars in this jar...don't they look cute? I think I'm going to leave them like this.

Thanks Nie for all of your wonderful ideas! I wish you and your husband a speedy and successful recovery. I know many of the blogs participating in today's Nie Nie day are offering silent auctions with the proceeds going to the Nielson family recovery fund so I urge you to check them out! Gabrielle at Design Mom also has links you can use to find other ways to help the Nielson family. Thanks for visiting!


Update: It came to my attention that the link to the clipboards I made for the kids wasn't working earlier...I have fixed the problem. ;-)

A Thank You & A Look A-Head

Thank you all so much for participating in my first ever blog party. I think it was a great success---because of all my wonderfully creative and talented friends. You all amazed me. There have been a few late comers, so check on them too. It was so fun to see the many ways spray paint can transform things. I know that I've added a few more projects to my ever growing spray paint list. I'm beginning to think it might be a wise idea to buy stock in spray paint companies. That way I might be able to recoup some of the large amounts of money I spend on those marvelous little cans.

And speaking of spray paint. . .

I went to the blue big box home improvement store to buy more paint and look what I found.I couldn't pass this guy up. Look at that toothy grin.
You can't be afraid of an old thing like this.
It has good bones...bwahhhaahaahaa!!!

I'm not putting out my Halloween decorations yet,
but I thought I'd give you a little preview of things "a-head."
Thanks Susie for the "heads up" on the crows.

Now you can see why this guy
headed
out the door with me.
He's just too much fun!

Tuesday, August 26, 2008

Busy

One starts third grade today - the Princess has orientation this week, but doesn't actually start kindergarten until next Tuesday. Sooooo, we were busy celebrating last night. Join me tomorrow and I'll show you what we did! Until then, I'm leaving you with a couple of photos you've seen before. These items show up somewhere in tomorrow's post. That way you can play I Spy...just like my kiddos!


Y'all come back now, ya hear?

Party On

Let's keep this party going one more day.

Monday, August 25, 2008

Keeping Keys


I can't take credit for this cute little idea. My ultra-crafty sister-in-law made this. She had one in her house, and I complimented it often enough, that she made me one for my birthday (or maybe it was Christmas) a few years ago. It's on the wall right between the back door and the mudbench. We always know right where our keys are - as long as we remember to hang them up when we walk in the door! ;-)
The project was actually pretty simple. She took a piece of wood, cut it to size and routered the edges (I'm not sure if that is the right spelling because woodworking is the Hubby's department). You could also buy a premade plaque at a craft store. Then she drilled a hole in the center and bolted the old door knob on. After she painted and distressed it a little bit, she screwed in four cup hooks, added a couple of old skeleton keys and voila! It's great just as it is, but because I love words, I've been toying with the idea of adding some vinyl lettering at the top that says "welcome" . Cute, huh?

Cheap art

I needed something to fill a large wall in our powder room and came across a print I thought would work well. It was in those bins of posters/art at the back of the craft store -- the bins I haven't rummaged through since college!

I found a $10 poster...


And used frames I had to create this...


I bought poster boards, painted them chocolate brown, and then cut the photos down to the size I wanted. I placed the photos on top with double sided tape. If you want to spend a little more, you could have actual mats cut for the pictures, and then paint them. But I'm a thrifty decor chick and I'm impatient. :)

Total cost for this project was $6 for the art (I had a 40 percent off coupon baby!) and $1.50 for three poster boards. If you don't have the frames, look for them at half off. Or use a bunch of smaller frames you already have and cut one large poster/picture/image into smaller pieces. Cheap, one-of-a-kind art!

Yard Sale Treasure

I was on my way to a service project at my church Saturday morning so I had some rare time without my 4 kiddos, when I saw a HUGE yard sale at our town common. I HAD to stop. This was a rare (and I mean rare) opportunity. I only had a minute to look since I was on a schedule, so I hurried up and down the aisles scanning everything as quickly as I could. And then I saw HER. She was beautiful. And only $5. I personally think that is quite a steal.


Don't you think she'll look lovely with some "autumn-y" soup like pumpkin or squash in the center of a buffet? I'm so excited! Now I'm off to find a place of honor to display her.

Sunday, August 24, 2008

PAINT PARTY!!!

It's Time to Celebrate the
Wonders of Spray Paint!


I've showed you my
"paint outside the black box" projects.

Now it's time to show off yours.

It will be fun to see all the
different colors you've chosen,

including our favorites, white and black.
(Yes, it's fine to show off something black)
I'm as excited as a kindergarten girl
opening a new box of crayons!

Let's start clicking and commenting!

Friday, August 22, 2008

Project Mom Casting Submission~

Here is my casting submission for Project Mom!

Also known as...my blog made me brave again!

I See Sea Glass

Last week I stood in front of rows of paint trying to find a color that I would love as much as my black. I found this beautiful Sea Glass in a satin finish. I knew right away that I would love it because it reminds me of a room in my home.
Now I just had to find an item to cover with this delightful color.
Out in storage I found this little beauty.
I had adopted her at the thrift store. She's old, beat up, and even a bit warped (I hope that's not how my kids describe me). I knew that her previous owners wanted someone to love her because before they donated her they slathered her up with a heavy coat of furniture oil. It took forever for that stuff to soak in, that's why she was in storage. But, with a new finish she could come out and enjoy family life in a room that she would relate to in color.
You know, the true beauty of sea glass is that it's a bit rough looking. So after a couple of nice coats of spray paint I covered the little table with some white glaze, to show off the details as well as the wear. Then out came the sand paper to sand the spots that would have worn naturally. And just like a piece of sea glass, the beauty of my newly made-over table came shining through.
And speaking of beauty. . . go visit Chelle and Nikki to see their beautiful five minute projects. Don't forget to leave them a little love note.

Have a wonderful weekend, my friends. Get your spray paint projects ready for Monday, cuz we're going to have a PARTY!!!

Thursday, August 21, 2008

Toile + Barn Stars = True Love

I am officially out of Back-to-school posts. So I had to share this little project that I did last week. I have been wanting to decoupage something on a barn star for a long time. I have looked endlessly at scrapbook paper, but I just couldn't find the right thing. Then I remembered this beautiful toile wrapping paper my lil' sis wrapped my birthday presents in this year. When I saw it, I was instantly in love. I unwrapped my gifts very carefully and tucked the paper away waiting for the perfect project. And here it is...


I cut each section of the star's rays separately (next time I try this project, I'll only cut out one large diamond for each ray rather than two triangles) then Mod Podged them on. I sealed it with a coat of Mod Podge as well. It turned out beautifully and now hangs proudly across from my mudbench.

Happy crafting~

Espressoooohhh!

OOOOHH! May I just say that this non-black spray paint week is turning out much better than I anticipated! I'm discovering new colors and, on top of that, every project has been one that I've pulled out of storage and am now using in my home. Double Bonus!
See this little country cabinet. . .
I purchased it at the thrift store years ago and it's been in storage ever since. That's why it's so dusty. I put it in the donate pile a few times, but it always managed to find it's way home. I decided that it was time to give it a makeover or give it away. It just happens to be the perfect size to fit in the alcove, above the potty, in my boys bathroom. It now has a new home, so it's time to give it a new look.
I chose to paint it espresso.
Yes, I used my new little gadget. (I tried to answer all of your questions about this new tool in the comment area of Tuesdays post.) I also used my mask---safety first! If you were standing next to me when I took this picture you would have noticed that those pesky little vegetables are trying to show through the paint. I'm not too worried because I have a plan. But this is a good time to be reminded that if you're painting over an existing finish, it's important to give it a good sanding and use primer.
I'm going to hide those pesky vegies with wallpaper. I really like combining wallpaper with wood. I did it when I covered the back of my china cabinet and when I made the decorations for my daughter's wedding.

Wallpaper is thicker than regular paper and it's handy for covering big areas. You can usually buy it for just a couple of dollars at thrift stores and garage sales. I paid a dollar for a brand new roll of this pinstripe walpaper.I cut the paper to size and then adhered it to the doors.
*HELPFUL HINT* Those plastic fake credit cards, that you get in the mail as advertisements, come in handy for smoothing out the wallpaper.
Then I hung it, decorated it, and filled it full of bathroom necessities. It has a new, useful life and I think it looks looks great!

I hope you're getting your spray paint projects ready for Monday's party.